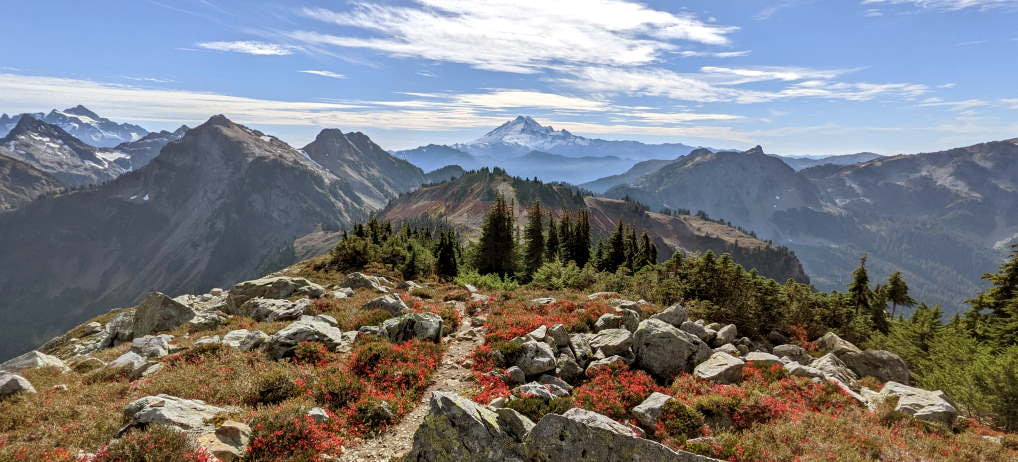
This backpacking adventure had phenomenal mountain views and stunning lakes, laced with delicious berries. At night we had the beautiful milky way shining brightly overhead, along with some other strange lights. We found solitude on High Pass and friendly comradery everywhere else. The fall colors were particularly spectacular.
If you have been wanting to try backpacking, but are scared of sleeping outside with the animals, I think the number of people here should alleviate your worries some and this is a nice easy place to give it a try. If you are experienced this is still a nice place to spend a weekend with lots of amenities to make things easier, and you even have the option of car camping if you have the right vehicle.
Adventure Guide
I have a video in the works for this trip so check back or subscribe to our newsletter or Facebook page to make sure you don’t miss anything.
Trail Details
- Moderate to Hard Trail Options
- Hard Road & Parking
- 2.5 - 10 mile trail options
- 1500+ ft Elevation Gain
- Dog friendly
- Best time to visit is summer through fall, check reports for conditions
- Need a Pass - US Forest Services (see Recreation Passes and Permits for options)
- Vault toilets at trailhead and both lakes
- No cell phone service
Hazards
- Some trail sections are narrow, slippery, and/or rocky
- Mosquitos & Flies - summer
- Smoke and Wildfire - possible late summer to early fall (I carry a good mask)
Road/Parking
The road up to the Yellow Aster Butte Trailhead is rough and best in a SUV, but is possible in a car. The parking is all roadside, so if you are leaving your car there overnight you might want to get there early to get a good safe spot. You can see some of the road in the video below.
The road beyond that is shown on some maps as a road and on others as a trail. It is virtually unmaintained and you need a serious vehicle to handle it. We did see a CRV and a Forester up there, but most vehicles were high clearance off-road capable tucks and SUVs. The road is narrow and has lots of hairpin corners, some that require multi point turns. There is parking by the lakes for at least 30 vehicles.
Trail Reports & Weather
WTA - Twin Lakes Trail Summary & Trip Reports
WTA - High Pass Trail Summary & Trip Reports
WTA - Winchester Mountain Trail Summary & Trip Reports
WTA - Silesia Creek Trail Summary & Trip Reports - Closed as of 2022
The Mountaineers - Mount Larrabee
Mountain Forecast - Winchester Mountain Weather
Mountain Forecast - Mount Larrabee Weather
How To & Options
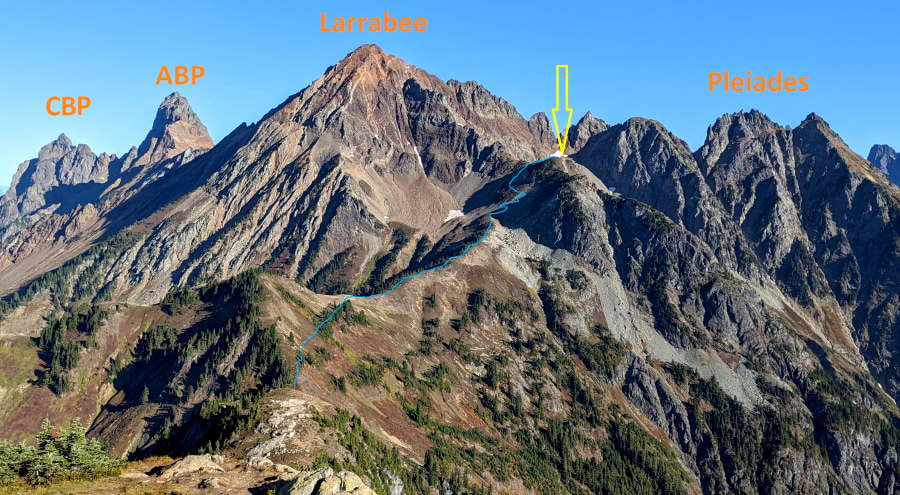
The High Pass Trail shown goes all the way up to the ridge below Larrabee. Getting up there is steep and a little slippery, so you may choose to turn around before that at the true High Pass and shorten this route by about 1/2 a mile and 700 ft of elevation gain. See “Our Adventure” below for more details.
Other than the Twin Lakes, there are no reliable places to filter water, so you need to fill up there.
Plan your Trip
Option #1: Camp at Twin Lakes
You can hike up (or drive up if you have the ability) to Twin Lakes and make this a base for exploring High Pass, Winchester Mountain, and Silesia (if it is open). Sunrise and sunset from Winchester are particularly popular. The lakes up here are also great for swimming, floating, paddling, or just relaxing.
Bonus: There is a fire lookout at the top of Winchester that you could stay in, but it is first come first serve and there is no water or bathroom up there. I did a night in the Park Butte Lookout and it was an incredible experience!
Option #2: Day Hikes
Hike or drive up to Twin Lakes and day hike from there. Winchester and the hike to Twin Lakes can be combined for a moderate to hard day, with a little over 3,000 feet (~1000 m) elevation gain and 8.5 miles (~13.5 km).
Extend Your Trip: Camp by Yellow Aster Butte
If you want to extend your trip by a day or several, you can camp on the tarns by Yellow Aster Butte and use that as a base camp to explore the lakes, Tomyhoi Peak (scramble), Yellow Aster Butte, and Tomyhoi Lake on your way there or back. Check out the video for more info on that area.
Extra Adventurous Option: Summit Larrabee
There is no official trail up so route finding and expertise are highly recommended.
Campsites & Amenities
Twin Lakes: Beautiful lakes with lots of campsites and a good number of people. It is unlikely that you will have this place to yourself, but there are some spots that are more secluded than others. We found the first lake to be a little quieter and more spread out than the second, which has more flat terrain right along the beach. If you are looking to meet you neighbors and have a more lively atmosphere, the second lake might be your best option.
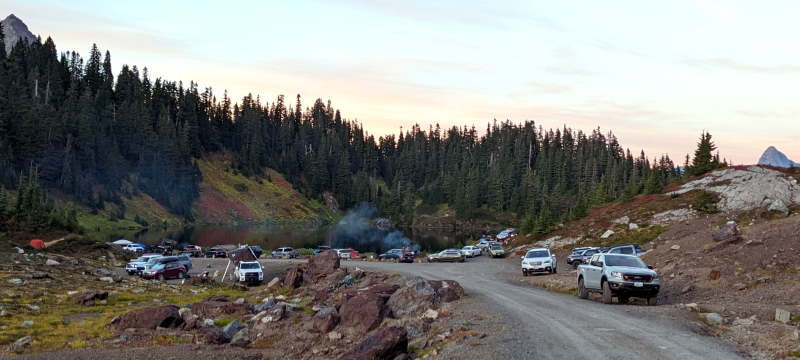
Either way, expect vehicles to be coming and going. It was pretty peaceful, but felt more like a state park campground than backpacking. Campers ranged from simple tents, to car top tents, camper vans, back of car camping, big setups with pop-up tents with lights, and even one hammock strung between two cars.
We picked a semi-secluded spot above the first lake and the road with lots of space.
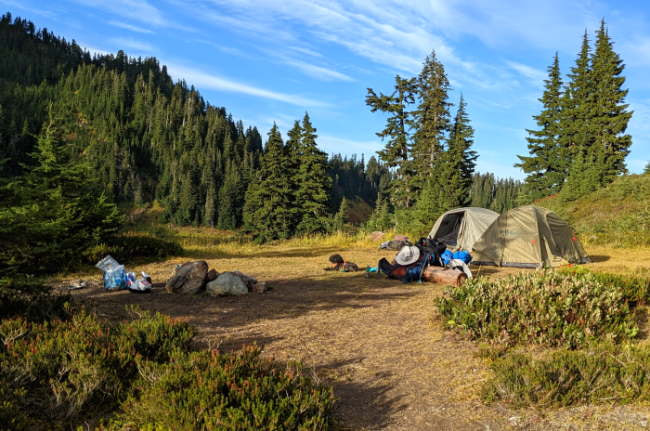
This spot looked to be the best. It was tucked away above the first lake, but below the road and even had a picnic table.
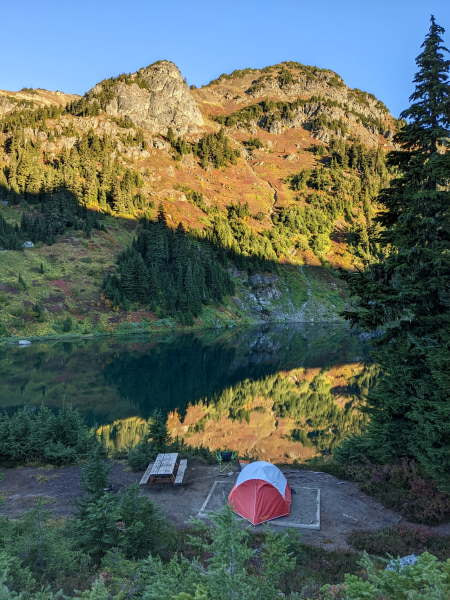
There is no drinking water here so you will need to rely on filtering or treating the lake water. There is plenty of water access at both lakes. At the first one you need to climb down one of the many paths leading to the water. The second one has a “beach” right by the road, making for easy access.
There is a bathroom with a Mount Baker view and two pit toilets at the first lake and a single large pit toilet at the second lake. No trash is available, so please pack everything out.
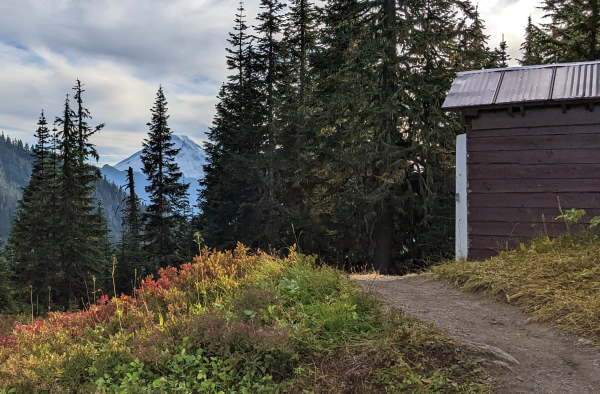
Winchester Mountain:
The mountain has amazing views and is a popular sunrise/sunset spot. There is no bathroom and no water, so you will need to pack all waste out and carry your water up.
Just a short way up Winchester there was this cute camping spot. It was overlooking the lakes and had a view of Mount Baker.
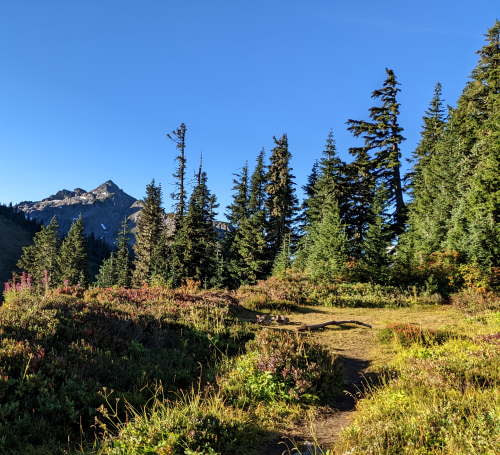
At the top there is room for tent camping (can be windy at night), or if you are lucky you might be able to stay in the lookout. This one has a single bed (sleeping mat recommended), a table, dozens of books, and lots of floor space. If the storm shutters are closed, it has usually been done by the caretakers for the lookout’s protection.
High Pass:
There were a couple people camping near High Pass. Due to the low traffic on this trail, this will likely be a truly quiet and secluded backpacking experience. Other than limited snow there is no water up there and all waste needs to be packed out.
Our Adventure:
We have been up in this area before, but this was my first time for these trails and we were blown away by the scenery and colors.
Day 1 / Part 1: Yellow Aster Butte Trailhead to Twin Lakes
Parking was a mess, but we carefully wiggled the car as close to the edge as we dared, folded in the mirror to give passing cars a few more inches, and hoped for the best. We shouldered our overnight packs and headed up the dusty rutted road.
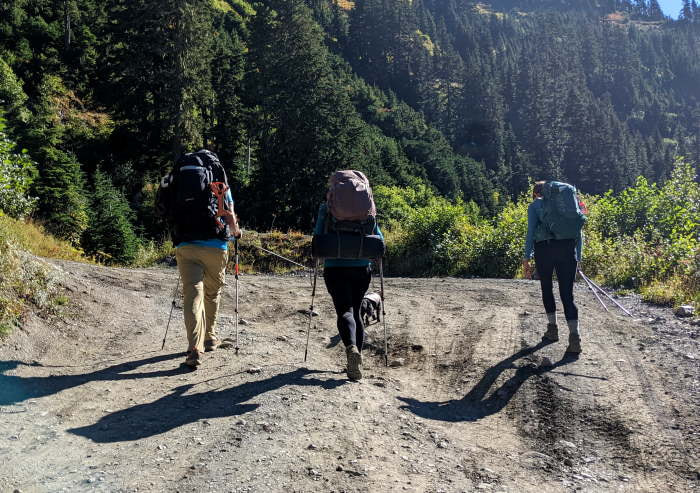
The way was long and hot in the full sun, but the views were a nice distraction. As we climbed the switchbacks our car slowly blended into the scenery below. Most of the time it was just us, but occasionally we would be passed by vehicles, slowly making their way up or down. Each time they passed the air would fill with a thick cloud of dust and I would try to hold my breath until it cleared. A pack of dirt bikes zoomed by and put on a little show for us as they passed.
For me, the moment we reached the lakes the weariness and discomfort melted away. The mountains, adorned in fall colors, reflecting in the deep blue water was stunning!

It was a little before noon when we arrived and a convivial game of musical campsites was taking place. As people came back from their early morning hikes they were tearing down their campsites and other people, who had already setup in less desirable locations, were trading up and offering their newly vacated spots to new arrivals. It was amusing to watch partially or fully constructed tents migrating around the lakes.
Day 1 / Part 2: Twin Lakes to High Pass & Larrabee
After unpacking camp, our packs felt blissfully light as we bounced up the trail. Just past the turn-off for the High Pass Trail we crested a hump that felt like its own mini pass. A whole new rugged landscape unfurled before us.
Stoney mountains created an imposing wall across the far side of the valley, with just a hint of smoke hovering in the background. Airplane jet streams drifted in the wind and one hovered just above an unnamed peak, like a single birthday candle with party streamers floating around it.
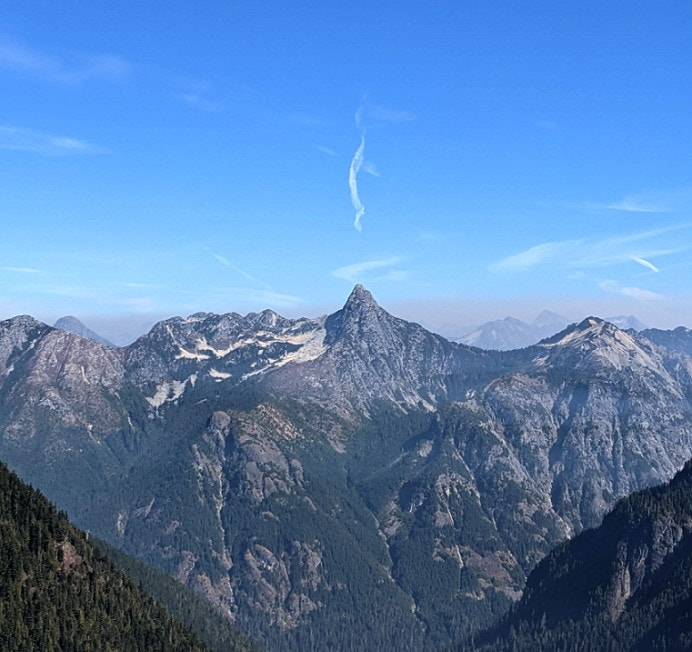
The trail dipped, then began its switchback climb up the first pass. The blue line is the approximate trail from Low Pass to High Pass, and then to the ridge below Larrabee (yellow arrow), which is the end of the maintained trail. There was no tree cover, but in the afternoon almost half of the trail was shaded by the mountains.
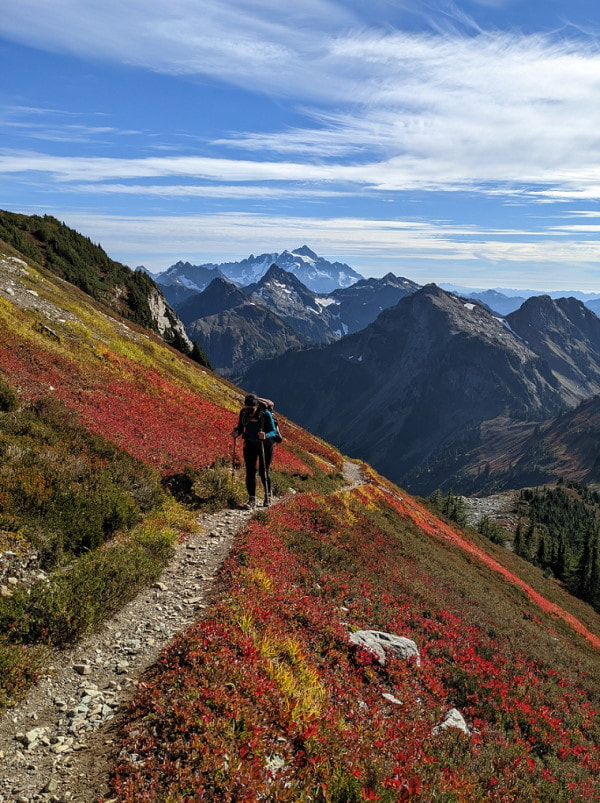
Most of the switchbacks were in great shape, but a couple areas were crumbling around the edges or slippery, so we were glad to have our poles. There were several avalanche shoots with semi unstable paths cut across them. It was pretty easy going, but I would not want to be up here on a wet or icy day.
All of that red you see is huckleberry plants and they were loaded with juicy berries! I’m not sure where the bears were, but we were happy to eat our fill and not have to share.
As we crested High Pass, Mount Baker and Mount Shuksan rose above the surrounding peaks. “Dr. Seuss” flower seed heads (western anemone, photo below) and butterflies fluttered about adding to the magic. Our little pup got a little carried away and slid a bit as he tried to chase some of the insects off the trail.

After High Pass the path transitioned to a rougher scree covered trail with some very steep loose sections where we went one at a time on the way back down. This last section isn’t essential, but I can say I definitely felt it was worth it and would gladly do it again. You rise even higher and although you still have Larrabee towering above you, it feels like you are on a summit with the ground falling away on the 3 remaining sides.
We were only 3 miles from the lake, but from the ridge below Larrabee there was not another person in sight. On this entire hike we only crossed paths with two other families near the start of the trail.
Dusk to Dawn:
Back at camp we watched the light fade into the mountains and saw the headlights flicker to life above us on Winchester Mountain. They looked like fireflies as they floated back down the mountain. There were at least 20 of them. I’m sure the show from up there was incredible, and if I come again I will be sure to make it up for a sunset or sunrise.
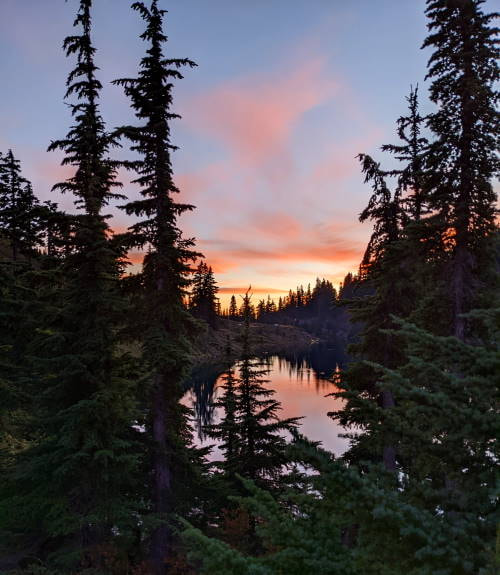
It cooled off in a hurry, so we crawled into our tents. A little after 9 PM I made a trip to the bathroom, and as I stepped out I saw a light moving in the sky, then another joined, and another, and another, until there were about 20 of them equally spaced in a row. They were just a little brighter than the stars and moving at a 45 degree angle. I ran back to camp and alerted the others. As we watched, they reached a certain point and each disappeared one by one as they reach that same spot.
We figured it must have been some kind of military exercise, but we were a bit perplexed by the proximity to the Canadian Border. Perhaps the Canadian military? The next morning the group next to us enthusiastically asked if we had seen the aliens too!
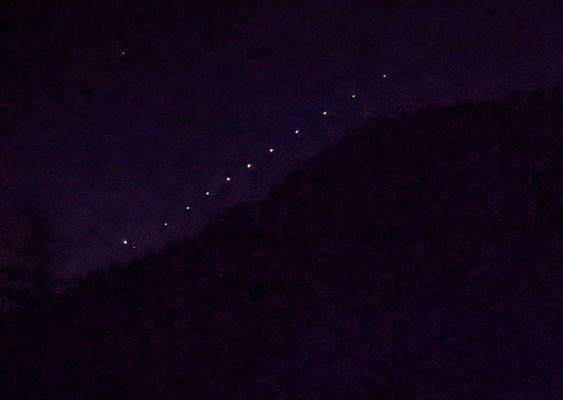
When we got home, after scouring the internet for flight data we discovered that in fact we had not seen military or aliens, we had witnessed a SpaceX Starlink Satellite launch!
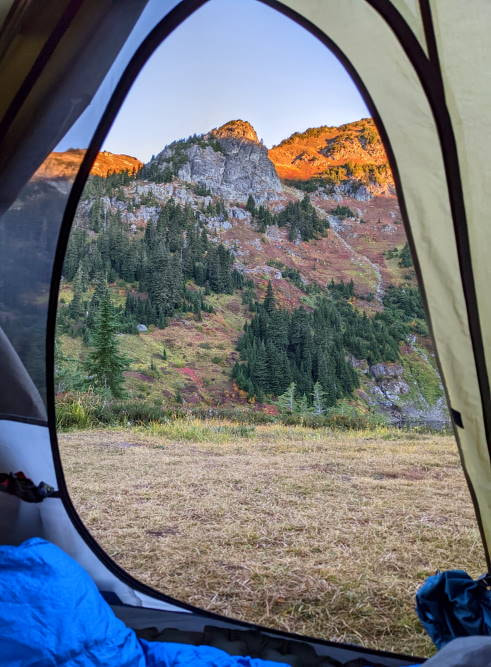
In the morning I woke to find that our little dog had managed to wiggle himself into my sleeping bag and was delightfully soft and warm. He might be a little more high maintenance than a stuffed animal, and I’m sure his intrusion interfered with my sleep, but at that moment he was perfect. The sunlight slowly trickled down Winchester Mountain and into the basin making everything glow, beckoning us to emerge.
Day 2 / Part 1: Twin Lakes to Winchester Mountain
On our way up, we generously helped ourselves to a second breakfast of mountain huckleberries and they were divine! Once again, the fall colors were vibrant and the anemone seed heads were prolific. It was sunny, but not yet hot, a perfect morning.
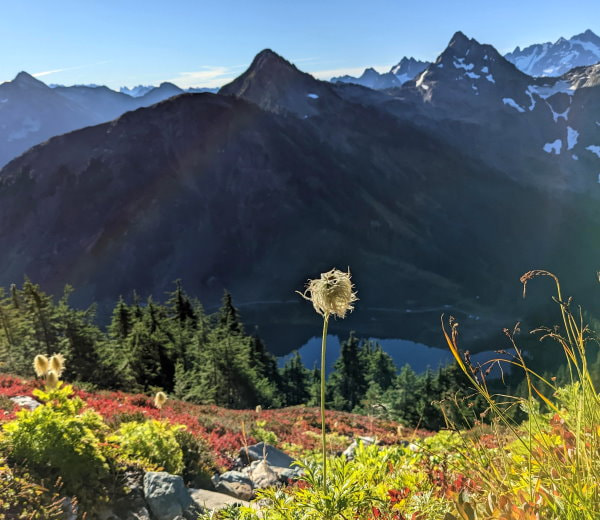
The climb had a lot of elevation gain, but the grade was softened by the switchbacks. There were a couple unmarked side trails, but it seemed like all of them either went to viewpoints or were just alternate routes that rejoined the trail again, so getting lost should not be an issue. Toward the end the trail wraps around the west side of the mountain and turns from dirt to bare rock. There is plenty of firm footing, but a slip here could easily have devastating consequences. After that it lightens up until the last bit to the end. It pretty much goes straight up and there is a small section that could require your hands. If you keep to the right you will have a more gradual approach.
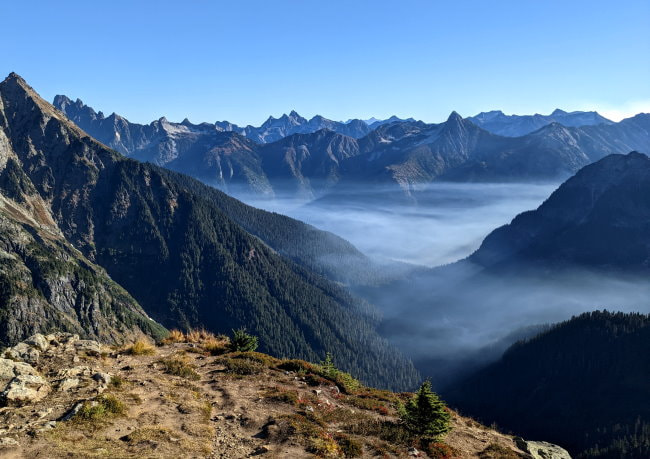
Winchester’s summit offers 360 degree views, but not all at once. As you circle the lookout you get the lakes below with glaciated Shuksan and Mount Baker, then Yellow Aster Butte and Tomyhoi Peak, then red tinged Larrabee and the Border Peaks straddling the Canadian/American Border, then the vast valley of peaks stretching into the distance, and back to the lake. The valley to the east (with the birthday candle mountain) was filled with gauzy swirling mist, being called upward by the heat of the sun, and was mesmerizing to watch.

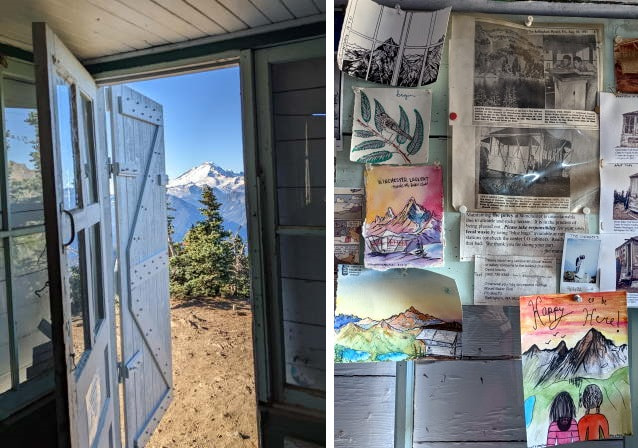
I always love exploring the lookouts. They are all a little different, but most have a board with art and cute sayings. The “Happy to be Here” and “If you are unhappy, you are not Here” made me smile. This one has a logbook on the ceiling with some history and there is a photo with most of the peaks labeled.
This lookout was badly damaged and it looks like they just finished replacing the windows. We actually saw a couple people bringing down broken wood pieces the day before. Thank you to all the volunteers! Please make sure to securely fasten all the doors and windows when you leave to help keep it safe.
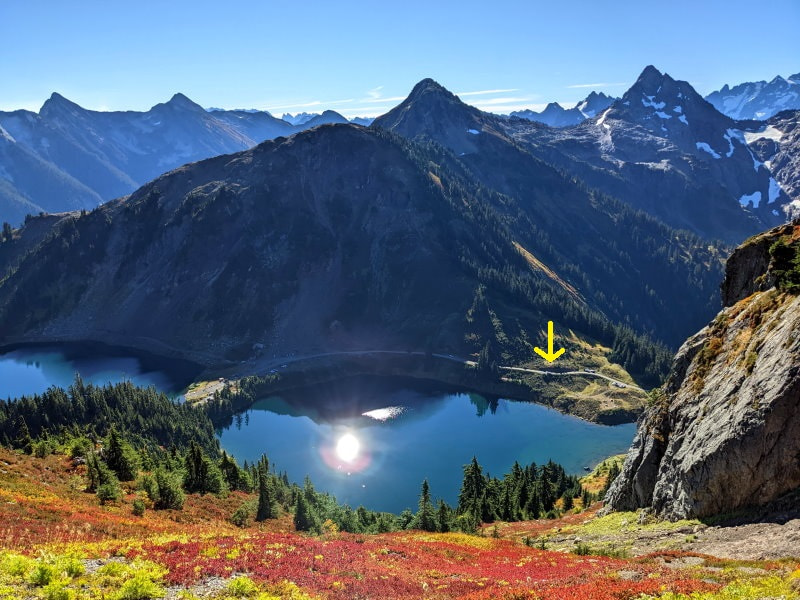
As we returned to our camp (yellow arrow) the sun touched the water lighting it up spectacularly. It wasn’t even noon yet, but already the lakes overnight guests were starting to clear out.
Day 2 / Part 2: Twin Lakes to Yellow Aster Butte Trailhead
Our walk down had the same beautiful views as the day before, but this time our apprehension over the state of our vehicle hung over us. About 1.5 miles from the bottom our dog started limping and on investigation we found a sore on his foot. We had a boot, but decided the best option would be to carry him, so we shifted some gear around and stuck him in the top of my husband’s pack. Apparently he was hurting but not worn out yet. From his perch at over 6 feet up he was randomly lunging to snap at bugs. This unpredictability was tricky, but his antic certainly lightened the mood.
We finally rounded the last corner to find that our car was still there and unblemished! On closer examination someone had left some finger doodles in the dust on the windows, but no harm done.
What to Bring?
-
The Basics - Good to have on any hike
-
Backpack: We use the Osprey Kestrel 68 and Osprey Kestrel 38 because they are comfortable, adjustable, and have a nice variety of attachment options.
-
Footwear: Hiking shoes, preferably waterproof.
-
Sleeping Bag: I had a Marmot Trestles Elite Eco 20° similar bag.
-
Sleeping Pad: I used an inflatable one with a built in “pump.” It is super compact and convenient, but a little crinkly.
-
Tent: A backpacking tent.
-
Camp Stove: You can survive the night on cold food, but it is always a nice treat to have something hot. A very basic stove will work here if you are sheltered from the wind, but you might not want to count on it for a real backwoods adventure with possible inclement weather. For an overnight like this I would just bring the stove, fuel, a pan for water, and a spork. Jetboil isn’t as versatile (mostly only boils water) but is much faster and works in most weather. Make sure you have matches because the built in lighters aren’t very reliable.
-
Food: As much as you will eat and then some just in case. You can go simple with something like ramen, dehydrated backpacking meals, or RiteRice. A little fancier and try to cook some real food, or super simple peanut butter and jelly or tuna. I like to do some wheat wraps with salami, mustard and cheese for lunch, and bring nuts, mini microwaved sweet potatoes, some figgy pops, and Trader Joe’s Nuts on a Date Bar for snacks. Dehydrated meals are super simple, but a dal packet and a rice packet or RiteRice also make a really quick tasty dinner (usually more than I can eat). Breakfast can be simple oatmeal or overnight oats. Tea is also nice and light and makes for a great warm beverage that is just as good as home.
-
Light: Make sure you pack a headlamp (plus batteries) and I like to have a small solar light.
-
Water Filter: As clear as that water looks, you still definitely want to filter it. I have a Sawyer Mini Filter and it works well but is a little time consuming and it can be hard to fill the bag. A water bottle or using a large ziploc bag to scoop and fill the bladders can make it a bit easier. I recently upgraded to a Sawyer Gravity System and it’s bulkier but still nearly as lightweight and a little easier.
-
Sandals: I like to have a change of shoes so I can take off my boots and still have something to wear in the evening.
-
Extra clothes and layers: It may get cold at night so bring something warm.
-
Toilet paper
-
Hiking Poles: These are great for stability, being able to utilize your arms for a little extra push, and checking for snakes. I trust Black Diamond Standard Poles and own Black Diamond Cork Grip Poles.
-
Gloves (optional): I like to wear liner gloves year round when I am using poles because they keep my hands from chaffing and the worst sunburn I’ve ever had on my hands was on the back around where the pole strap goes.
-
Bear Canister (optional): There containers are a bit safer than hanging your food, but make sure you practice opening them! I have a bit of trouble with BearVault especially when it is cold out. There are a few tricks, like using a credit card that can make it easier.
-
Battery Pack (optional): This battery is a bit overkill for a single night, but will definitely get the job done. I usually keep things with batteries in my sleeping bag at night so the cold doesn’t drain them. We actually had our charging cable break on this trip, so we discovered once we got out there that we couldn’t charge, so you never want to completely rely on a single phone.
Product Links: I am not sponsored by any of the products I link to. If you choose to make a purchase from one of the links of a product I listed or any other item a small percentage will go back to me to fund this website, at no additional cost to you. The products I link to are either ones I have used or similar if those are not available. Thank you for your support.
More?
Stay the night in a fire lookout at Park Butte - Washington State
Check out more incredible Washington Hikes
Experience the flowers in Southern California
