When I think of going north I tend to visualize snowcapped mountains. While I’m sure there are many in the north, the Ring Road takes you through the center of the north which presents fewer snowcapped mountains than the fjords, but plenty of volcanic activity.
-
Grjótagjá Cave Hot Spring - No swimming
-
Stóragjá Cave Hot Springs - Swimming allowed
-
Fosslaug Hot Spring & Reykjafoss Waterfall - Bathing allowed
Check out Iceland Itinerary to see all of these stops on a map.
Check out our full Iceland Highlights Playlist on Youtube. We have more videos coming so stop back to check it out or subscribe to our newsletter to make sure you don’t miss anything.
In Between: Many people head up north to Husavik for whale watching or make a loop of Detifoss, Ásbyrgi Canyon, and Husavik, for what some call the Diamond Circle, but we did not have time so we headed straight for Myvatn.
The drive west towards Myvatn was fairly bland and had very few vehicles. Up till now we had enjoyed surprisingly good service with both Google Fi and Vodafone, but not for this section. We drove for nearly an hour with little to no service. Unfortunately, I broke my own rule and forgot to save the GPS coordinates for our next stop ahead of time, so we missed it in the dead zone. We had planned to stop at Hrossaborg Crater, which in case you want to check it out is at GPS coordinates: 65.613611, -16.260787 Map.
Right up until we approached the Lake Myvatn area things were pretty quiet, but starting at the geothermal area the tour buses were back. Myvatn is about 6 hours from Reykjavik and only an hour from Akureyri (which has flights) so it gets much more tourism than the East fjords. We enjoyed the Myvatn area, but didn’t find the scenes quite as striking as some of the other areas we visited, although we only saw a small sampling of their many attractions.
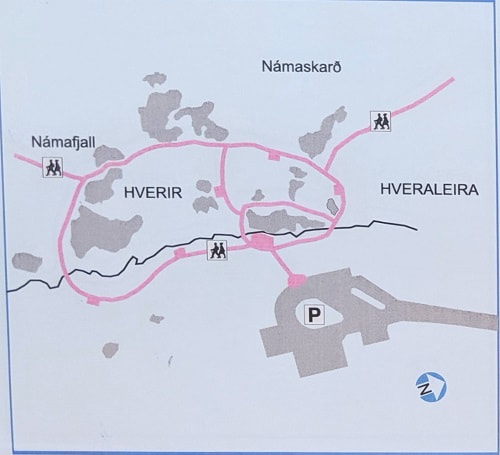
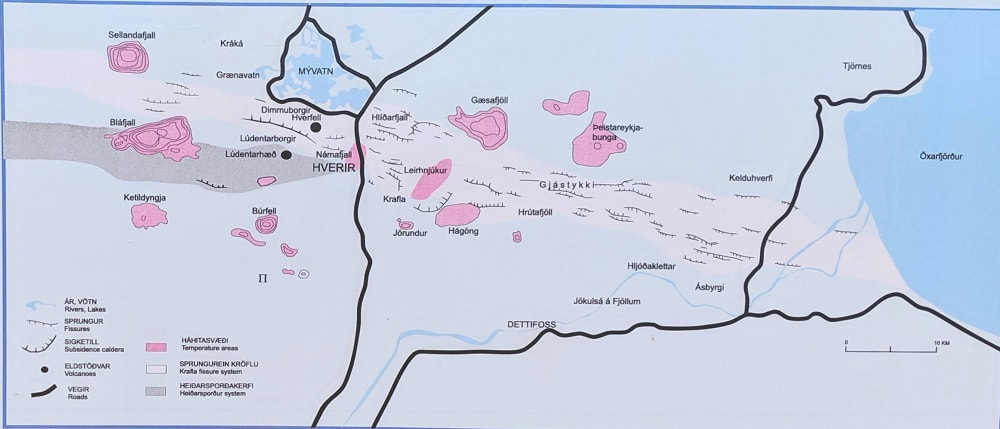
Hverir Geothermal Park
Location: Parking - GPS Coordinates: 65.641729, -16.807251 Map
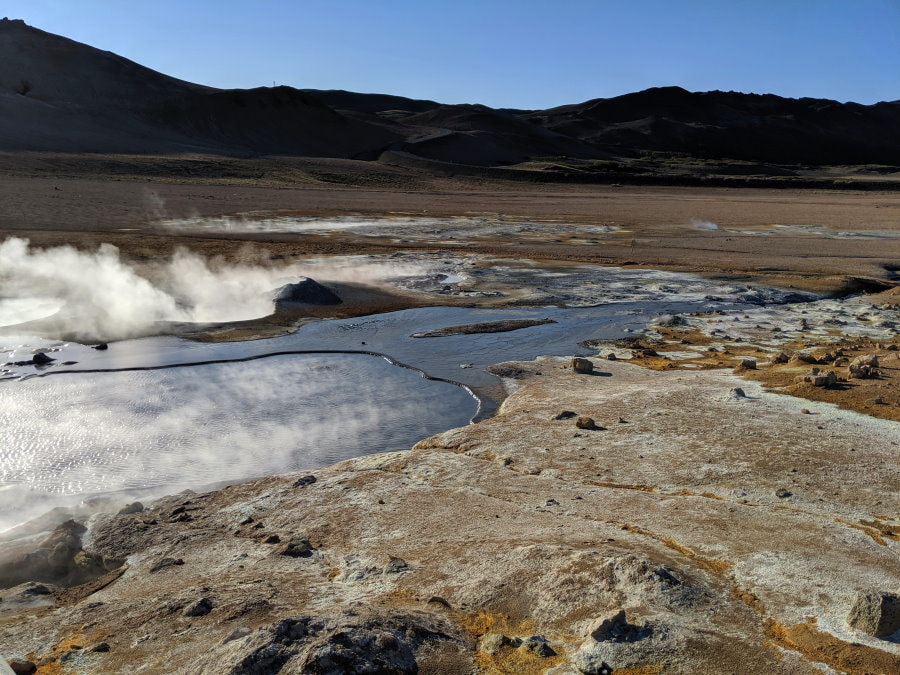
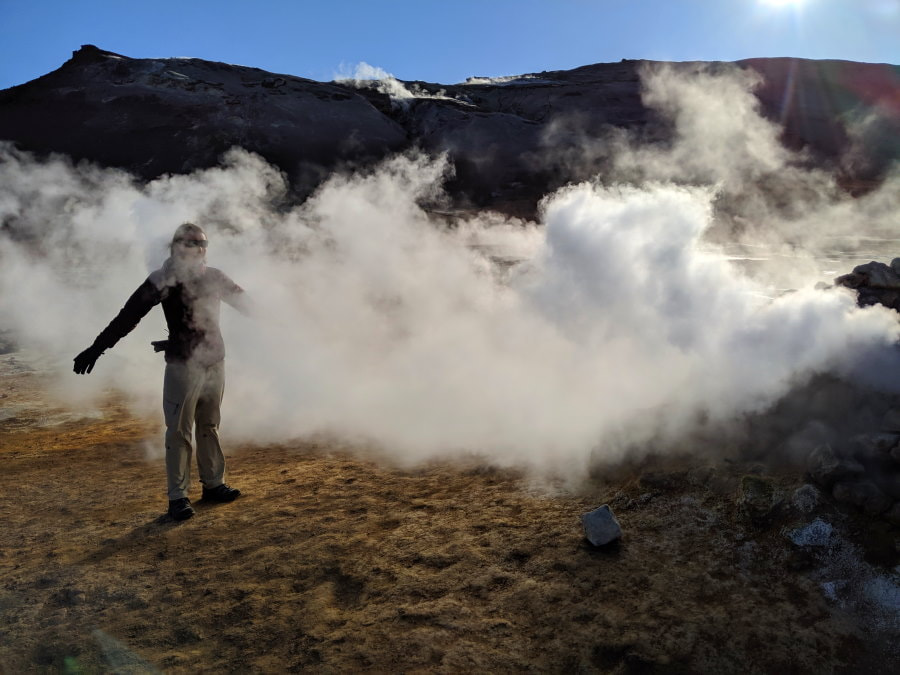
You might smell this place before you see it, and most people won’t find it pleasant, but once you acclimate to the rotten egg smell this area is pretty cool. This place looks like a scene from Mars and even if you have been to another geothermal area I still recommend this one since it is an easy stop. Hverir Geothermal Park doesn’t have a geyser like in the south, but it has several very active fumarole chimneys. These fumaroles are mounds that bubble, hiss, and spew steam, sometimes in copious quantities.
How Much Time and When?: We were there around 7:30 PM in late May and the mountains were casting a bit of a shadow so the lighting wasn’t ideal for photos, but it wasn’t bad. I don’t think there is really a wrong time to go, just depends on what you are looking for. As for how long, this could be a 15 minute stop just to take a quick look or you could take one of the many trails like the one up to Mount Namafjall and spend easily half a day here or more.
Difficulty: Easy, the paths are nice and flat.
Facilities: A couple informational signs and paths including an observation deck.
Road & Parking: A short paved road off of Route 1 with a nice parking lot with room for a couple dozen vehicles.
What to Bring: Your camera for the obligatory silly photos that come along with places that smell like eggs and spew steam. If you are sensitive to that sulfur smell, I found essential oil to be useful for combating the smell. I don’t like to bring things traveling that are single function when I can help it, so I brought this tiny bottle of MotionEaze (a blend of natural essential ois to ease motion sickness) and was able to use it for the smell as well as motion sickness.
In Between: Back on Route 1 we drove up and over Mount Namafjall. There were lots of lookouts and hiking areas along the way. Driving down towards Lake Myvatn we had a great view of the area.
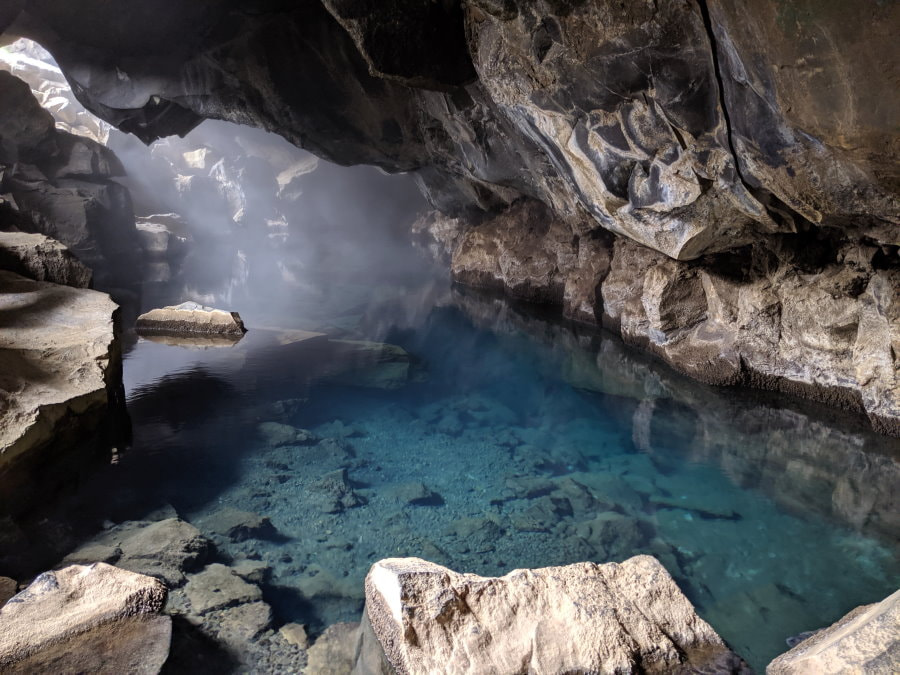
Grjótagjá Cave Hot Spring
Location: Parking - GPS Coordinates: 65.626148, -16.882307 Map
This spot is easy to find and since it was made famous by the Game of Thrones show it can get crowded. Dealing with a crowd in a small cave sounded very unpleasant to me, so we opted for morning hoping to beat the crowds. We got here around 8:30 AM and only one other vehicle was in the parking area. There were two openings to the main cave and a couple other gated openings to other nearby caves.
This photo is not altered, those were the actual colors and it was stunning. It was a cold morning and the warmth of the cave with tendrils of steam rising off the water felt wonderfully cozy. Grjotagja looks like an incredible swimming spot, but unfortunately this area is a bit unstable and the water can burn you so swimming is no longer allowed. Even without taking a dip this place has a very romantic feel.
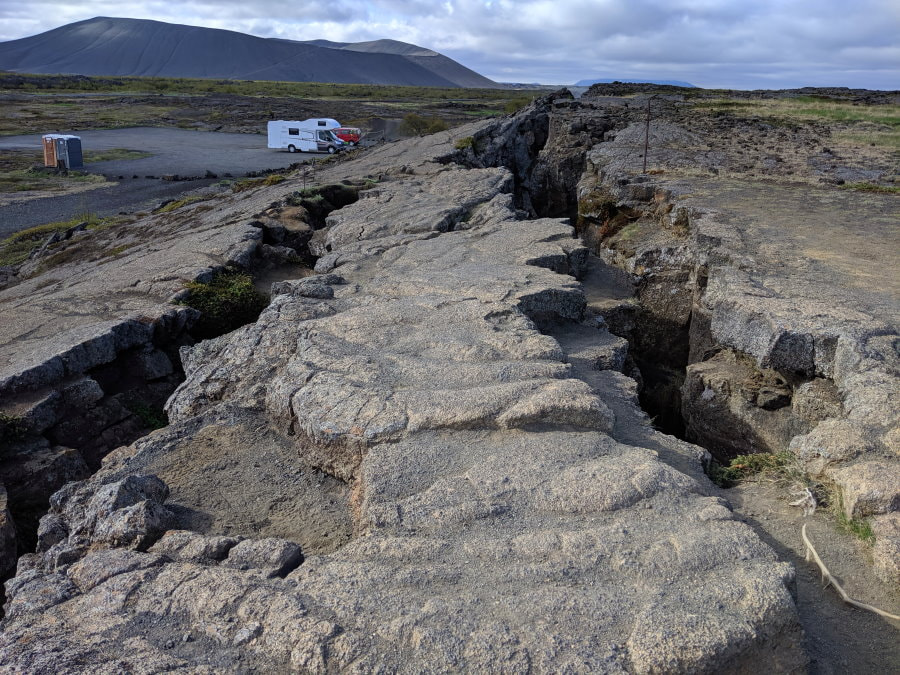
After checking out the inside I ventured up on top and saw these massive fissures running right over the area of the caves. I’m glad I saw these after instead of before. No wonder the other cave was gated.
How Much Time and When?: We were there around 8:30 AM in late May and the lighting was perfect. Due to the size of the cave I think that coming off hours here is key. You don’t need much time.
Difficulty: Climbing in and out of the caves wasn’t difficult, but it does require some climbing around on the rocks. Watch your head.
Facilities: Two porta potty toilets were there when we visited and there was an informational sign.
Road & Parking: This is just off Route 1 and there was a small pull off for parking that could accommodate about a dozen vehicles.
Stóragjá Cave Hot Springs
Location: Parking - GPS Coordinates: 65.639869, -16.909600 Map, the caves are at approximately GPS coordinates: 65.638183, -16.910158
Once you find the parking spot the trail is quite easy; just follow the Storagja sign straight and look for the stairs on your right.
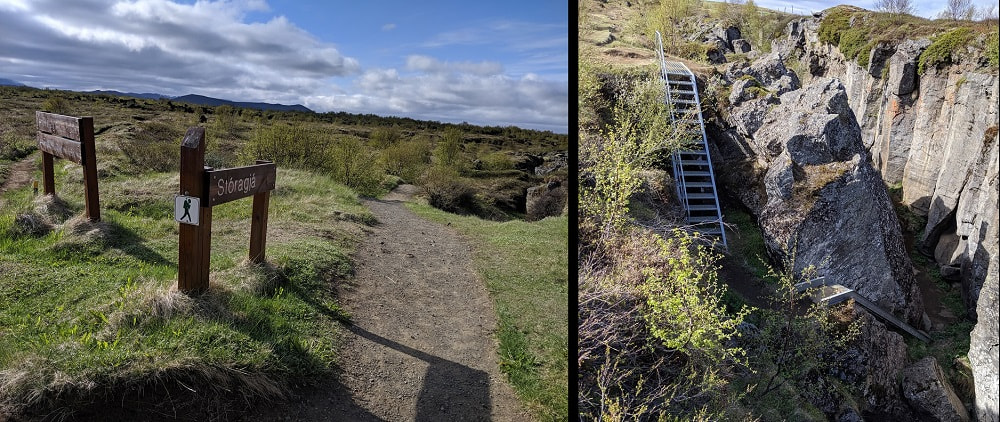
At the bottom of the stairs you can explore the nooks and crannies of the small canyon. If you take an immediate left at the bottom of the stairs the first pool is right there. You can see the chain anchoring the rope to climb in and out of the water in the image below.
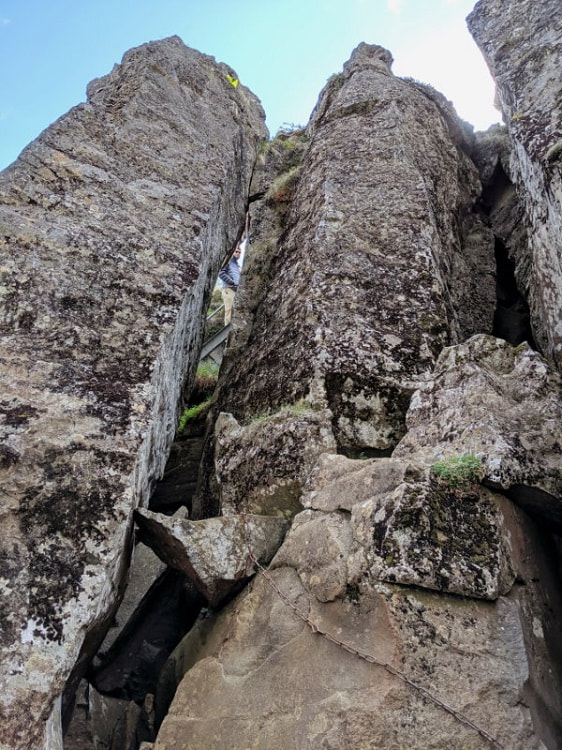
This pool has a bit more light than the second one and I found it a little less scary, but a somewhat tight squeeze to get in and out. I tested the water in both and as of late May I would put them just a tad cooler than most American home swimming pools, but at least it doesn’t smell like sulfur. The water in both also appeared deep enough that you would need to swim.
The second pool was a little farther down on the left. Look for the ladder. It was very dark and the water was quite a ways down. I looked up at the ceiling of this one and there were some jagged rocks pointing down. While it is a bit bigger and I’m sure those rocks have been there for a very long time, I don’t think I would be able to work up the nerve to swim in this one.
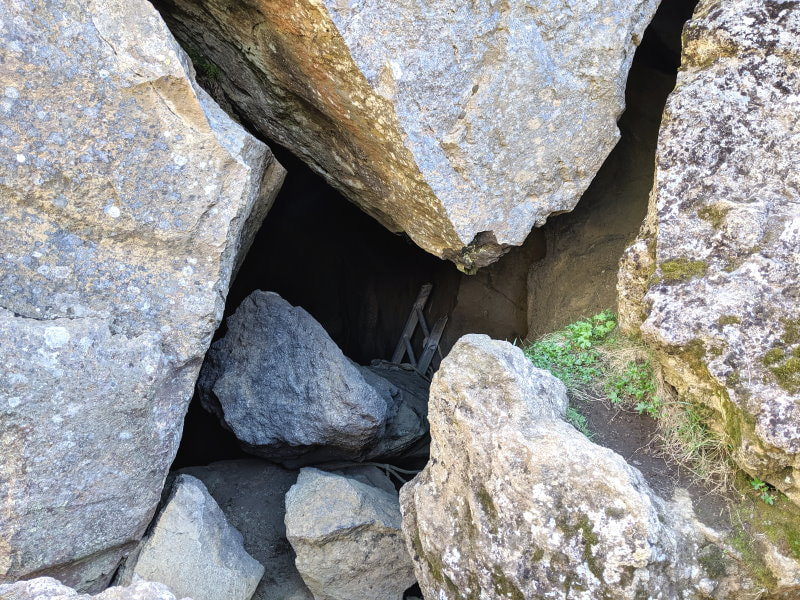
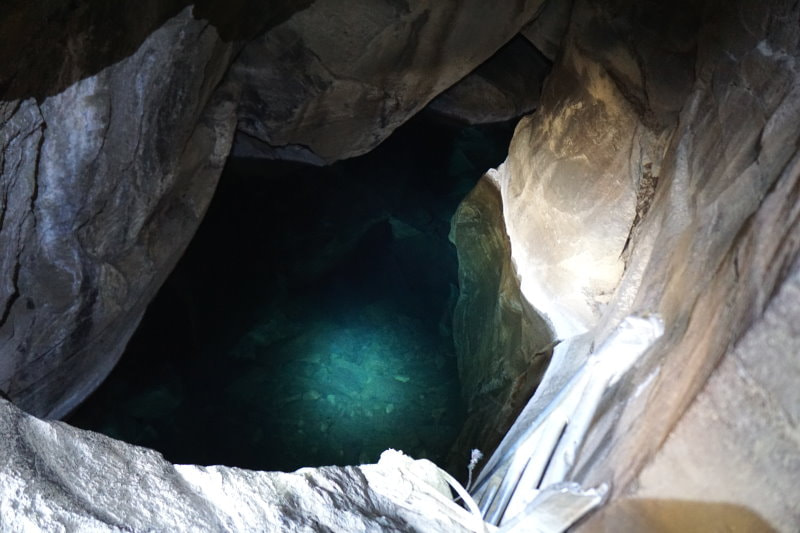
This one also has amazingly clear deep water. Make sure you bring some light if you plan to venture in here. Without my headlamp it was almost pitch dark.
How Much Time and When?: You could just spend 15 minutes taking a look like we did, or spend more time here going for a dip. Both caves are very small so I think having more than a couple people in them would be uncomfortable. However, swimming would be most enjoyable on a hot day since the water is fairly cool.
Difficulty: Easy to get to, but not easy to get in and out of.
Facilities: None except a directional arrow. It looked like there is a path that connects this area and Grjotagja.
Road & Parking: Small pull off on the side of the Route 1 with enough room for a few cars.
What to Bring: Don’t forget a headlamp for the caves. If you do want to swim there are lots of nice private nooks that you can change in. You may want some kind of grippy sandals, clogs, or water shoes for this adventure and a fast drying towel takes up much less space than a regular one and dries quickly so it doesn’t get smelly.
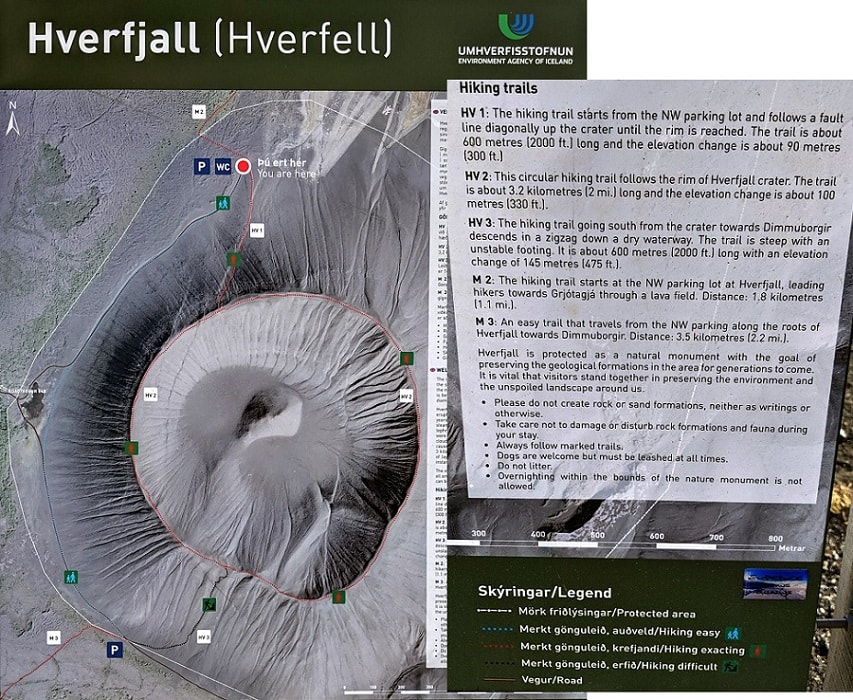
Hverfjall (or Hverfell) Volcanic Crater Hike
Location: Parking - GPS Coordinates: 65.612583, -16.875588 Map
Since we missed our crater stop the day before we decided to check this one out. We were a bit confused when we got to where we thought the trail was supposed to start and saw a sign pointing down the road which said it was still quite a bit farther. It turned out there are actually two trail heads. The one we had on our map was for the most strenuous option, which required scrambling up the crumbly side of the crater. While I wouldn’t necessarily be opposed to that option, the other side was much easier.
The main parking area is next to the start of the most popular well traveled trail up the side. It is still like walking in sand, but it mostly stays put.
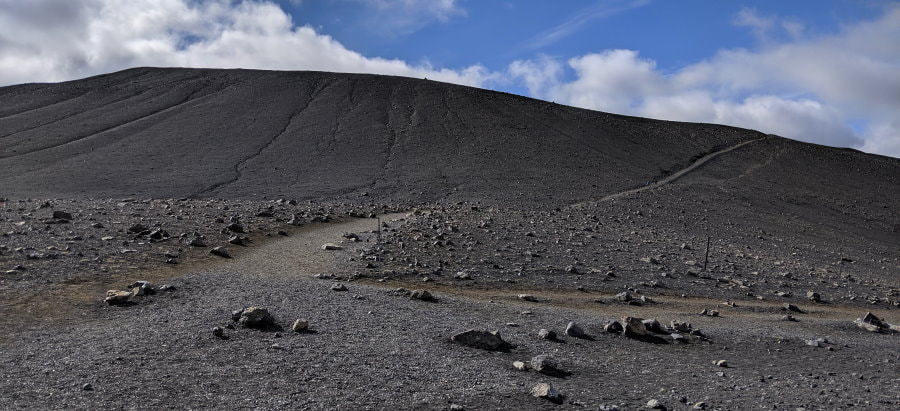
At the top you have a great view of the surrounding area and down into this old volcano. You can walk the rim or go back down the way you came. There is also a path around the base.
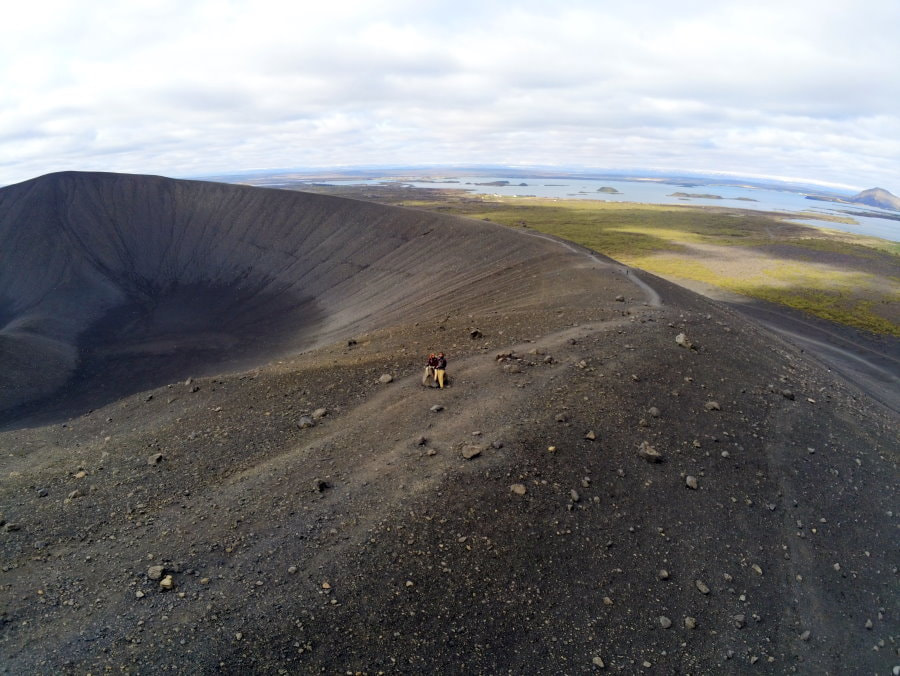
How Much Time and When?: We went to the top, walked about a quarter of the way around, and went back down, which took us about an hour with plenty of picture taking.
Difficulty: The path is obvious and well worn but it feels a bit like hiking on sand, so it takes a bit more effort than it feels like it should. The way back down is quite slick in a few spots.
Facilities: There are some informational signs and a 200 ISK public toilet building that accepts cash or card.
Road & Parking: This was a couple kilometers down a well maintained gravel road. The lot could hold about a dozen vehicles.
What to Bring: You could do this trail in just about any footwear, but we found hiking poles to be very helpful, especially on the way back down. We flew by many people that were trying to carefully pick their way back down the hill without losing their footing.
In Between: Our next stop was right around the corner but they are also connected by trails if you want to walk.
Dimmuborgir Volcanic Formation Stroll or Hike
Location: Parking - GPS Coordinates: 65.591442, -16.912703 Map
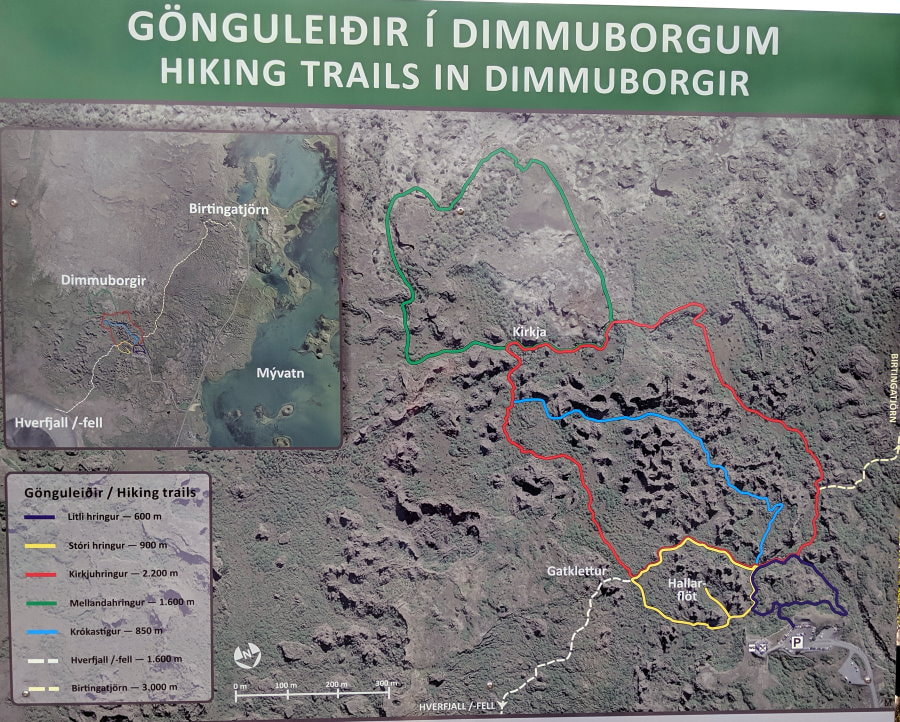
Most of the trails here were nicer than many of the roads we drove on. The purple, red, and yellow trails were paved, had ropes on both sides, and were mostly flat. The blue trail was one of the hiking options that instead followed a dirt trail, but was still pretty gentle.
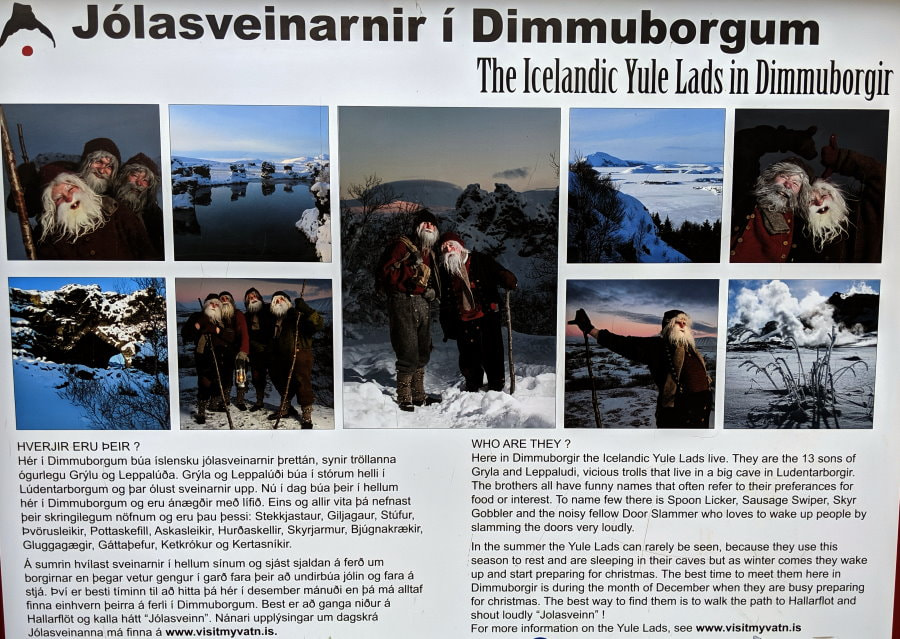
In addition to all of the formations this park also had some interesting holiday traditions. The Yule Lads on the sign below make appearances from time to time and have “lairs” hidden around the park. If you come across a sheep skin or some odd things in the caves it is probably supposed to be left by the Yule Lads. They look a bit more garish than American Santa’s elves and have a reputation for not being completely benevolent, but that is part of the Icelandic tradition.
We took parts of the purple, yellow, and red trail, and all of the blue trail. The paved trails have side shoots here and there to check out a cave, or a special formation, but the blue trail was by far my favorite. It had much more to look at and instead of walking by the rocks, you walk right through them, sometimes literally. The end of the trail where it goes back to red actually took us through an arch.
All of the special formations on the map also deserve some attention. Our favorite was Kirkja (or the church) which has a huge arch you could walk through that had a polished look around the opening that almost looked like marble. If you are not up for walking out that far Hallarflot is also a large arch, but I felt Gatklettur was more impressive. However, both have a tendency to attract crowds.
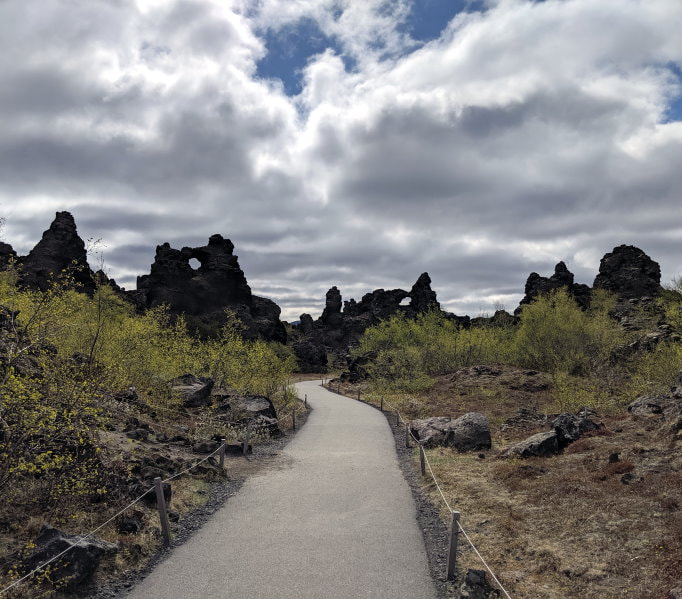
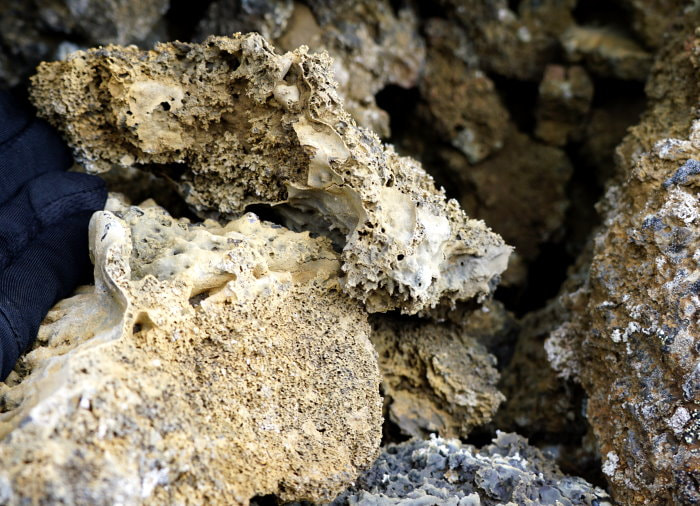
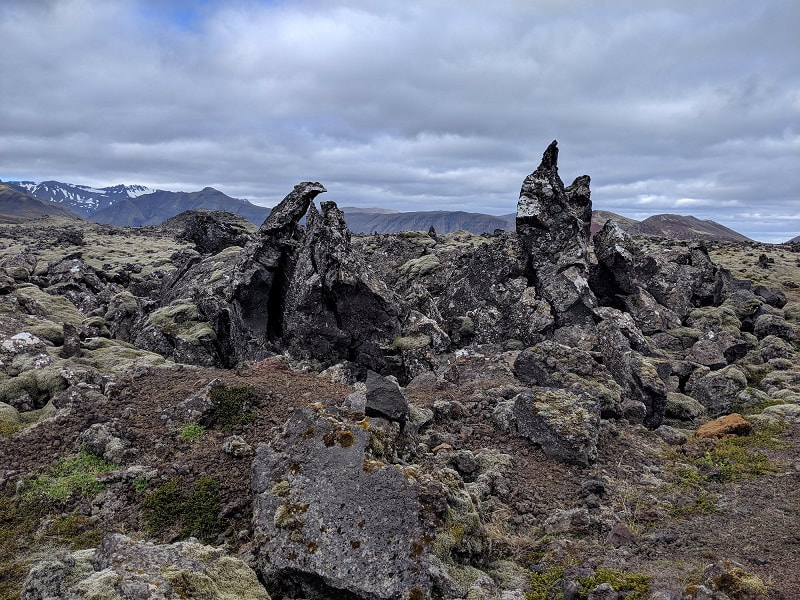
One of the things the blue trail helped me really get to see and appreciate was the texture of the rock. If I didn’t know where it came from I would have guessed that it was the remnants of an old coral reef. The stones were porous and extremely light for this size. One side was often prickly, while the other was totally smooth. Bits of it resembled cut bone. It was quite bizarre.
How Much Time and When?: We arrived around 10:30 AM and were here for about 1.5 hours. This is the kind of place where you probably want at least 30 minutes, and at least an hour if you want to make it to Kirkja the easy way, but could easily spend half a day if you did all the trails.
Difficulty: Depends upon the trail you do and how much you want to see. None are difficult, but some were easier than others.
Facilities: There was a building that housed public toilets (200 ISK), a cafe, and a shop. We didn’t go in, but the cafe (Kaffi Borgir) boasted a view and had a menu posted at the trailhead that wasn’t terribly priced for Iceland and included a soup buffet option.
Road & Parking: Large paved lot just off Route 848.
In Between:
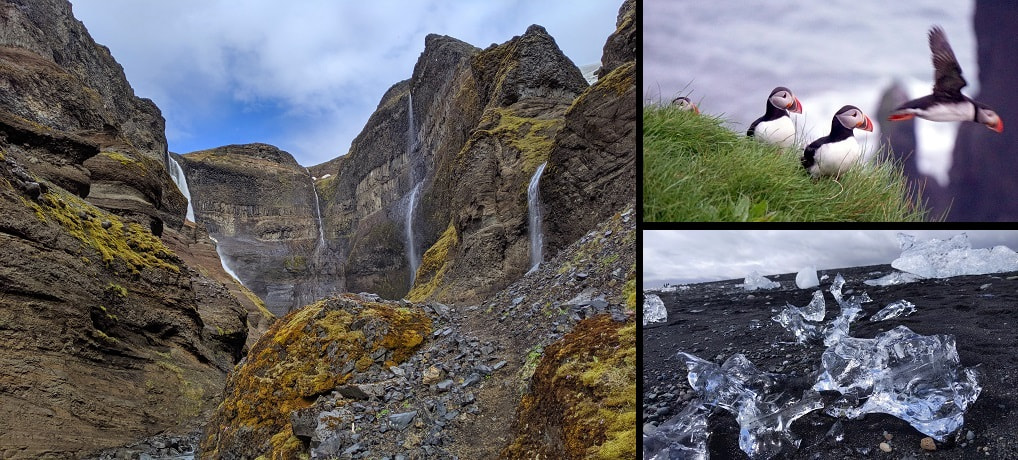
There are tons of other places to explore near Myvatn. You can find some of the attractions on the Visit Myvatn Website. This area is also popular for bird watching and boasts many varieties of colorful ducks.
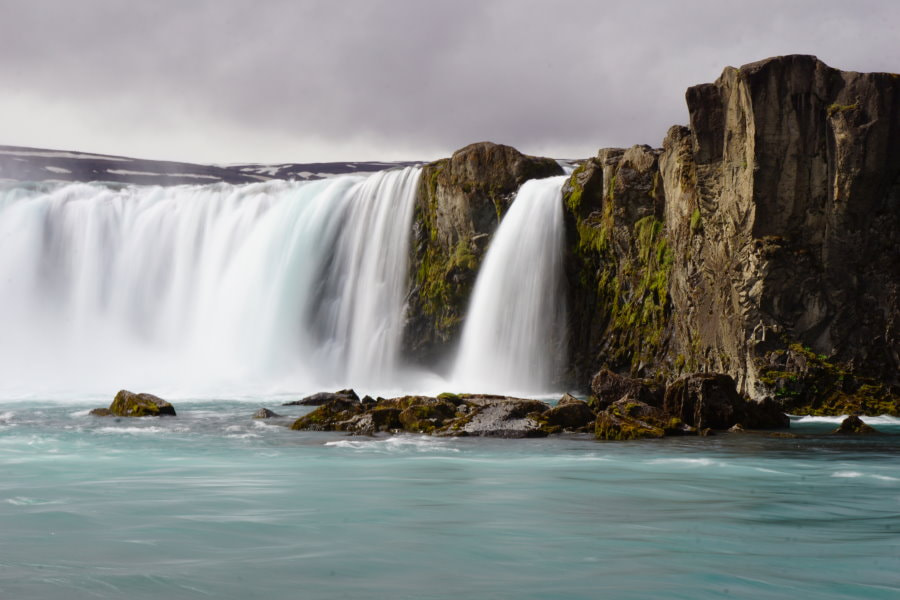
Goðafoss Waterfall
Location: Parking - GPS Coordinates: 65.684534, -17.540009 Map
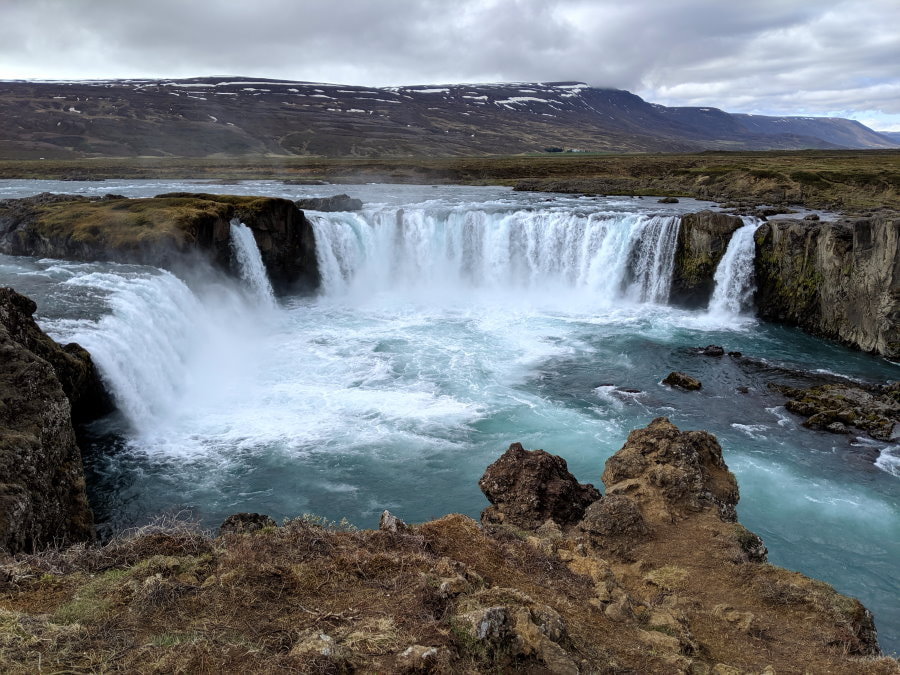
This spot is very touristy, can be very crowded, but is a must see spot! While we found some of the big popular waterfalls in the south a bit overrated, this one was not. Godafoss is a beautiful mix of size, power, and delicate beauty that is hard to capture.
I felt that this waterfall had a bit for everyone. You could admire the waterfall right from the parking lot and you can even see it from Route 1. There is a paved trail on the west side that you can take to a viewing platform and a rougher trail on the east side (based on the construction a paved trail may be coming soon) connected by a pedestrian bridge.
For the more adventurous there are some stone stairs (complete with wiggly rocks) and a trail down below the waterfall. You can venture pretty close and feel the spray on your face. The trail on the east side takes you pretty close to the lower waterfall, Geitafoss, which captures all of the power of Godafoss in one narrow canyon, and I found the rolling water mesmerizing.
How Much Time and When?: I think 15 minutes to an hour would do. We were here around 1:30 PM on a very chilly day in late May and the crowd wasn’t too bad, but this place does draw a lot of tours.
Difficulty: Look from your car, flat paved path, and/or a rocky but easy trail; you pick.
Facilities: We didn’t see any restrooms, but there are several cafes nearby. There were also a couple guesthouses. The waterfall itself had some informational signs.
Road & Parking: This is just off Route 1 and had a large paved parking area, although it probably fills up in the busy season.
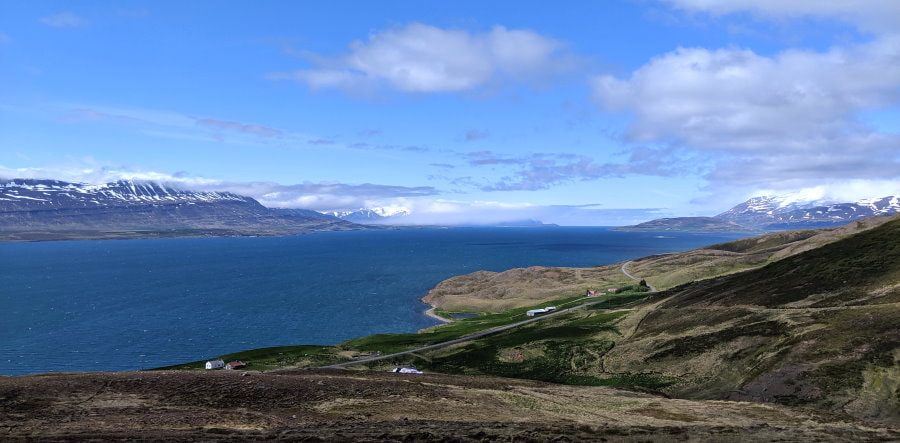
In Between: There are a couple of options for getting to Akureyri. You can take the Vaðlaheiði Tunnel, just don’t forget to pay the toll, or you can drive a bit farther up to a mountain pass and down the side of the fjord. We opted for the latter and were very happy with our choice. This whole drive was pretty, but cresting the mountain and looking down on the fjord was spectacular. We caught this on a sunny day and it was definitely worth the extra time. The mountain road was paved and pretty tame.
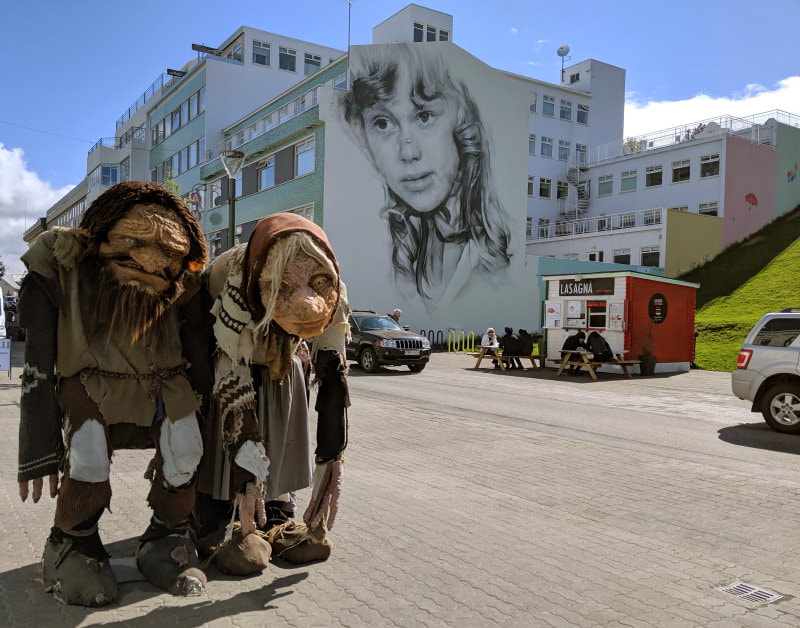
Akureyri, Capital of the North
We stopped in Akureyri for a late lunch, some ice cream, and a stroll around the city. Akureyri is small but colorful and has many historical marker signs around town to give you a snippet of history. We were only there for a few hours but felt that it was very walkable and had a good feel to it. There was some street art, a beautiful waterfront, and all the red stop lights were heart shaped. I can’t offer too much advice other than my usual approach to small cities: park somewhere central, get out, walk, and get lost. Just don’t forget to drop a pin where you left your vehicle.
If you are looking for something a bit more structured there are several bloggers with written walking tours for this town, so just Google it.
I enjoyed walking through the neighborhood around GPS Coordinates: 65.684700, -18.087333 Map. The houses were very colorful and some were quite unique.
How Much Time and When?: A couple hours to a couple days.
Road & Parking: The roads were fairly wide and there is plenty of free parking all over town. Just look for the signs that tell you how long you can park there. When you park you can scratch the time (don’t forget to use the 24 hour clock ie. 2PM = 14:00) on a piece of paper and leave it in the front window. Some cars will have little clocks for this purpose.
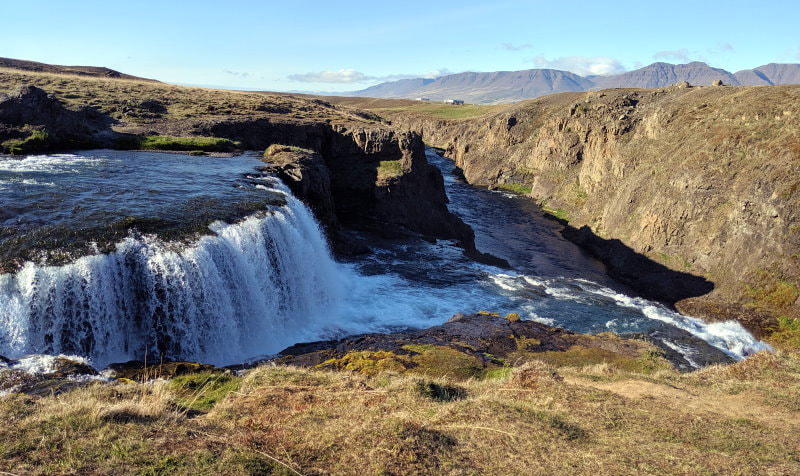
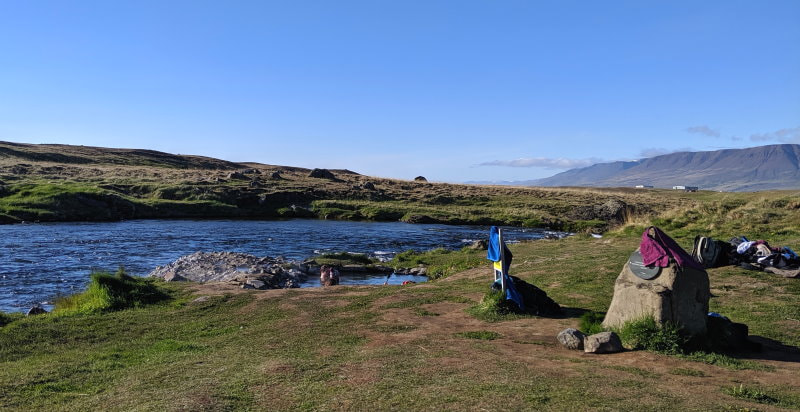
Fosslaug Hot Spring & Reykjafoss Waterfall
Location: Parking - GPS Coordinates: 65.498756, -19.378703 Map, Fosslaug Hot Spring - GPS Coordinates: 65.494216, -19.383578 Map
We probably would not have found this place if not for a note telling us which way to go on someone’s gate near the closest point on the main road. This spot is very close to the main road (752) but you can’t actually see it from the road, and in order to get to the pool you would have to cross private property and a river.
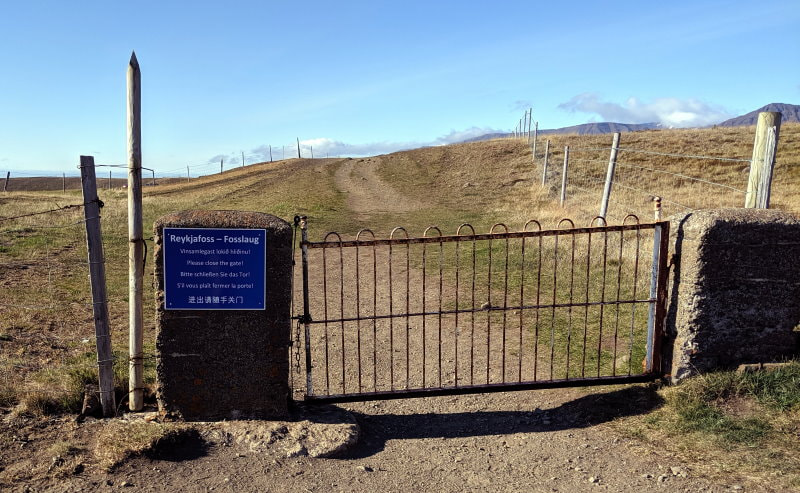
If you turn from 752 onto 753 and take your first right you will see a parking area by a fence with a sign. From there you just go through the gate, and follow the path past the waterfall. You will cross a little bridge with another gate and it will be just around the corner, at the point provided above.
Once there you can climb in, as long as there is space, and enjoy. Most people just change right there, but this is a short walk so I would recommend just wearing a swim suit under your clothes for the trip there if you are more comfortable changing in your vehicle. The pool is rather small and probably wouldn’t fit more than 6-8 people comfortably.
The water was warm but not hot (it was quite cold outside), except for right near the edge by the river where it comes in. Be careful where you put your hands and arms because it was actually hot enough to burn there. The walls seem to be made by carefully placed stones and the bottom is dirt. The water was quite murky, but didn’t smell.
Lay back for a while and enjoy landscape and the company. The sound of the river was soothing and it was a cold day so we watched the wispy steam rise into the air.
Sooner or later you will have to get out. This is the fun part, especially if it is cold out and you are shy. You can’t be seen from the road or the parking lot, but otherwise you are pretty much changing in a field. The day we were there was freezing so we made a dash for our towels and tried to strip out of wet clothes, dry off, and put on something warm as quickly and gracefully as possible in the frigid air. Something about speed, cold, and pruned fingers generally don’t help coordination so I can’t say it was pretty but we got it done and shivered our way back to the van.
Overall I thought this was a cool place, but it didn’t quite live up to my expectations.
How Much Time and When?: We got here around 6:30 PM in late May and there was a pretty constant flow of people, but we got a turn in the bath with a couple other people, and politely got out after about 15 minutes when another group showed up so they could have a turn.
Difficulty: Easy flat trail.
Facilities: None, just a sign to let you know that you found it, which is nice.
Road & Parking: Gravel lot off a decent gravel road. Space for about a dozen vehicles but seems to double as parking for trail riding.
What to Bring: Don’t forget some kind of clothing for bathing and I recommend a fast drying towel. I didn’t feel that footwear was necessary in the water here.
In Between: If you are staying in the area for the night there are a couple of campgrounds that both have showers and pools to wash any of the hot pot dirt away. We stayed at Steinsstaðir Campsite.
Víðimýrarkirkja Turf Church is a popular stop on Route 1, but it was closed when we tried to visit and didn’t have any posted hours or opening date. It seemed to have a public bathroom but they were also closed.
There were a couple other interesting monuments, some buildings, a bunch of horses, and one overturned truck trailer that seems to have been there a while, to see along the road.
Kolugljúfur Canyon
Location: GPS Coordinates: 65.332536, -20.570141 Map
Kolugljufur Canyon is a nice place to stop to see the waterfall but there wasn’t much of the canyon to see. The problem with the canyon is that both sides are about the same height and the walls are so straight and narrow that you can rarely actually see in. This place has a reputation for being dangerous due to people falling over the edge. I can see why, since the only way to peer into the canyon is to get dangerously close to the edge. There was some construction going on when we were there so just speculation, but perhaps they are building some reinforced viewpoints.
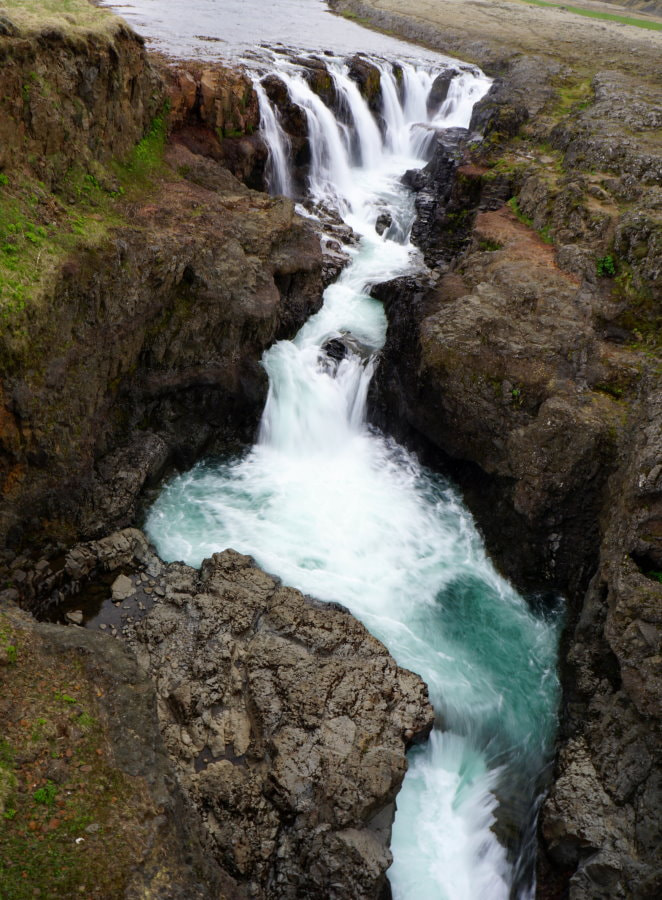
Overall the waterfalls are beautiful and this place isn’t hard to get to, but I wouldn’t put it on my must see list.
How Much Time and When?: We got here around 10:30 on a chilly morning and were the only people here. I would say 15 minutes to an hour would be plenty.
Difficulty: Easy path down both sides with a bridge connecting the two and an option of climbing down for a closer look on one side.
Facilities: A sign, picnic table, and an observation platform.
Road & Parking: Small parking area off a well maintained road.
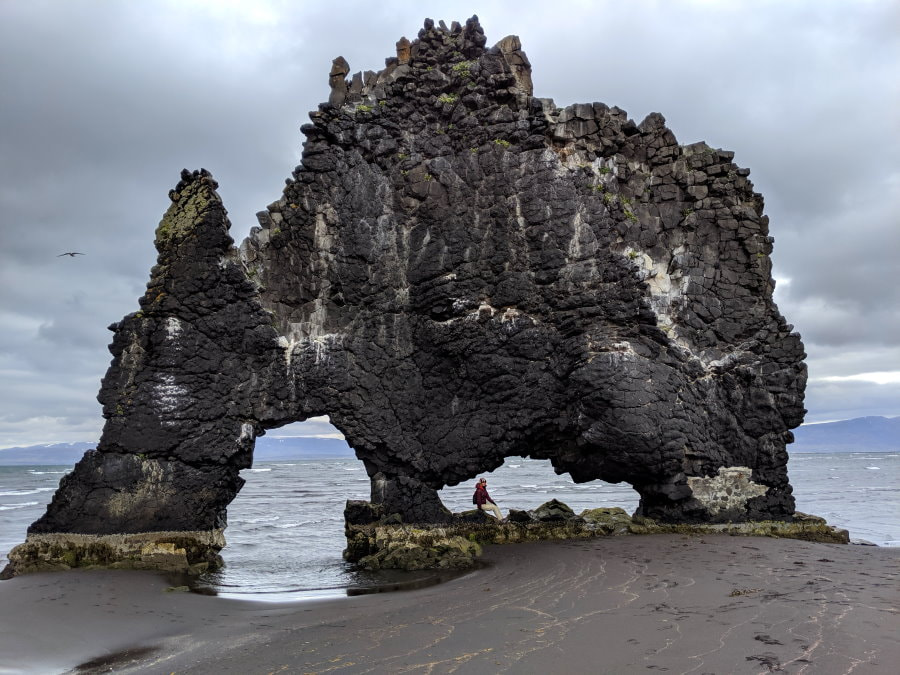
Hvítserkur Dragon Rock Walk or Hike
Location: Parking - GPS Coordinates: 65.603631, -20.639526 Map
The drive out here on the east side of the Trollaskagi Peninsula was easy, but a bit dull. The drive back on the west side was more interesting.
From the top you have a nice but distant view of Hvitserkur and on a clear day the fjord. The lookout had a well marked trail but the trail down was a bit more ambiguous. We saw a steep slope just below the lookout that had obviously been well used, but looked a bit dangerous. After some looking this appeared to the only way so we went for it. We carefully scooched and crab-walked our way down the cliff and made it safely to the bottom. This is not something I would recommend without good shoes. Luckily going up is much easier so if you make it to the bottom you are past the hard part.
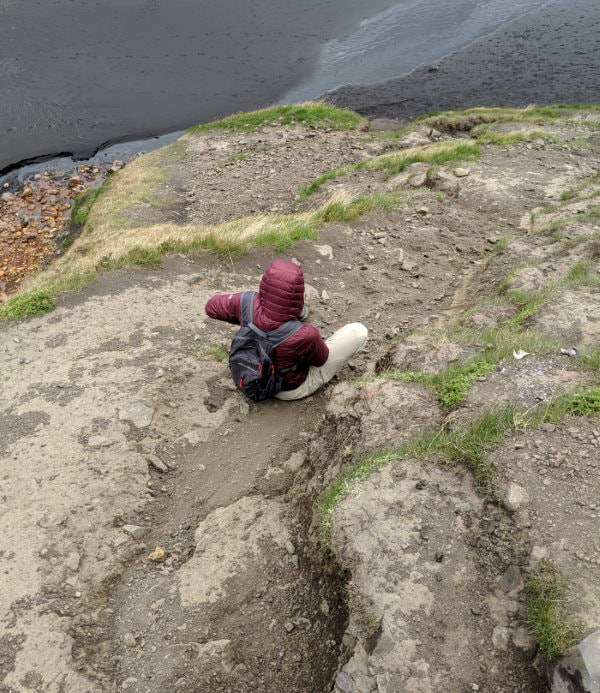
We lucked out and ended up here at low tide so we could walk all the way out to the formation. It may look small from the top, but up close I thought it was pretty impressive. The bottom has been reinforced by concrete to make it safer, but this is a natural formation and the concrete is barely noticeable unless you are looking for it.
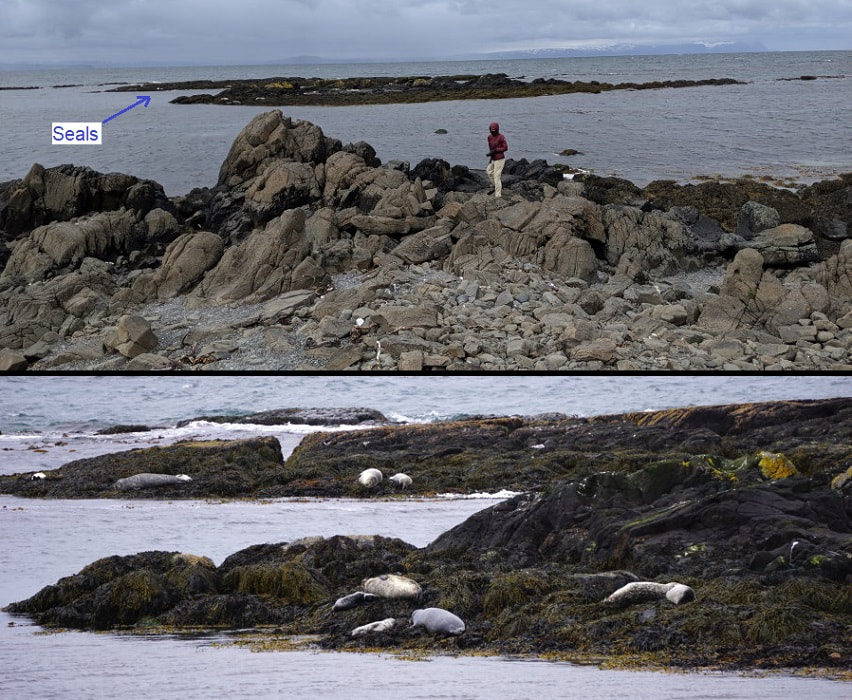
After checking out the big rock, we wandered farther down the beach (may be inaccessible at high tide). This wasn’t the most pleasant walking since we were treading on mostly rocks polished and rounded by the sea, but we saw tons of sea birds and a couple seals poked their heads up now and then.
How Much Time and When?: Depending on whether you intend to go to the bottom this could be a 15 minute to 1 hour stop.
Difficulty: Easy to the lookout but difficult to go down to the formation. I feel like a rope might be a liability, but would make all the difference here.
Facilities: A sign and a lookout. The sign states that there is a cafe and restrooms in a nearby town.
Road & Parking: The drive out here on the east side of the Trollaskagi Peninsula was easy, but a bit dull. The drive back on the west coast was much more interesting. There was a nice big parking area that could easily accommodate at least a dozen vehicles.
What to Bring: You might want a zoom lens or binoculars if you plan on looking from the top. If you plan to venture to the bottom you will want some good hiking shoes and pants that you can move in and don’t mind getting dirty. We wore Salomon Hiking Shoes and Mizuno Wave Rider Shoes and they worked well. Gloves to protect your hands might also be nice, but you may feel safer without them.
In Between:
There was plenty of sheep-dodging on the way back to the Ring Road and the road was a nice but narrow gravel road with frequent passing zones. On the west side of the Trollaskagi Peninsula we stopped at Seal Beach and saw a dozen seals napping on the rocks but they were quite far away. Bring a telephoto lens or some binoculars if you want to take a look. GPS Coordinates: 65.584110, -20.921866 Map
Product Links: I am not sponsored by any of the products I link to. If you choose to make a purchase from one of the links of a product I listed or any other item a small percentage will go back to me to fund this website, at no additional cost to you. The products I link to are either ones I have used or similar if those are not available. Thank you for your support.
More?
For more of Iceland see my full Trip Itinerary & Travel Budget.
For more of our journey around the Ring Road check out Southern Iceland, Western Iceland, or Eastern Iceland.
Info and Tips on Campsites around the Ring Road
See our full Italy Trip Itinerary.