It is hard to imagine anything on Route 1 being off the beaten path, but much of the East Fjords has that feel. This is an area with something new around every corner and plenty of surprises.
-
Svartifoss Waterfall Hike in Vatnajökull National Park - Dark Basalt Columns
-
Bjólfur Hike to Seyðisfjörður Overlook - Mountain Overlook
-
Studlagil Canyon Hike - A Canyon of Basalt Columns
Check out Iceland Itinerary to see all of these stops on a map.
Check out our full Iceland Highlights Playlist on Youtube. We have more videos coming so stop back to check it out or subscribe to our newsletter to make sure you don’t miss anything.
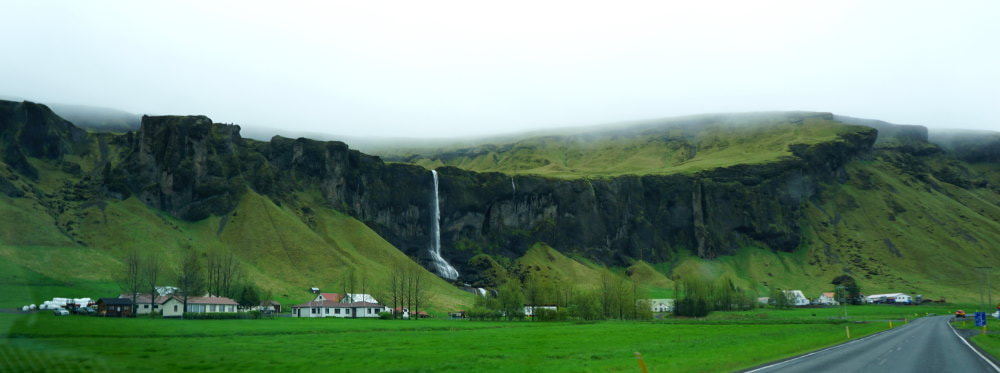
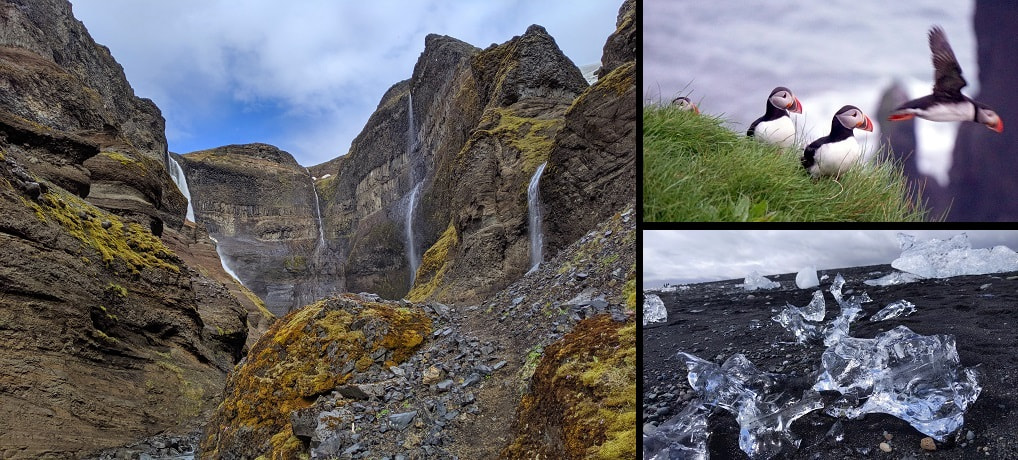
In Between: This bit of the drive, east of Fjaðrárgljúfur Canyon, had a few more sections of the mundane black volcanic washes, but also some of the prettiest scenery yet. We kept finding one beautiful spot after another to stop and see the countless beautiful waterfalls cascading down the towering green cliffs.
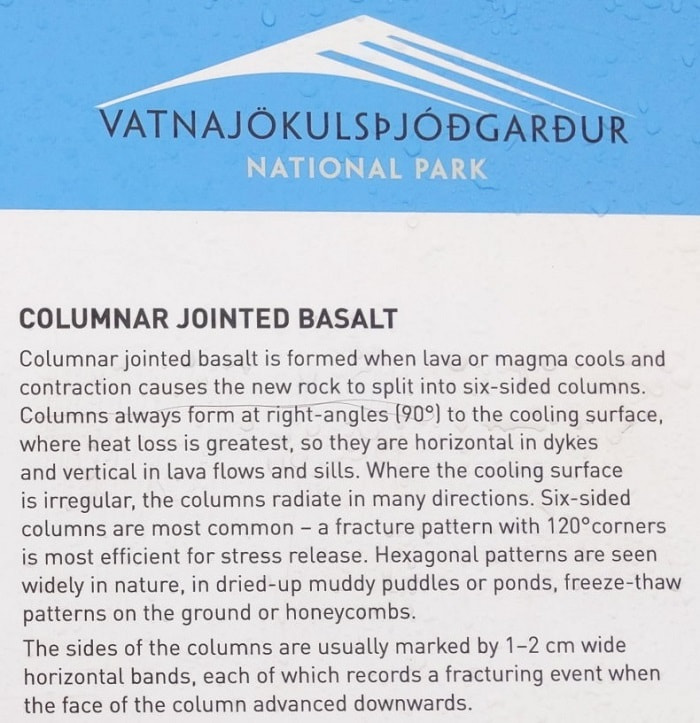
Svartifoss Waterfall Hike in Vatnajökull National Park
Location: Trailhead Parking - GPS Coordinates: 64.016928, -16.983708 Map, Visitor Center - GPS Coordinates: 64.016388, -16.966378 Map
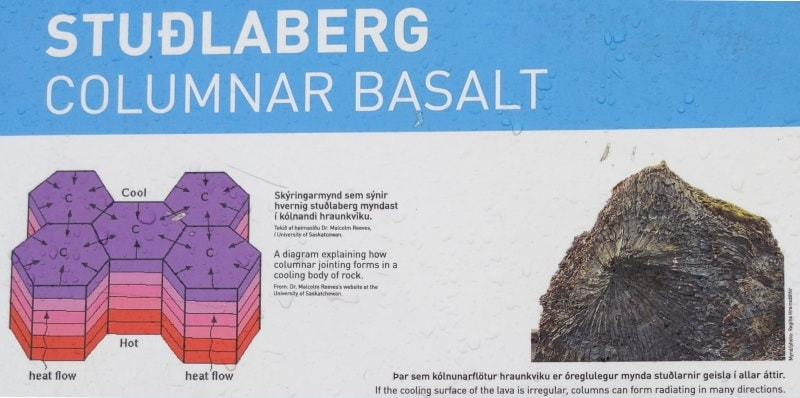
Svartifoss is a unique waterfall cascading over a wall of black hexagon basalt columns. A few years ago we visited the Giant’s Causeway in Northern Ireland and were under the impression that these hexagon formations were extremely rare and that no one really knew how they formed (although they may have had more info in the visitor center). Well, they may be rare in most places, but not in Iceland. As to how they formed, perhaps not everyone agrees, but Iceland has a pretty compelling illustrated explanation in this park. While it takes away a bit of the aura of mysticism I appreciate the science. This is some pretty cool geology.
There are many ways to get to this waterfall. You can go out and back or make a big loop of the area. We took the S3/S2 trail. The trail was pretty easy to follow and well marked, but I highly recommend bringing a trail map or taking a picture of the map at the trailhead so you know which forks to take. Some were marked with simple posts with arrows for the trail number but some had the destination names instead. If you don’t see the trail number you are looking for be sure to check all sides of the post.
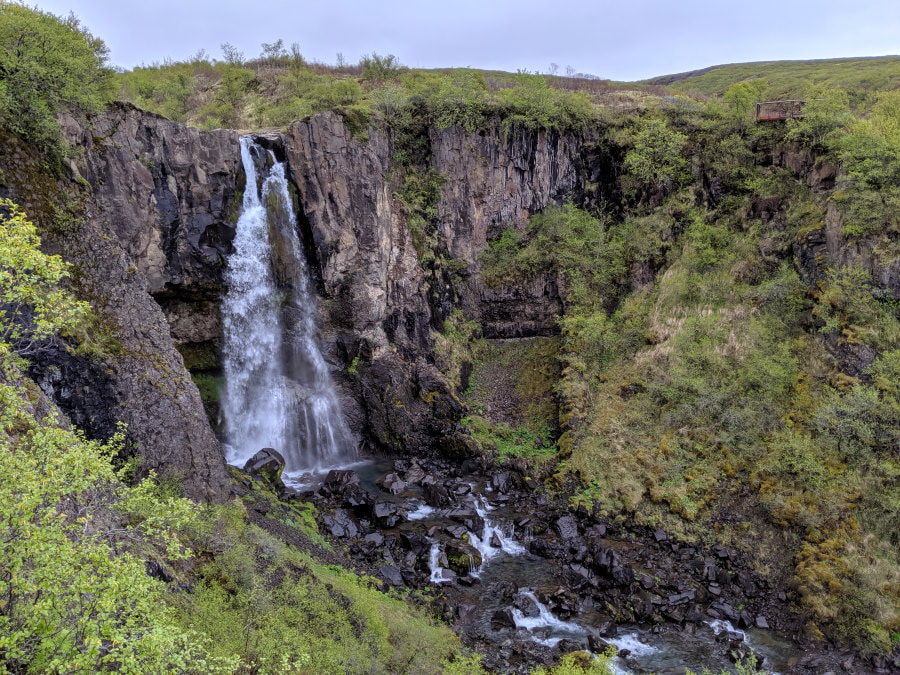
The trail is fairly gentle, mostly a gravel trail with some steps. It passes through some wooded areas and some low brush areas. The one we took passed a couple little waterfalls and Hundafoss, which is pretty and has an observation deck on one side. However, in my opinion none of these compare to Svartifoss.
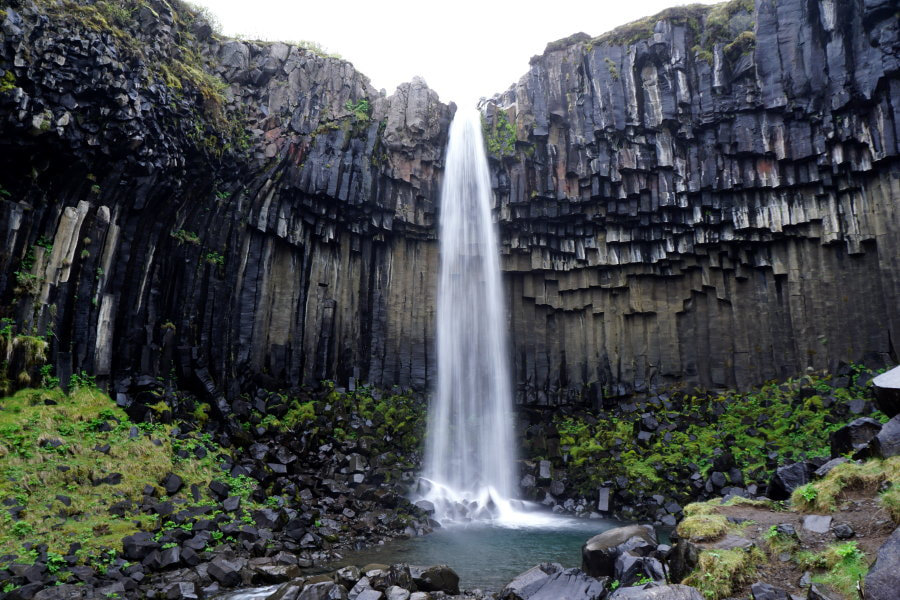
Svartifoss isn’t that remarkable as a waterfall, but the backdrop really makes it standout. The columns remind me of an upside down cathedral organ. Tha backdrop is black and golden. The columns can be seen in the canyon walls all around the waterfall. While it may be temping to get a closer look, this area is monitored by several video cameras.
Due to a setback with a flat tire we didn’t have time for any more exploring in Vatnajokull National Park, but it has many other trails and a lot to offer including views of the glaciers.
How Much Time and When?: This hike took us about an hour. We started at 6:45 PM in mid-May and there were some people around, but the trail was pretty quiet. We didn’t intend to go this late, but it worked out and we had decent lighting.
Difficulty: Fairly easy with some up and down. Gravel or gravel filled corrugated plastic walkway.
Facilities: There is a vehicle day use fee which was 750 ISK for most passenger vehicles when we were there. It could be paid online or at their kiosk which was easy to use. You will need your vehicle plate number.
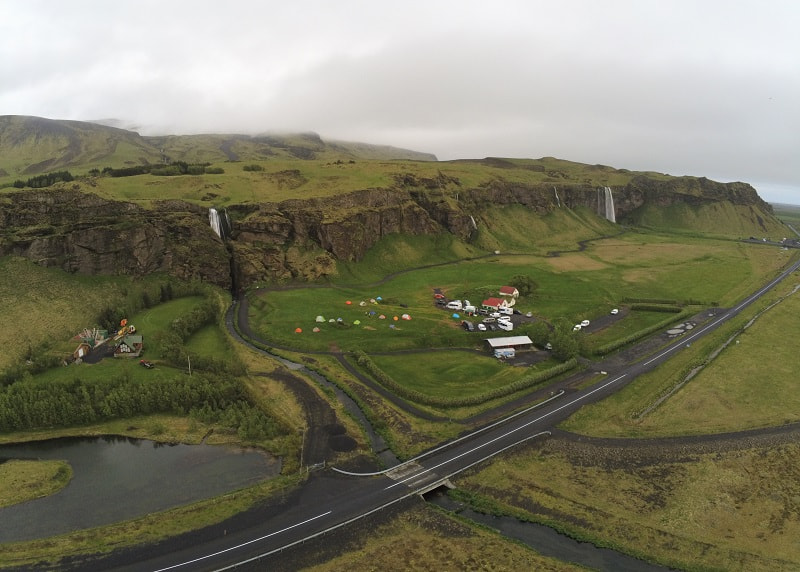
The visitor center has lots of information inside and out. It was closed when we were there (hours were 9AM-7PM) but there were still plenty of maps, bird/plant identification, and other informational signs outside. There were printouts on some of the more popular trails posted on the bathroom wall.
The bathrooms were free and kept nice and clean. They also offer changing areas and rented lockers. By the visitor center there is a large campground and during the summer a food truck operates near the campground.
You can check the current entry rates and camping fees at the Vatnajökull National Park Website. They also have info on the trails and park maps.
Road & Parking: The road was ok up to the visitor center. The parking was gravel lots. The one by the visitor center was ok. The one by the trailhead was a bit rough, but you can park and hike from the visitor center if it is too much for your vehicle.
Svínafellsjökull Glacier View Hike
Location: Svinafellsjokull Parking - GPS Coordinates: 64.008373, -16.879973 Map, the farthest point we got to, almost at the foot of the glacier - GPS Coordinates: 64.008429, -16.870544, there is also a nice view of the lagoon and glacier from below at GPS Coordinates: 63.997608, -16.875237 Map.
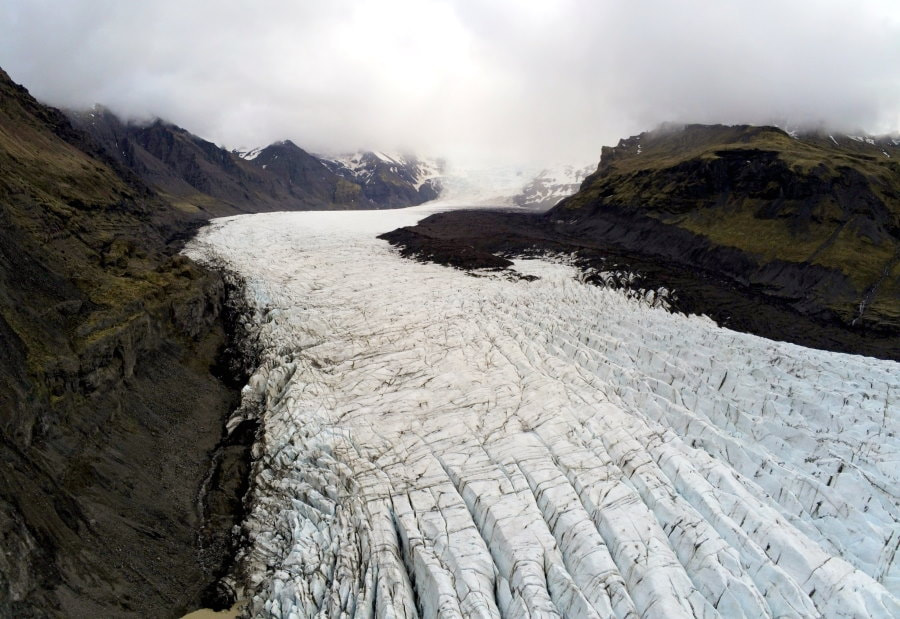
This is an area our glacier hike guide recommended as one of his favorite spots. We hiked some of the trail, but didn’t make it all the way to the GPS point he gave us (64.036397, -16.829988) so we are not sure what we missed. We did get a nice view looking down on the glacier with some beautiful scenery and this spot was isolated enough for us to get some aerial shots without disturbing anyone. We enjoyed it, and the view from the very rough road in was spectacular; however, I wouldn’t list it as a must stop spot, especially if you have done a glacier hike.
We were greeted by a cute glacier lagoon and a sobering memorial to some hikers who were last seen here and probably perished on this trail. AllTrails shows one short trail to a viewpoint. This trail is not marked, but the beginning of it is easy to follow to the viewpoint, then it quickly turns into “choose your own adventure” with footprints going every which way and no clear path.
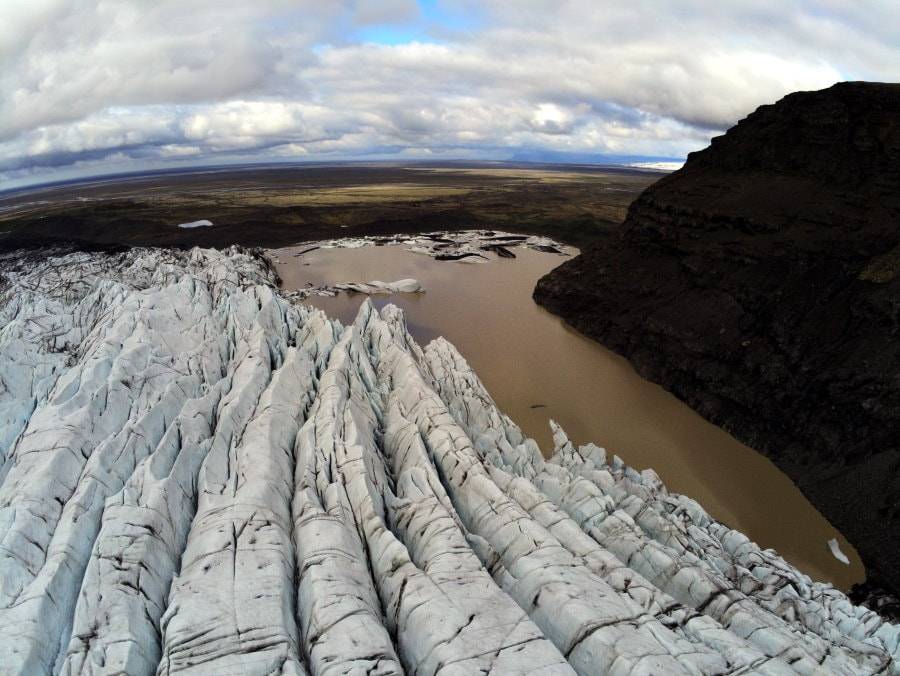
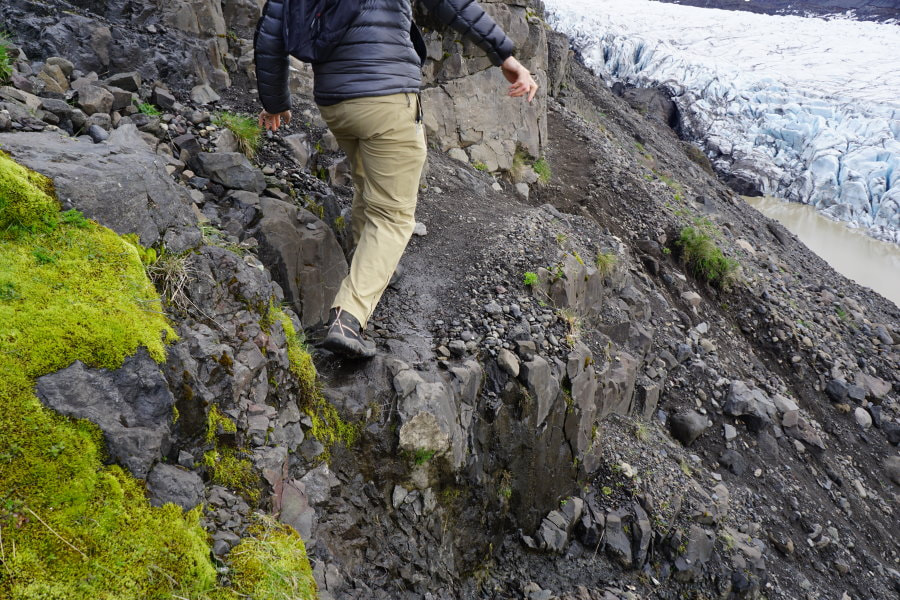
The trails runs along the side of a naturally terraced hill which has a steep drop into the icy water below. We were hoping that we would be able to use the GPS points that our guide gave us to find a path, but we kept running into dead ends as we tried to get to the top of the hill. Many of these were washouts so they may have been passable at one point, or maybe were supposed to get up from the other side of the hill. We sent the drone up to scout out the trail and think we may have seen a way up by doubling back a few times to zig zag up the layers, but were a bit pressed for time so we called it and turned back.
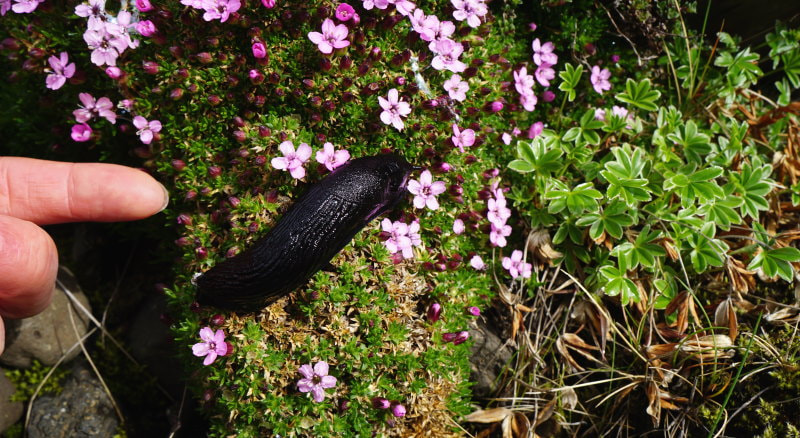
I think of glaciers as cold lifeless places, and I suppose the glacier itself probably was, but I was surprised how much life was growing around this glacier. That slug was one of many enormous ones that I didn’t expect to see outside of the tropics.
How Much Time and When?: We got here at 9:30AM in May and there were only two other vehicles and decent lighting. We spent a little over an hour and the sun peeked out briefly on our drive back to the road illuminating the ice beautifully.
Difficulty: Depends on where you go. If you just walk around the rim of the glacier lagoon it is fairly easy. If you go up the trail it starts out ok, but quickly gets rough and slick.
Facilities: None, just a basic warning trailhead sign.
Road & Parking: This gravel road was a bit treacherous for a 2-wheel drive vehicle. It lacked the big rocks sticking up that Haifoss had, but replaced them with giant potholes that you could easily get stuck in if you go too slow, but can hurt the vehicle if you go too fast. Once again our little van did it, but it was one of the worst roads we ventured down. The campground owner said that they run a surfacing truck over it periodically to fill the holes and smooth it back out.
What to Bring: If you plan to venture to the lookout make sure you have shoes with decent grip. We wore KEEN Targhee and Salomon Hiking Shoes. If you want to go beyond the lookout I highly recommend hiking poles. The poles will give you some extra grip on the crumbly and often slick terrain, and a slip here could have devastating consequences.
Jökulsárlón Glacier Lagoon Walk
Location: Where we parked - GPS Coordinates: 64.041625, -16.210597 Map Main Jokulsarlon Parking - GPS Coordinates: 64.048238, -16.180420 Map
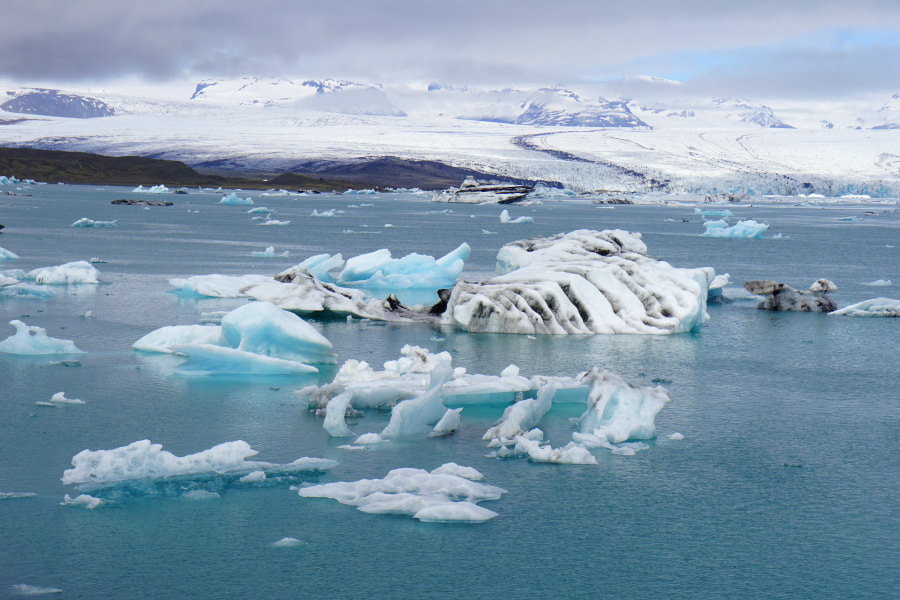
We went for a nice stroll along the south west side of the lagoon and loved it. After seeing a couple other glacier lagoons we were planning on skipping this one, but since it was right there we figured we would just take a quick peek. A peek turned into just a bit farther and a bit farther, and so on. The formations here were so varied that every few minutes brings something new. The sun and water play with the existing ones, constantly sculpting and turning them to catch the light in different ways.
How Much Time and When?: We were here around noon in May, and while the main lot had plenty of people and tour buses, this area was not crowded. I don’t think there is a wrong time to come. You could spend as much or as little time here as you want.
Difficulty: Nice gentle path that you can take as far as you want and turn around at any time.
Facilities: None at these small lots scattered along the side of Route 1, but there are some facilities at the main lot as well as many tour companies with boat rides, kayak tours, and more. Many can be booked on the spot but it is always safer to reserve ahead.
Road & Parking: The small lots along the side of Route 1 vary in condition and are all gravel lots. Some are better than others if you have low ground clearance.
Diamond Beach (Breiðamerkursandur)
Location: Parking - GPS Coordinates: 64.042948, -16.182110 Map or the other side Map
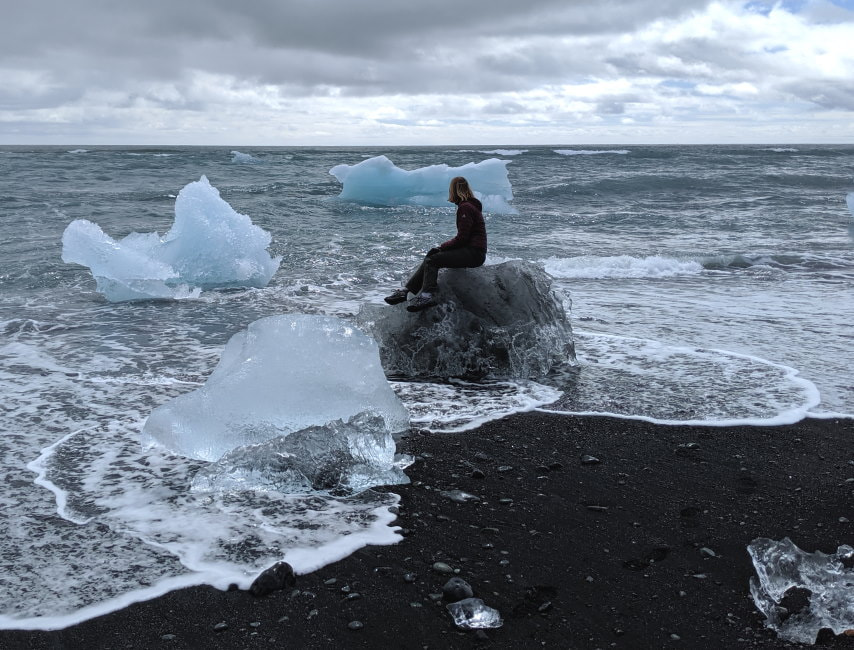
We parked and walked down to the beach with high expectations but only saw a couple small pieces of ice. We were a little disappointed but the pieces that were there were still very pretty so we took a couple pictures and marveled at the clarity of the ice. While we were taking pictures a seal surfaced just a little bit away and swam by! We both agreed that the seal had made it worth it and happily walked a little farther down the beach.
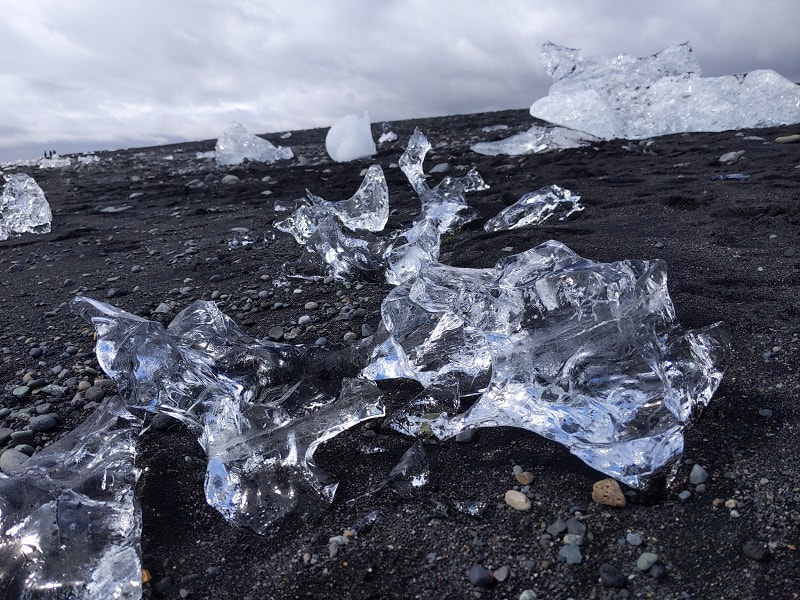
Just as we were about to turn back to the van we spotted a large group of people around the corner. And there it was, the shimmering ice that we had seen in pictures littered all across the beach. The ice varied in shape and size almost as much as back in the lagoon, but now most pieces were transformed from frosty snow covered giants to delicate translucent crystals. Along with the ice there were kids running around, people posing for Instagram, and one woman in a flowing dress recording what appeared to be a music video.
How Much Time and When?: There isn’t really a wrong time to go, but it can get crowded. Some photographers even come at before sunrise and after sunset for long exposure photos.
Difficulty: Easy as long as you don’t mind walking in sand.
Facilities: None, but there are some across the road at the Glacier Lagoon
Road & Parking: Big gravel lot just off Route 1.
What to Bring: You will probably have a hard time resisting touching the ice (and to think you may be touching water that has been frozen for thousands of years) so I would recommend gloves to keep your hands warm. It is easy to forget about the sneaky waves when there is so much to look at. Many people end up with wet feet here, including me. Even though I had waterproof shoes on it came right over the top when I wasn’t looking. I wouldn’t bring them just for this, but if you are in Iceland you probably have boots anyhow, so you might want to wear them.
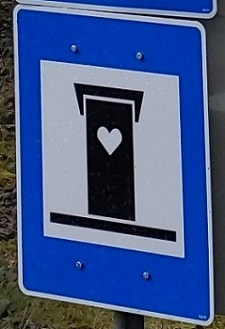
In Between: The drive over to Hofn is very pretty, more green cliffs and little waterfalls. We saw a bunch of random abandoned buildings with street art and murals painted on them. Our lunch stop was at this very nice rest stop (GPS Coordinates: 64.180217, -15.780031 Map) complete with a free restroom in the form of a clean porta potty. These are available whenever you see the little house with a heart sign and are fairly common in the east portion of Iceland. Since there is very little else out there we really appreciated them.
Hofn is one of the last places for fuel and groceries before you enter the fjords so we stopped to top up. They had a nice grocery store and visitor center (with a small free museum and bathrooms), but the town felt a bit run down. The Olís there had a bulk candy section and it happened to be the weekend so it was 50% off so we got a few to try on the road. We also noticed a yarn selection in the grocery store that could rival many arts and craft stores in the US.
After Hofn you will pass Vestrahorn, a scenic area that many people visit. It was foggy when we were here and they charge admission so we skipped it and headed into the fjords.
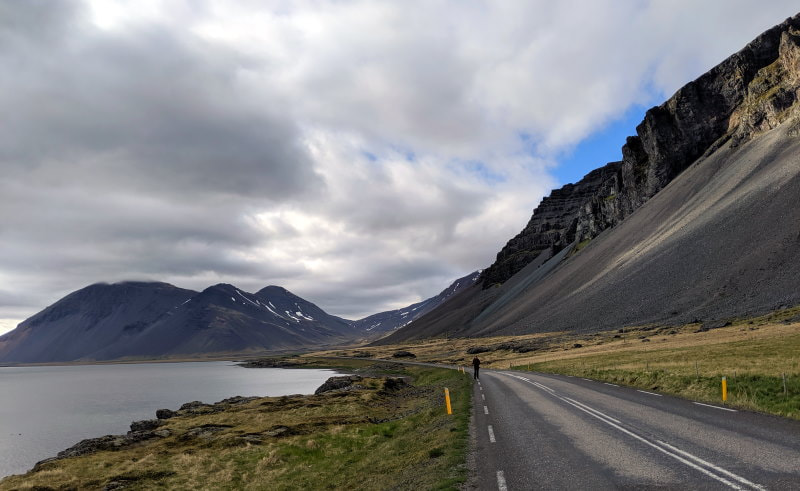
Driving through the East Fjords along Route 1
Make sure you have a full tank and are ready for some remote driving because we rarely saw any other vehicles, there were no towns for over an hour, and the only side roads were small gravel roads, often F-roads.
I’m not sure whether all of these actually count as Fjords or Fjörður (Icelandic word for fjord), but I want to share a little about each regardless. I had trouble finding names for all of them so I figured I couldn’t go wrong with numbers.
Each of the fjords had its own unique personality and we felt that each successive one got more beautiful as we headed north. The East Fjords continue up well past Route 1 and my favorite one that we saw was actually Seyðisfjörður (a short detour off Route 1).
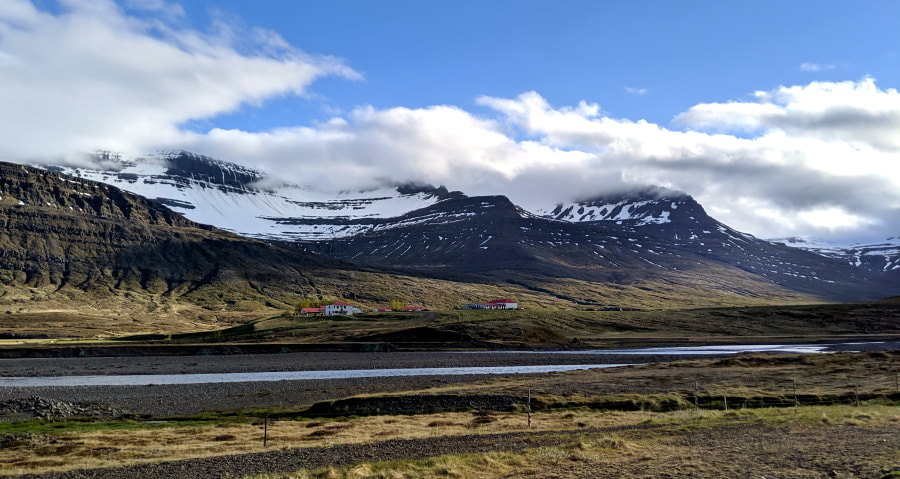
1 - Might be called Fjörur, might not. This landscape looks a little bleak on a rainy day, but when the light hits it just right you can see the rainbow of colored rock and sand. Keep an eye out, we saw a few wild reindeer here near the beginning.
Going around the bend from 1 to 2 was stunning and one of my favorite sections. This was a winding road on a short cliff overlooking the ocean. Many odd stone pinnacles stood in the sand right at the edge of the ocean.

2 - I found a map that called this one Álftafjörður, but when I searched that I got a fjord in the west. This area was a bit marshier with green cliffs.
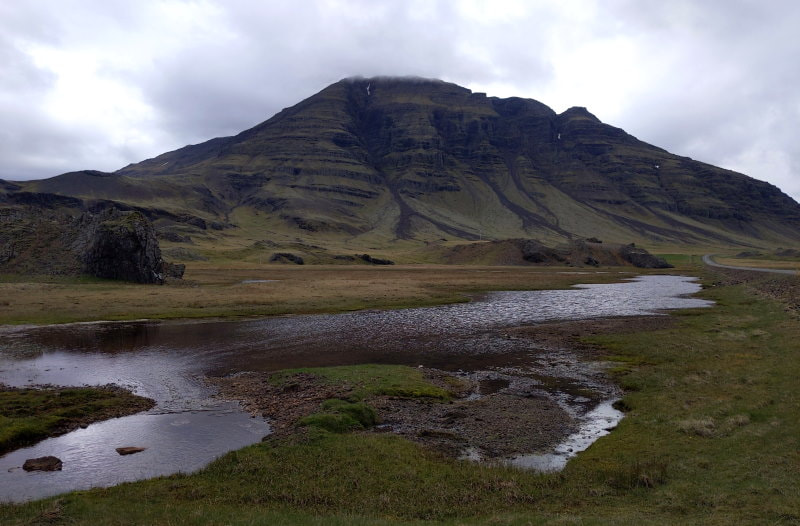
3 - I saw one map refer to this one as Hamarsfjörður. This is a nice pastoral basin with occasional rocky outcrops surrounded by dusty cliffs.
Just as you make the turn into the next fjord there is a turn for Eggin í Gleðivík (GPS Coordinates: 64.661946, -14.294785), a quirky stop with dozens of egg replica statues. We missed the turn and by the time we found a safe turn around we were pretty far down the road, so we didn’t go back.
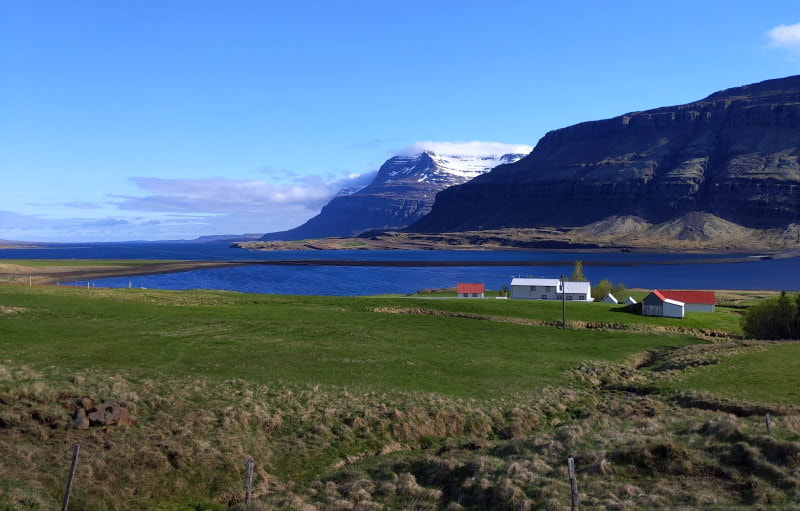
4 - Berufjörður - Here we finally have a proper fjord and you will start to see some snowcapped mountains. If you are traveling clockwise, I’m sorry, just some more snowcapped mountains, but if you are going counterclockwise like us these may be the first of the trip. There also were lots of birds, a fish farm, and a waterfall (Nykurhylsfoss or Sveinsstekksfoss at GPS Coordinates: 64.752609, -14.470994 Map).
If you have had enough of the fjords at this point you have the choice of taking the turn at the inside corner of this fjord onto the gravel route 939 through the mountains. Depending on your vehicle and the road conditions this may or may not be a good choice.
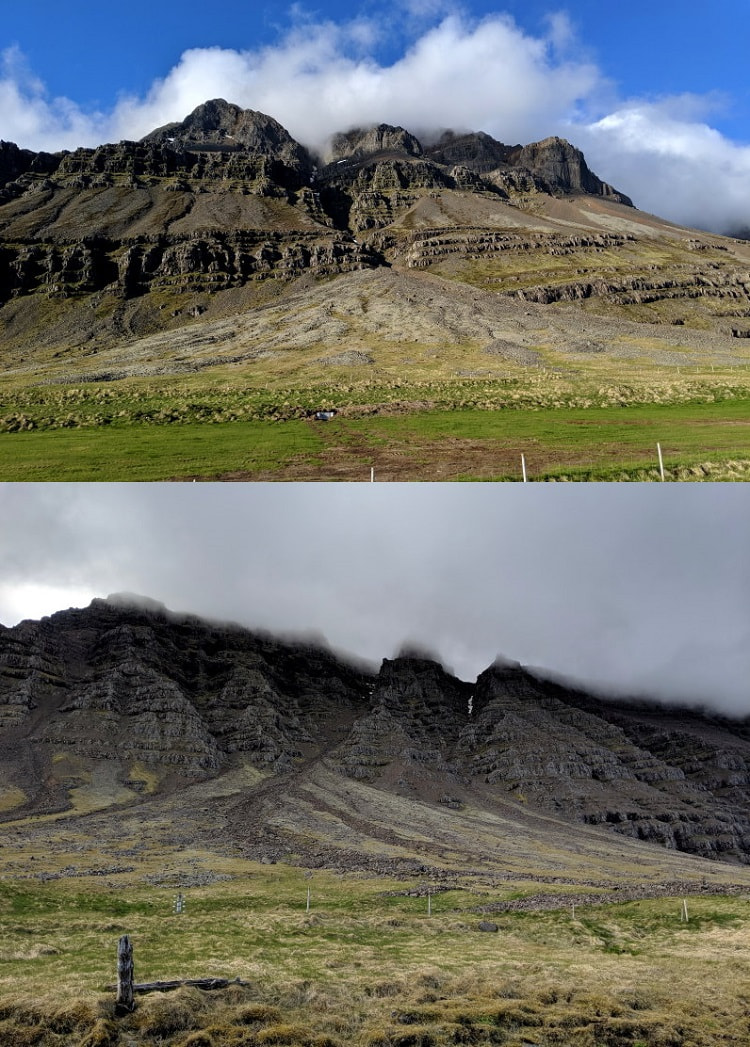
5 - Bay of Breiðdalsvík - This one had more terraced mountains swimming in and out of the fog, one moment basking in the sunlight and the next shrouded in fog giving them an aura of mystery.
Once again you have a choice here of which way to go, but Route 95 doesn’t save much time so we picked to stay in the fjords for a little longer and follow Route 1.
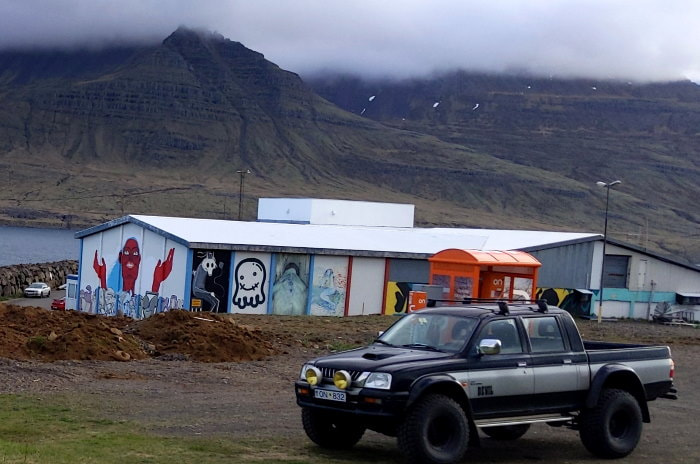
6 - Stöðvarfjörður - There was a tiny town with a couple interesting places like these buildings and Petra’s Stone Collection Museum/Shop. There was also a campground here.
7 - Fáskrúðsfjörður - This fjord had a cute little island and stunning views as you round the corner. It had more fish farms and the biggest town we had see in hours with another campground. Instead of rounding this fjord we followed Route 1 through the tunnel, under the mountains and into the final Route 1 fjord.
8 - Reyðarfjörður - We stayed in Reyðarfjörður Campsite for the night on the edge of town. We went on a beautiful walk here that follows a canyon with a few waterfalls and gives you a nice view of the town and the mountains. The sun setting behind the mountains made this a perfect after dinner walk. There were lupines everywhere. You can find directions for this walk in my Reyðarfjörður Campsite post.
How Much Time and When?: The East Fjords are the kind of place you could drive in a day or a week. It really depends on how many stops you want to make.
Facilities: There were frequent picnic spots along the fjords, but only a few with bathrooms so keep your eyes out for the signs. Many have very little warning. A few of the pull offs also have informational signs with a bit of history. The towns are typically quite small so fill up on diesel and petrol and bring snacks.
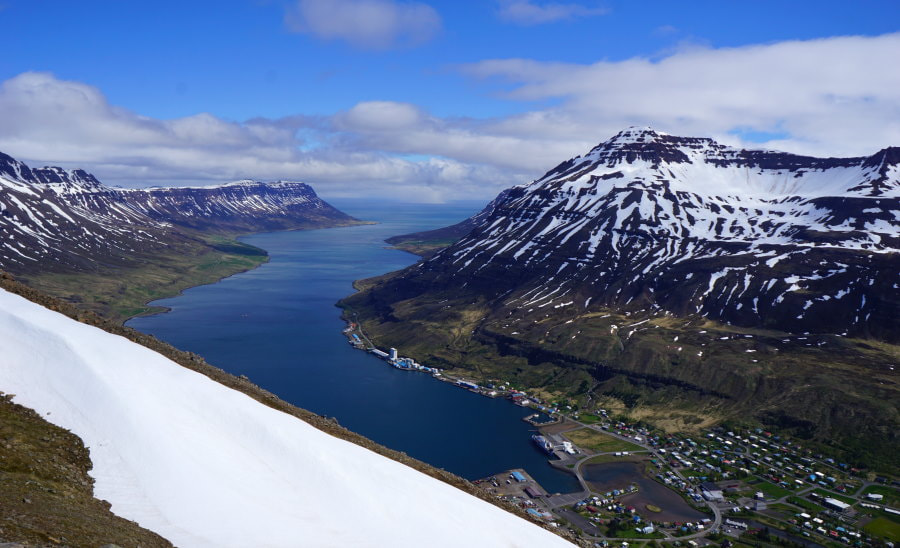
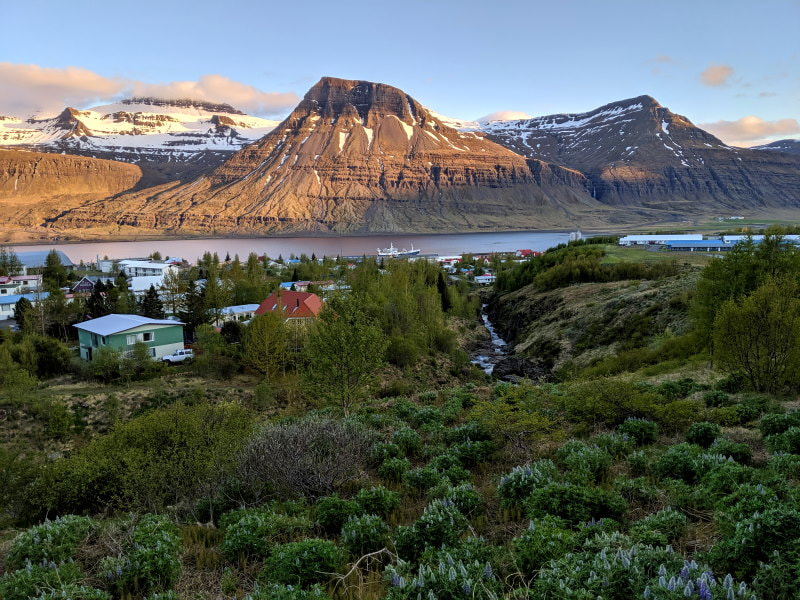
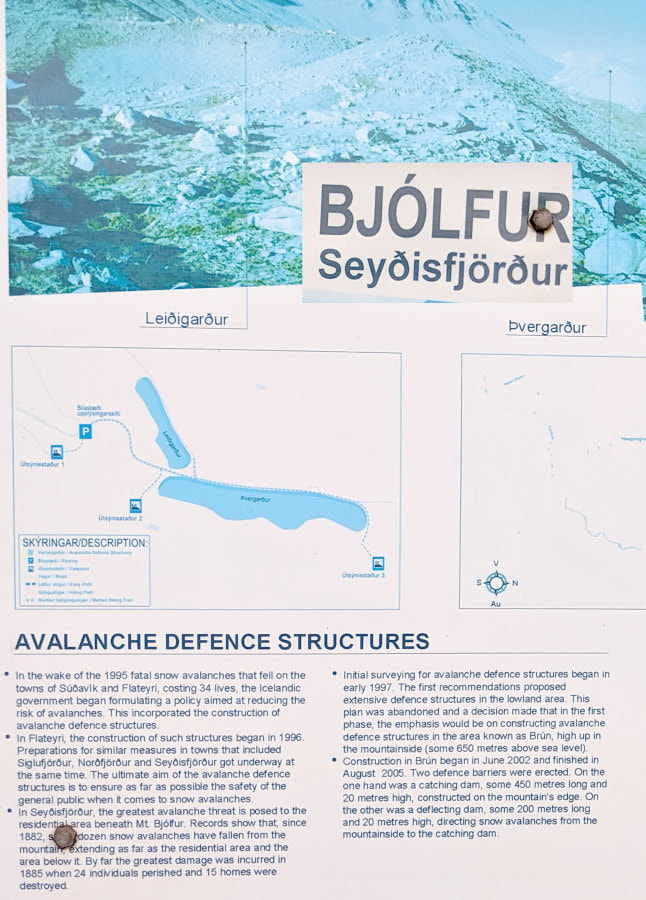
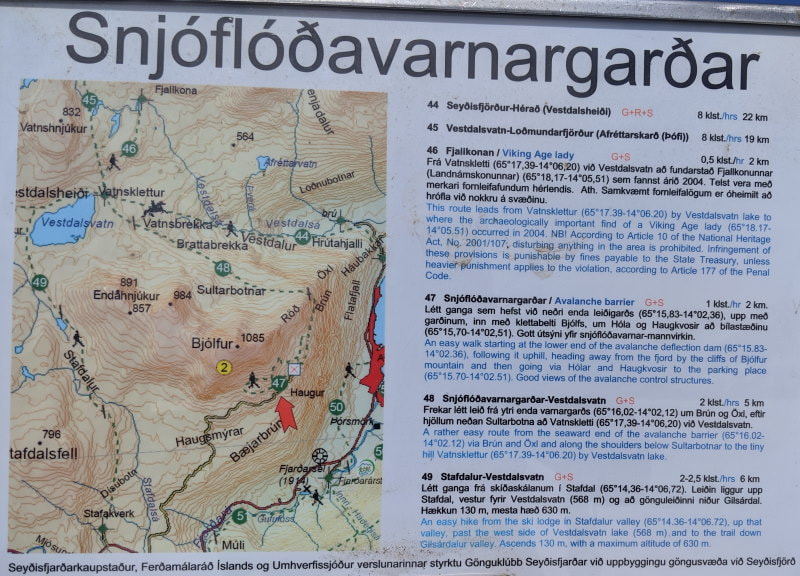
Bjólfur Hike to Seyðisfjörður Overlook
Location: Parking - GPS Coordinates: 65.234989, -14.096978 Map, Overlook: GPS Coordinates: 65.261089, -14.040462 Map
Seydisfjordur is a very popular town to visit and renowned for its picturesque location. We opted to see it a little differently, looking down on it from the protective avalanche wall on Bjolfur Mountain. If there isn’t snow and you have a 4x4 you could drive all the way up to this point. In late May the roads were impassable to most vehicles and when they disappeared into the snow it was hard to see where they even were supposed to be. There was evidence a failed attempt of someone trying to drive through the snow.
We parked just off the road next to another apparently abandoned car (seemed to be a common thing to do in Iceland) and set off up the road. It wasn’t long before we hit a couple areas of light snow on the road. A bit farther on we hit some heavier snow which completely obscured the road. There were a few set of footprints so we chose some and followed them. Turned out we guessed wrong, so we backtracked and went the correct way. These patches of snow came and went, but as we got higher up they got deeper and more frequent.
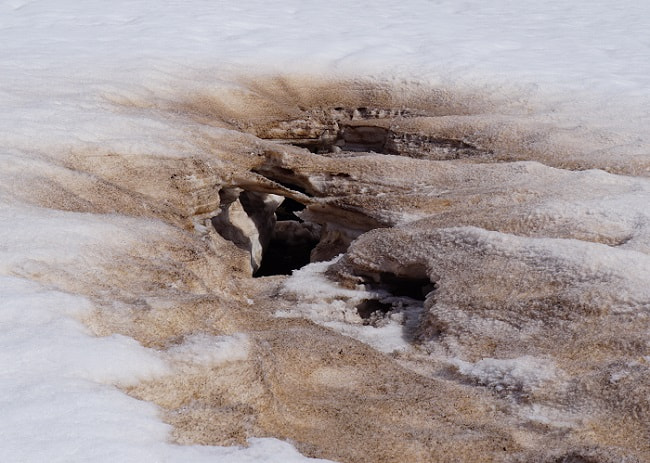
One spot gave us a bit of a scare because we realized that there was water running beneath the snow we were walking on and we had no idea how much or how deep. It tuned out the road must have had a small culvert with a steam running through it and we were off the road, so no real danger, but made us question if coming up here on our own was a wise decision. If you have Google Maps this road is actually on the map so you can use that for some guidance but make sure to turn satellite on because the two don’t line up perfectly.
Almost at the lookout we encountered a few sketchy areas. One had large amounts of snow up above it and looked like avalanches were possible. The other had a long drop which was a good distance from the path, but the path was angled in that direction and with slick snow slipping could be dangerous. For these areas we carefully proceeded one at a time, using our hiking poles to ensure we had a solid footing.
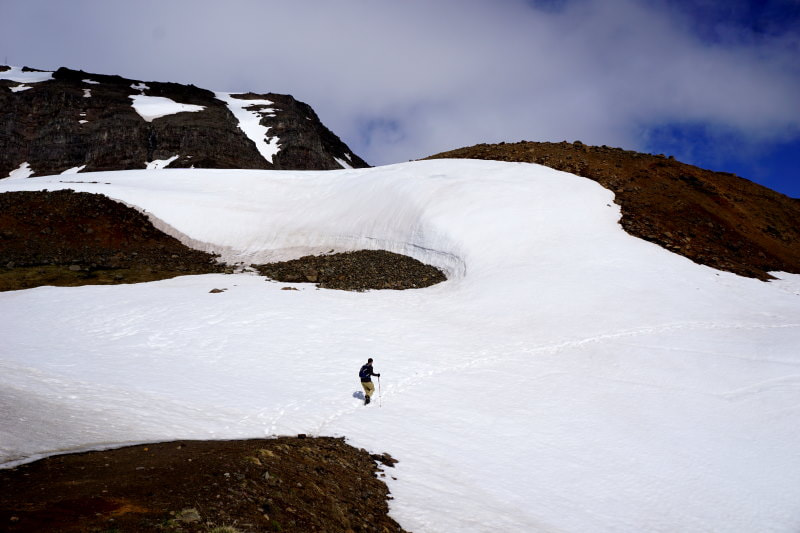
The entire trail was surrounded by beautiful snow capped mountains, but the lookout was stunning. We didn’t catch so much as a glimpse until we suddenly crested a hill and there it was. The brilliant blue of the water and colorful town were incredible. This felt like we were in the fjords of Norway. If you look close enough you can even pick out the rainbow colored pedestrian walkway. If you look up and to your left you can also see the massive avalanche barrier.
From here there are many other trails around the mountain or you can go back the way you came. We had braved enough snow, so we turned back and headed back to the van.
How Much Time and When?: This hike took us about 3 hours total from the road to the lookout and back. We started around 10:30AM and made it to the lookout at noon, but encountered a lot of deep snow. We did this in late May and were a little unsure of the safety of some of the snow that we were crossing and passing below. Please consider the conditions and use your judgment.
Difficulty: The trails is usually a gravel road which is about 6.5 miles round trip and 121 flights of stairs. The snow made it a bit more strenuous, but isn’t there year round.
Facilities: A couple trailhead signs with some basic info about the area.
Road & Parking: Route 93 to Seyðisfjörður is a well used and maintained road, but can be treacherous in bad weather and fog. It does go over the mountain. Just off 93 there was a very small parking area with only room for a couple vehicles. About 1 km in there was another area that most vehicles could probably make it to with parking for a few more vehicles. If you have a 4x4 and the snow has melted you could drive all the way up to the lookout and park there. The road is rough and only wide enough for one vehicle in most areas.
What to Bring: You will want warm clothes and sunscreen regardless of the season. The wind howls up here and you are completely exposed. If the snow is melted you may be fine with normal shoes, but it you experience snow like we did you may want:
- Good boots that go mid-ankle or higher. We wore Salomon Quest 4d Boots and KEEN Targhee Boots.
- Warm socks that will keep your feet warm, dry, and keep the snow out. We generally prefer SmartWool: women’s/men’s, but like the lifetime warranty of DarnTough: women’s/men’s.
- Packable rain gear and down jackets. We experienced clear skies with snow for about 15 minutes on this hike. You will probably find yourself shedding layers on the way up as you exert yourself and putting them back on for the trip back down.
- A day pack to carry everything, including whatever you aren’t wearing at the moment
- Water: Any hydration pack or bottle will do.
- We also both wore thermal moisture wicking base layer pants under our hiking pants to cut some of the chill from the wind, but pants that cut the wind would have worked too.
- We would not have attempted some of those snowy areas at all without hiking poles and found them very helpful to keep our footing and help us through the deep snow. The only thing wished we had with us was the hiking pole snow baskets because we did have some trouble with them sinking deep into the snow. When we were unpacking our pack we realized that we actually had one set of baskets with us the entire time.
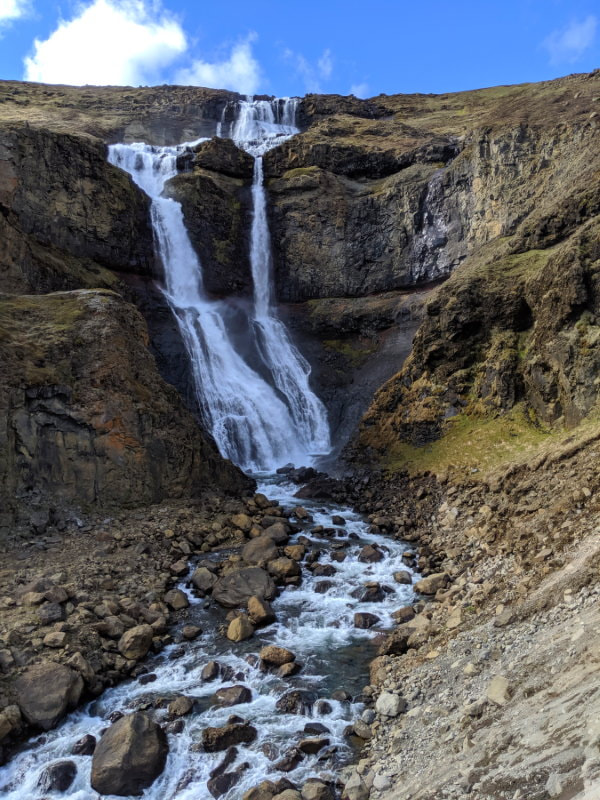
In Between: We grabbed a few things in Egilsstaðir and stopped along the highway for a couple roadside attractions like the Torfhusin I Hjardarhaga turf buildings (GPS Coordinates: 65.351185, -14.978857 Map) and Rjúkandafoss (Rjukandi Waterfall)(GPS Coordinates: 65.327251, -15.087550 Map. Neither was a must but both are very easy as they are right on the side of the road so I would say they are worth at least a quick stop.
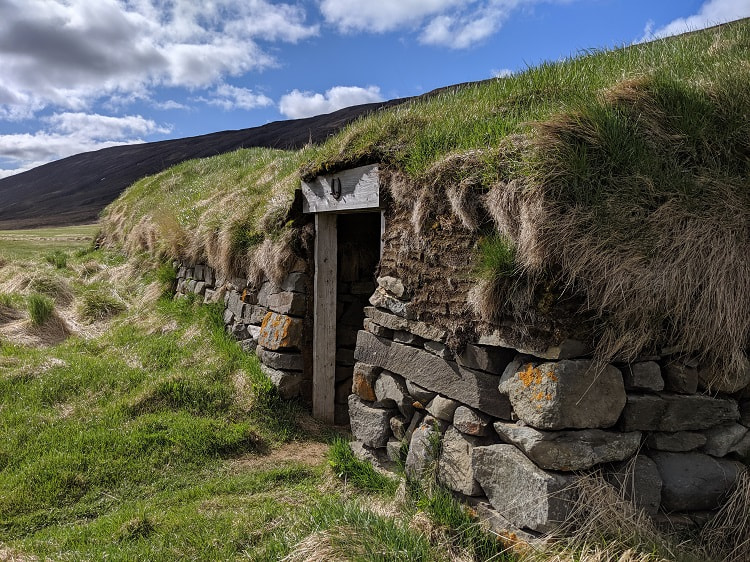
The turf buildings were sheep barns and you can walk inside them. I was impressed by how large they were inside and how the turf was used not just outside, but also between the stones to block the wind. The waterfall is an easy walk up a gravel path to a small observation deck, but is steeper than it looks. Both have informational signs.
Stuðlagil Canyon Hike
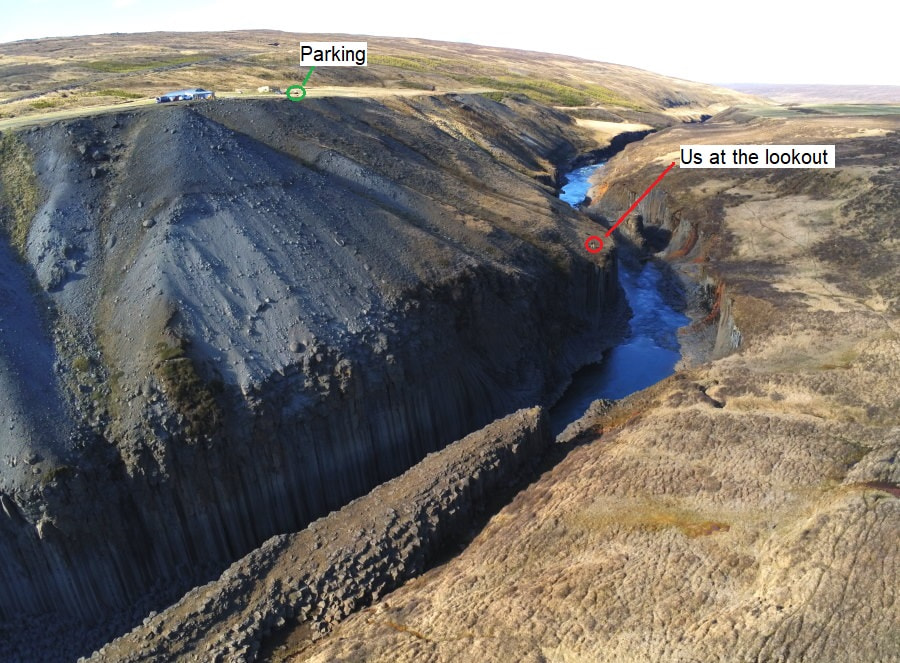
Location: Parking - GPS Coordinates: 65.163559, -15.308623 Map, the turn for the road to the parking area - GPS Coordinates: 65.170492, -15.309287 Map
We had a bit of a hunt to find Stuðlagil Canyon, but we found it and I was impressed by how well done it was, especially considering the road that the parking was on isn’t even documented. The area we visited is the official area open to the public and gives you views from the cliffs above but does not have any access to the bottom of the canyon. There may be access to the bottom through other nearby farms, but I was unable to find much clear info on how to do that. It appeared that you might be able to get down to the water farther down the canyon, but that would involve crossing private property, and at the time we were there the water was too high to be able to make it back upstream very far. Later I found a Hit Iceland article that has more instructions about how to go about it.
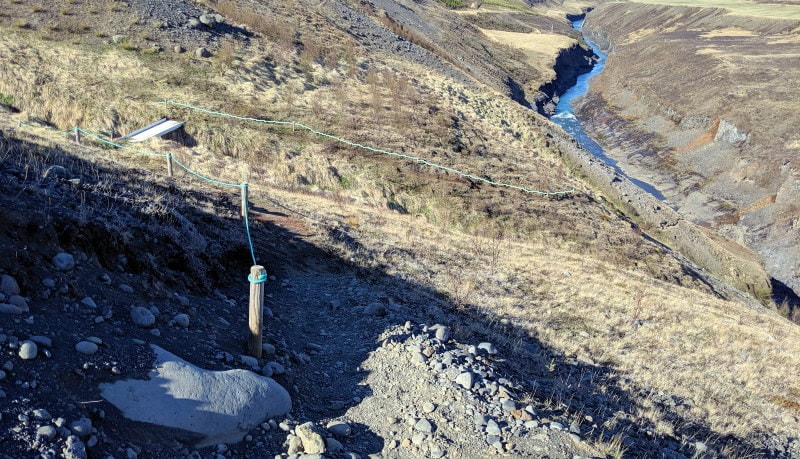
At the top we found a map and printed pamphlet by Austurland (Eastern Region of Iceland). There were two trails down, both with knee high ropes along most of the trail. While the height was inconvenient, the ropes made the short but steep path much easier, and would have been fairly dangerous without them. The right fork of the trail takes you to the main lookout point and the left fork takes you to another view slightly farther down the canyon. Both trails put you right at the cliff edge with a very steep drop.
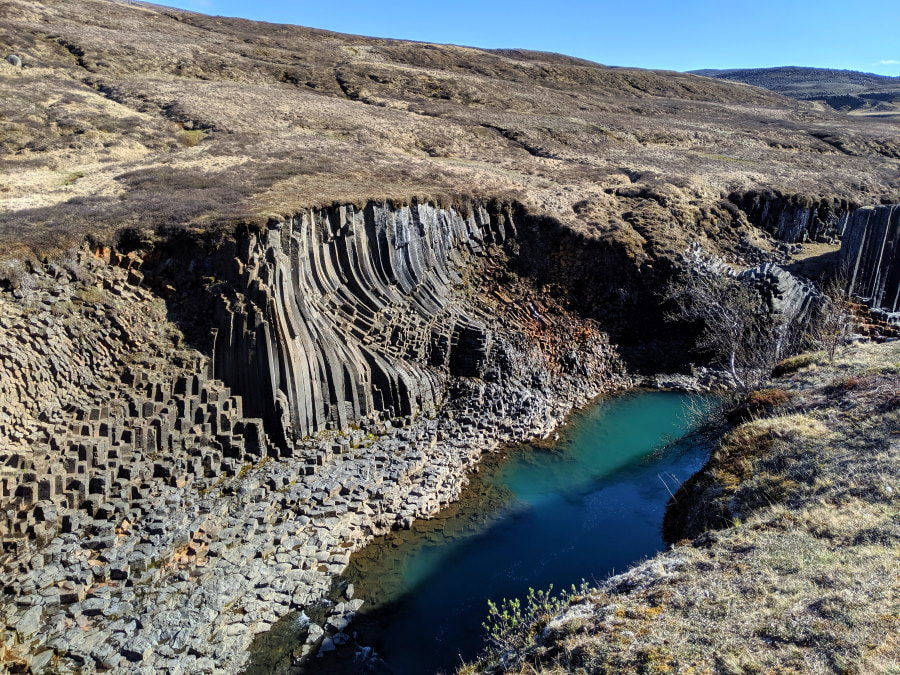
The crystal clear blue water and steep walls of hexagonal columns were incredible. The magnitude of this place and variety of formations was staggering. We saw basalt columns in many places in Iceland, but the size and variety of textures and colors here made these our favorite. This was a place that live up to its reputation.
See Svartifoss for a bit on how these basalt columns form. While these columns formed long ago, this is a relatively new attraction since most of it was underwater until a dam diverted most of the water in 2007. I am very curious what this looked like before then. If anyone has seen a picture please comment below.
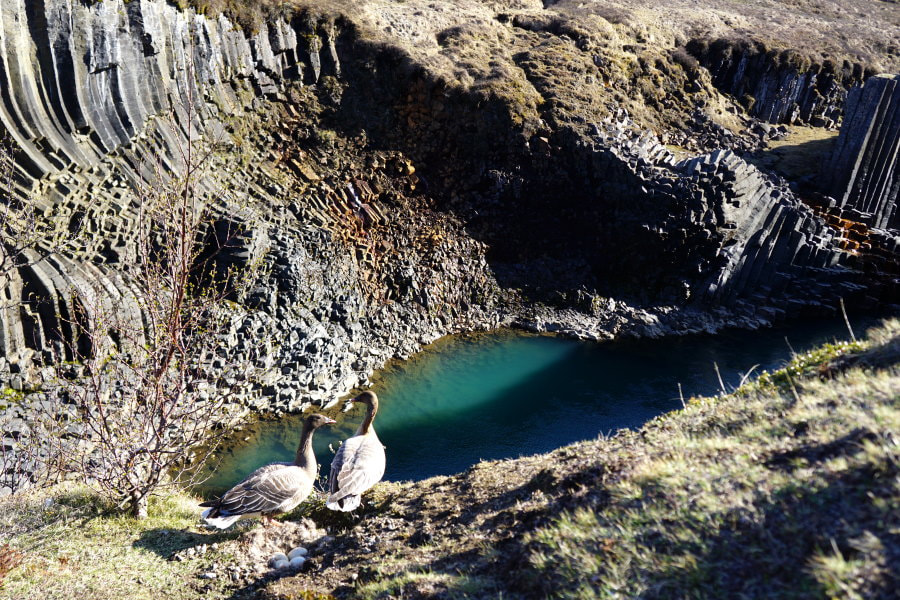
How Much Time and When?: We spent less than and hour here. The detour off Route 1 added about 30 minutes or so, but was well worth it. Our visit was around 5PM in late May and we were a bit too late for the best light but still got a good view with only one other couple. I would try to come closer to mid-day for photography. May through mid-June pink-footed geese nest here and they are protected.
Difficulty: The trail is only a quarter of a kilometer long, but quite steep. There are ropes along most of the trail but not at the cliff edge. The lookout areas are relatively flat, but narrow and have a very steep drop below. I feel this wold be a difficult area to bring small children.
Facilities: There is an informational sign.
Road & Parking: The roads here were dusty but smooth gravel in very good condition. The parking area is a fairly large gravel lot next to a farm that could accommodate at least a dozen vehicles.
What to Bring: Do not attempt this without grippy shoes. I wore Salomon Hiking Shoes and my husband had Mizuno Wave Rider Shoes.
Product Links: I am not sponsored by any of the products I link to. If you choose to make a purchase from one of the links of a product I listed or any other item a small percentage will go back to me to fund this website, at no additional cost to you. The products I link to are either ones I have used or similar if those are not available. Thank you for your support.
More?
For more of Iceland see my full Trip Itinerary & Travel Budget.
For more of our journey around the Ring Road check out Southern Iceland, Western Iceland, or Northern Iceland.
Info and Tips on Campsites around the Ring Road
Check out our full Peru Trip Itinerary.