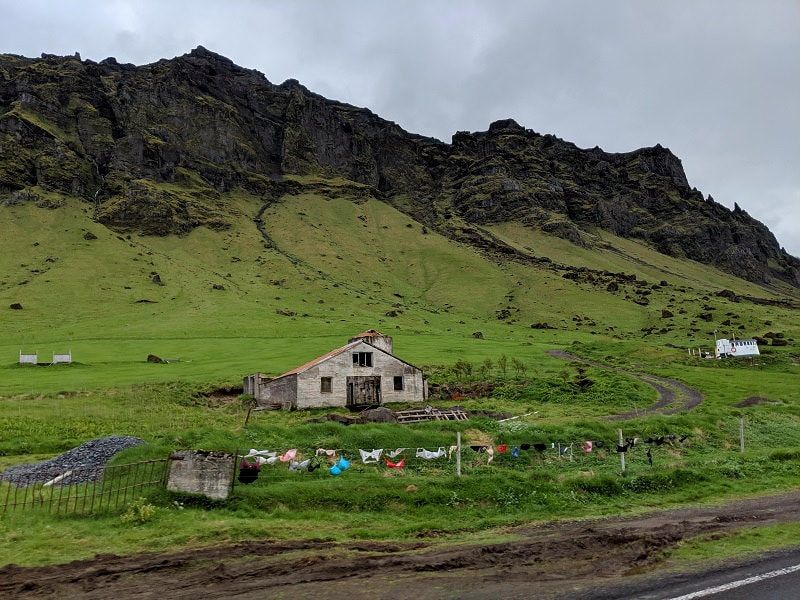
The lush greenery of the southern coast provided more stunning vistas at every turn with dozens of waterfalls cascading from the cliffs above. While this part of the country is known for hordes of tourists, and we did deal with some, we also found a few magical places to enjoy in peace.
-
Haifoss Waterfall Lookout & Hike - My favorite but rough road
-
Kvernufoss Waterfall Trail - Secluded but easy to get to
-
Fjaðrárgljúfur Canyon Walk - Green Canyon
Check out Iceland Itinerary to see all of these stops on a map.
Check out our full Iceland Highlights Playlist on Youtube. We have more videos coming so stop back to check it out or subscribe to our newsletter to make sure you don’t miss anything.
In Between: The main road from the airport to Reykjavík was a bit dull. The terrain is fairly flat and black with a bit of green. This is a nice time to get used to your vehicle on the highway with minimal distractions. Don’t worry, the slow start didn’t last long.
Reykjavík - Exploring & “Free” Walking Tour
We tried out a few Icelandic specialties for lunch, then met up with our walking tour with City Walk. Tour reservations open about a week ahead of time so make sure to reserve a spot. Our guide was a funny and informative degreed history teacher; a great intro to Iceland. This is a tip based tour where you pay what you feel it is worth, and the concept is debated as to whether they are just undercutting regular guides, but the idea is they have to be good if they want to make money.
Our guide took us around a bit of the city and filled us in on lots of history, stories, and quirks of the area, like how in the winter they play ice football (soccer) on the lake. He also explained how many of those planes that are flying over the city, nearly close enough to make eye contact, are from the flying school. They are usually pretty good fliers. The rule against flying drones above the height of the buildings makes perfect sense when you experience a couple flyovers. At the end of the tour he helped us pick what to do next and gifted us each a small taste of Icelandic licorice. I’m not a big licorice fan but I was pleasantly surprised.
There are a dozen museums and a ton of guides for what to do in Reykjavík, but here are a few quick free ones:
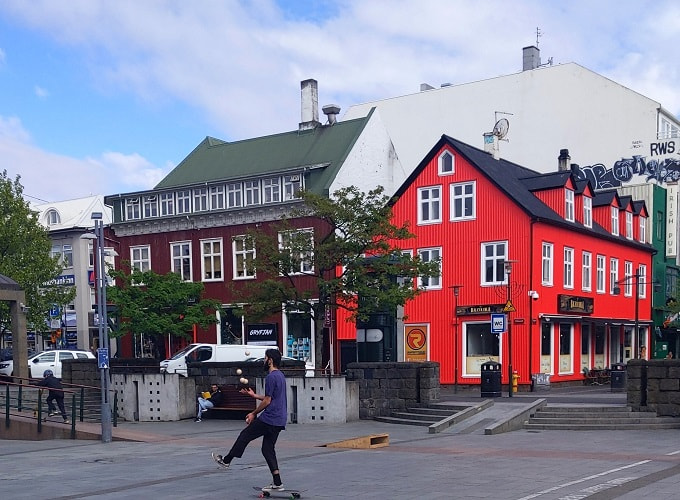
- Ingólfur Square - This was a fun area full of locals just hanging out. There were lots of skaters to watch, including one who was juggling. A few street food vendors are usually here and it is a good place to grab a bite and just people watch for a little bit.
-
Waterfront - If it is a clear day make sure to go to the waterfront for a view of the Snæfellsnes Peninsula.
-
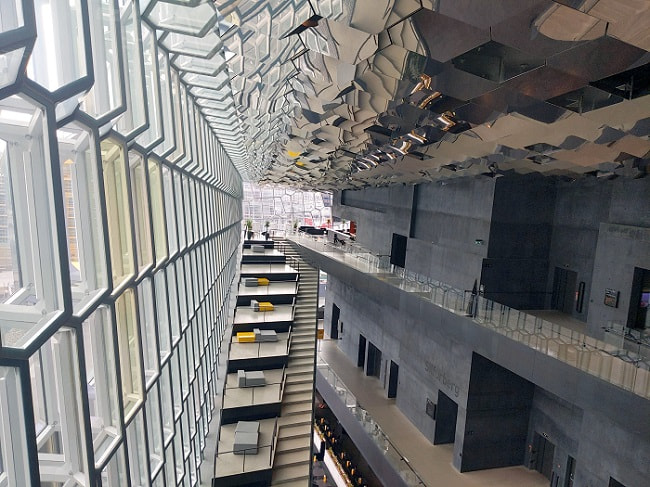
Harpa Concert Hall - The opera house is free to walk around and is a very pretty building inside and out.
-
Reykjavík City Hall - They had a cool 3D map of the entire country, free charging stations, and bathrooms (don’t forget to top off your water bottle)
-
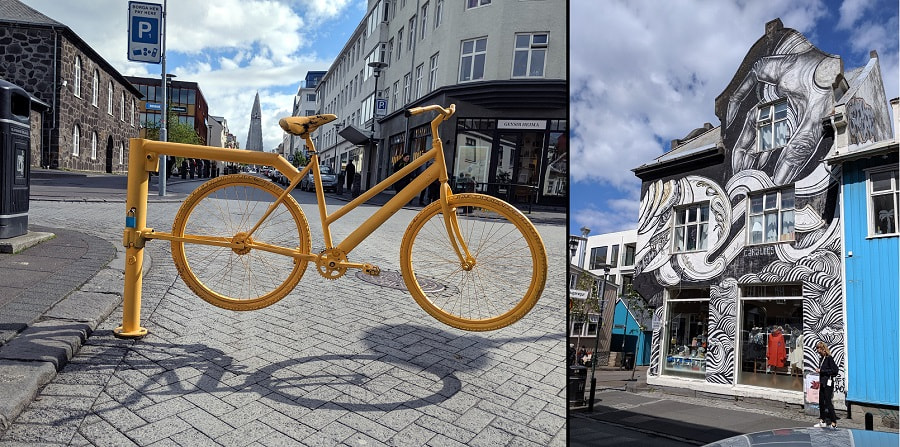
Hallgrimskirkja Church Area - Of course you have to see this iconic geyser church if you are in the area, but we really liked walking some of the streets just North and West of the church. There was lots of street art, some pedestrian only zones and some parts felt a bit like the Temple Bar area in Dublin.
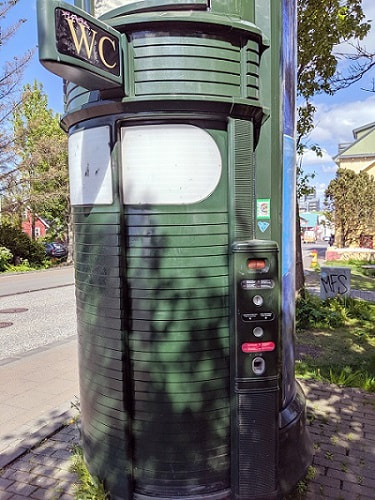
Facilities: Remember, the water is excellent here so you can fill up your water at any tap. There are many free restroom pods around the city. Google “public toilet” to find some. These look almost like cross of a phone booth and a light pole. They are round green pods with a self washing system that seems to power wash things between occupants. They aren’t particularly fast or fancy, but get the job done. There is one near the front of the Hallgrimskirkja church.
Roads & Parking: The roads are pretty good for the most part, but get a bit small in some areas if you are driving something larger than a car (we had a small campervan). Parking is free in most residential areas and paid in most commercial and tourist areas. The zones are clearly marked with roadside signs. Parking fees can be paid by card, but we avoided them and just walked a couple extra blocks. I Heart Reykjavík has a great article including a map of the parking zones and how to use the meters.
Icelandic Life: If you want to learn a bit about the culture of modern Icelanders I highly recommend The Little Book of the Icelanders by Alda Sigmundsdottir. It is a witty take on Icelanders from a native Icelander who spent her teenage years abroad, gifting her with an outside perspective.
In Between: Driving here from Reykjavík was interesting. The landscape was mostly green and black, occasional distant mountains, and frequent puffs of steam. People had all kinds of little outbuildings with steam coming out the top that I assume were collecting the geothermal energy (usually underground so I’m not sure and I couldn’t confirm this).
Reykjadalur Hot Spring River Hike and Dip
Location: Main Parking - GPS Coordinates: 64.022355, -21.211440 Map, Hot Spring - GPS Coordinates: 64.048636, -21.222703 Map
As a hot spring this is a very cool spot, but the hike there and back will have you either wanting another dip, freezing, or some combination of the two. Unfortunately, this is not one of those places where the hike keeps the crowds away either. We got there around 7PM and the parking lot was still half full. Most people were headed out as we were hiking in so the hot spring itself wasn’t crowded, but it was far from empty.
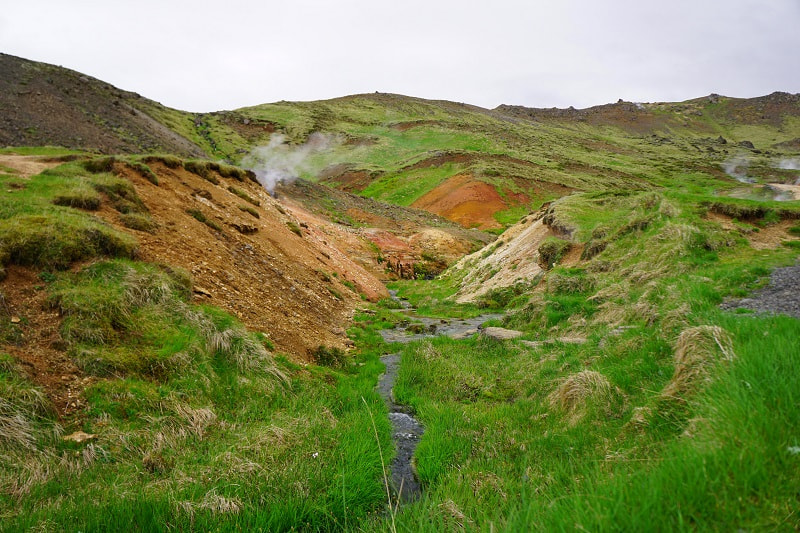
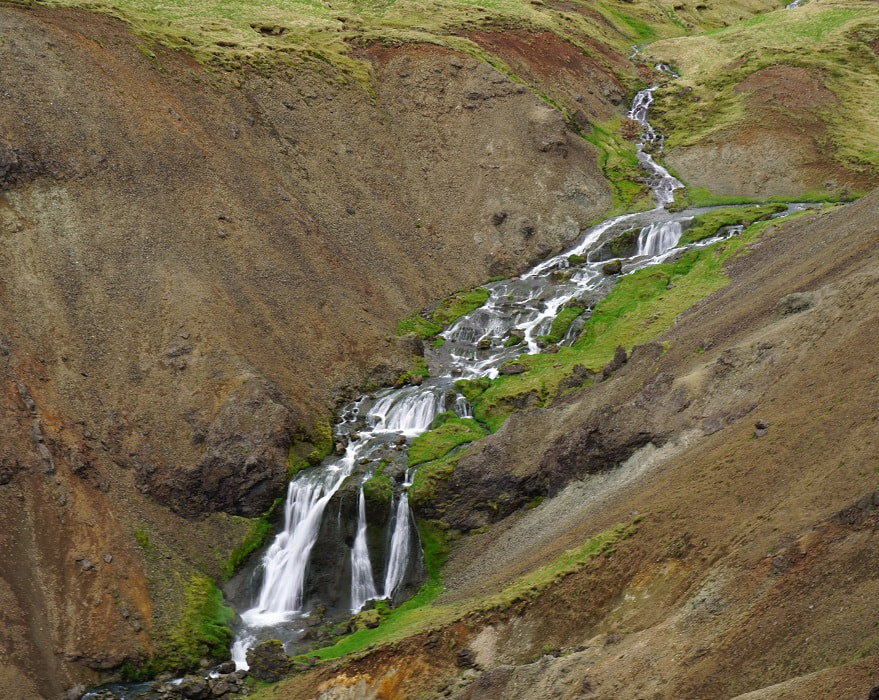
The hike is nice. You pass many geothermal active areas that range from a trickle of steamy water, to large bubbling pools. There was also a beautiful waterfall off to the side of the trail about halfway.
Of course this was one of those times when we had something beautiful to photograph and no people around to disturb, but realized that we forgot to charge the drone.
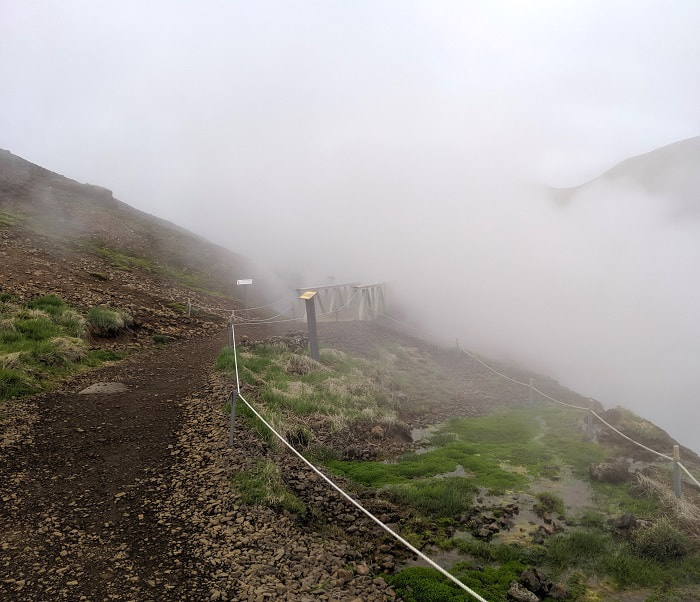
As we approached the hot spring stream we knew we were getting close based on the amount of steam in the air but couldn’t see it. We crossed a bridge over a boiling hot pool and the steam obscured our view entirely. As we walked out of the mist there it was, a magical reveal.
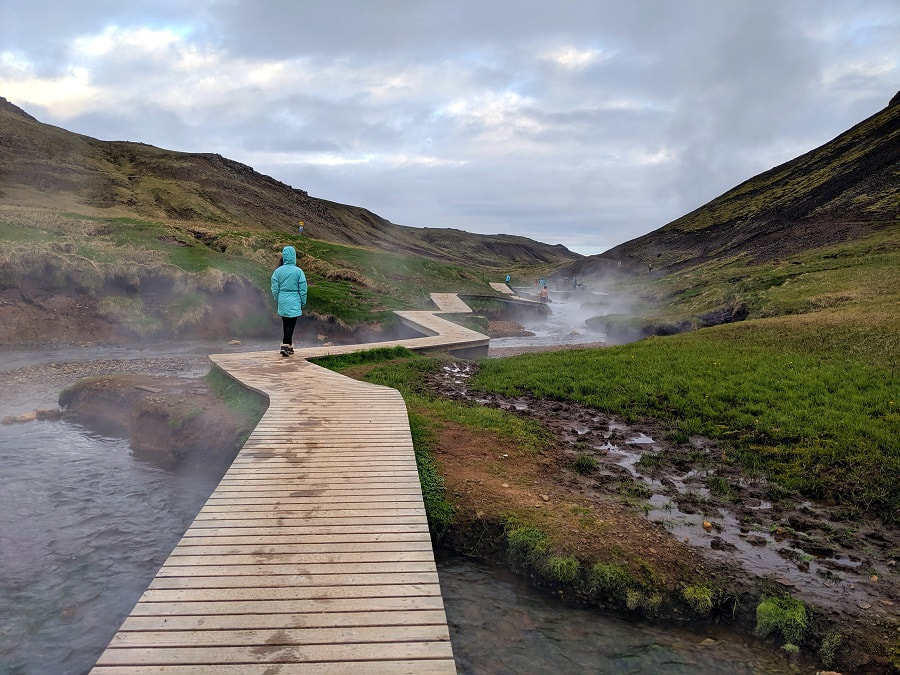
The hot spring has a boardwalk and a couple dividers that serve as changing areas, but are better at blocking the wind than eyes. The farther you go the hotter the water gets. Most of it was fairly shallow, but a few coveted spots had deeper pools. This is a stone and dirt bottom river and, while the water feels great and is pretty clear, you probably won’t leave feeling particularly clean. But what could be better than relaxing in a natural river after a long day?
When you are done you simply walk back the way you came. It took us about 1.25 hours to walk there and about the same to walk back. I was nervous when we were leaving that we would be the last people left, but as we were hiking out plenty of people were still coming the other way, taking advantage of the midnight sun.
How Much Time and When?: I would say at least 2.5-3 hours if you just want a quick dip, but you could easily make half a day out of it. Night was nice but you can also find fewer people in early morning. If you come during the busy time it can be hard to find a good spot and the water gets murky from all the people stirring up the silt.
Difficulty: 3.5 km each way, easy gravel path but lots of up and down
Facilities: Cafe at the beginning of the trail with restrooms but it was closed when we were there. No facilities at the hot springs, just a wall to change behind (which mostly just blocks the wind).
Road & Parking: The roads were main roads in good condition and the parking lot was large. Even with the large parking lot there were enough vehicles that people were parked along the road for quite a ways. Luckily the road is wide. There is an alternate parking area on a 4x4 road that is a bit closer to the hot springs and goes in a different way but all I know is that it was on the map.

What to Bring:
For the Water: No dress code here, bathing suit, undergarments, gym shorts, just as long as you are wearing something. I highly recommend a fast drying towel and you may want some kind of sandals, clogs, water shoes to protect your feet from the rocks. You will also want a plastic bag for those wet clothes when you are done, or you can do what we did and hang them off the loops on our packs so they were half dry by the time we made it back to the van.
For the Walk: Make sure to have decent shoes for the walk (nothing crazy, but you probably don’t want to do this in sandals) and something nice and warm for the walk back, especially if you have long hair. This trail is completely exposed so don’t forget water and some sunscreen if it is daytime.
For Photos: Not completely necessary, but you might want a waterproof phone case. This is an incredibly scenic place to take pictures but please be careful and polite with your cameras. Many people are changing here and probably don’t want their bits to be featured in your trip photos.
Check out Day Trip Essentials for a full packing list.
In Between: Long fairly dull drive.
Hitchhikers: As we were leaving we were approached by a group of hitchhikers asking for a lift back to the highway. We had never picked up hitchhikers before (illegal in the US) and were a bit nervous about it, but I had read it was very common in Iceland, so we decided to be nice and give them a lift. Since it was a campervan we didn’t have proper back seats, just the folded bed bench, but we weren’t going very far. We were a bit flustered never having done this before and in our hurry to pack up I had forgotten to stow the stuff on the counter including the silverware, so as we set off they ended up catching and holding the kitchenware that was trying to fly around the back. Back in town they thanked us and climbed out.
Geysir Geothermal Area
Location: Main Parking - GPS Coordinates: 64.313225, -20.297467 Map, Strokkur - GPS Coordinates: 64.312709, -20.301215 Map
The drive here isn’t particularly exciting, but well worth it if you have never seen a geyser. This is the home of Geysir which is bigger than Old Faithfull and where all other geysers get their name. However, since an earthquake, Geysir has mostly stopped erupting, but nearby Strokkur Geysir still does.
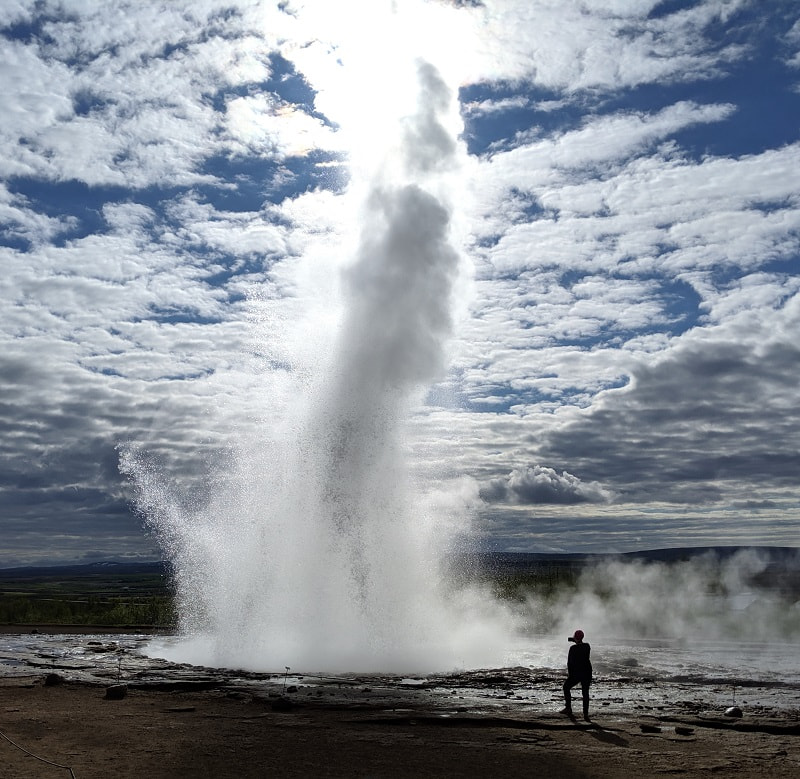
Strokkur Geysir usually goes off at least once every ten minutes, and while it is not quite as big it is still spectacular and requires much less patience. Keep your eyes peeled and camera ready though because it tends to go off the minute you look away (yup, I did that) and also occasionally goes off twice in a row. We got there around 9AM mid-May and the crowds were pretty minimal, no buses yet.
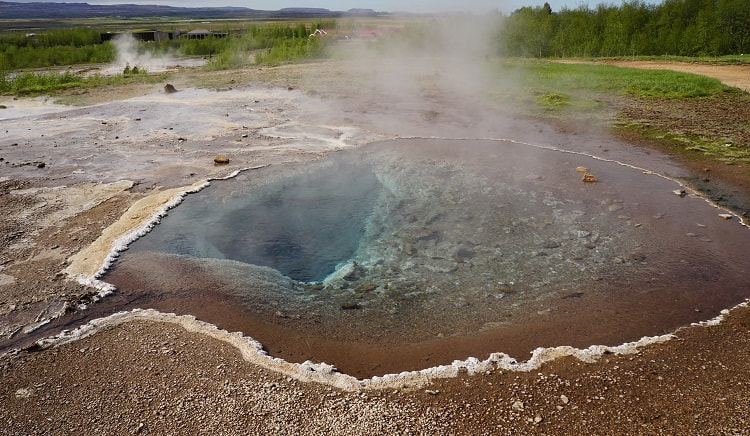
How Much Time and When?: There are trails and many other boiling pools and mud pots to see at this location so you could spend anywhere from 20 minutes to a couple hours. This place sees a lot of buses so early or late is best, especially in the summer, but make sure you have enough sun to see everything.
Difficulty: It is a short flat walk (less than 5 minutes) to Strokkur Geysir. All of the trails we saw were semi-paved or gravel and pretty easy.
Facilities: There is a tourist center (with free bathrooms, at least for now), souvenir shop, hotel, and cafe.
Road & Parking: This road was fine and the parking lot was huge
What to Bring: A little patience
In Between: Slightly more interesting drive with some nice views of the mountains and rivers.
Haifoss Waterfall Lookout & Hike
Location: Parking - GPS Coordinates: 64.206772, -19.678744 Map
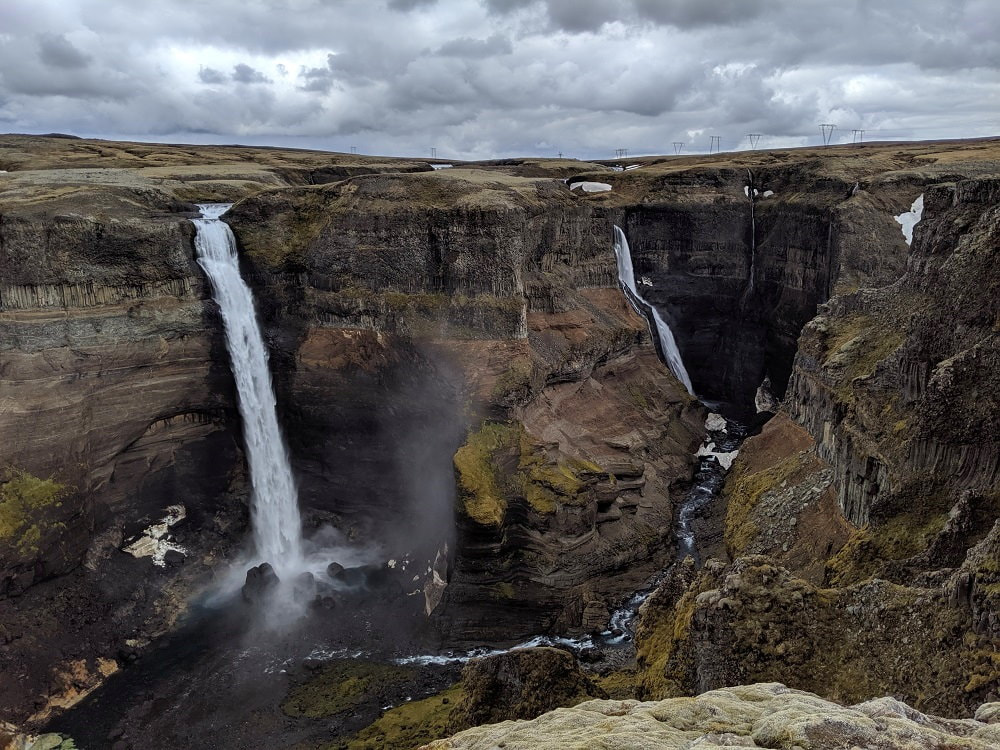
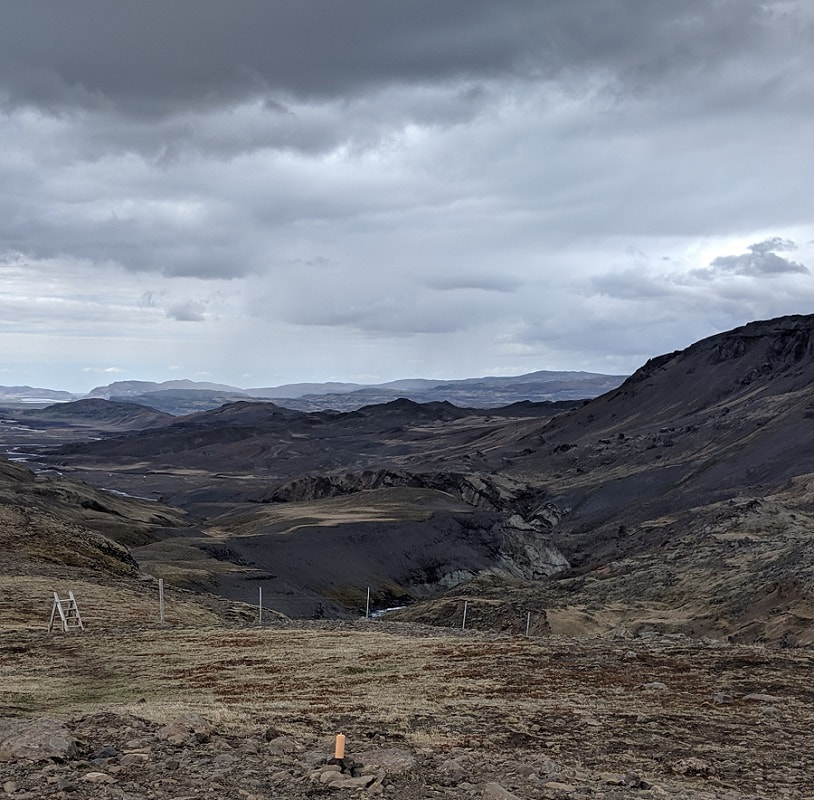
This was our favorite stop of the trip! It is a bit off the beaten path and takes some work to get to, but was well worth it. We turned off the main road and onto 332 (which out tour company told us would be fine in the van) for 7.5 km of white knuckle driving crossing our fingers that we wouldn’t get stuck. We finally made it and found only a couple other people there. One guy had hiked all the way in from the road and said he would gladly do it again for a place like this.
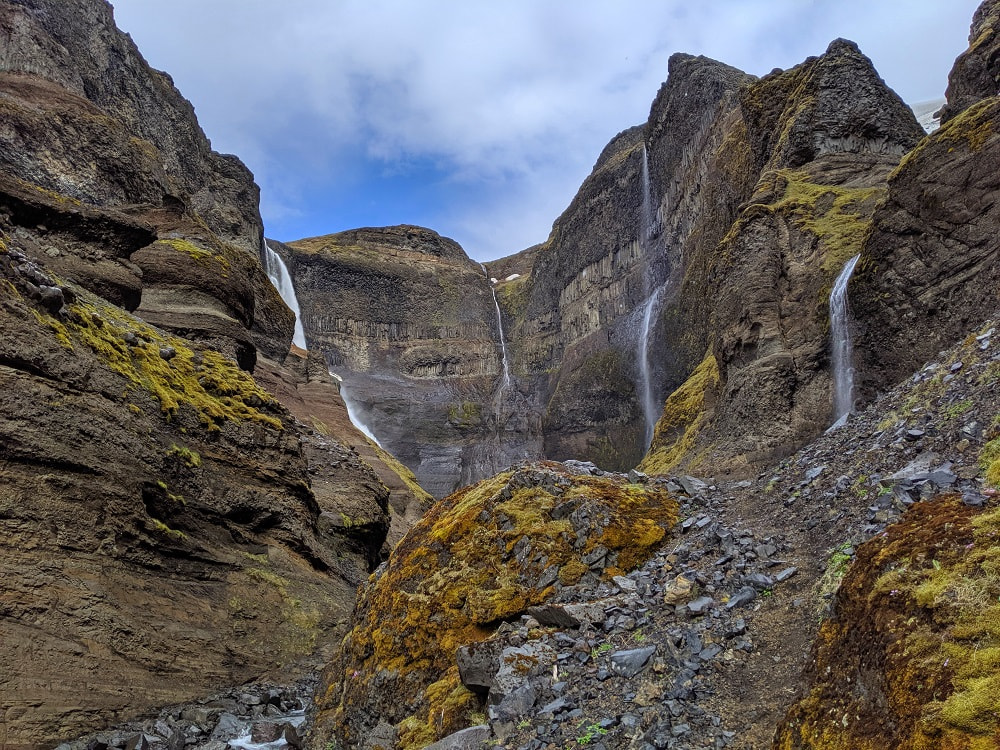
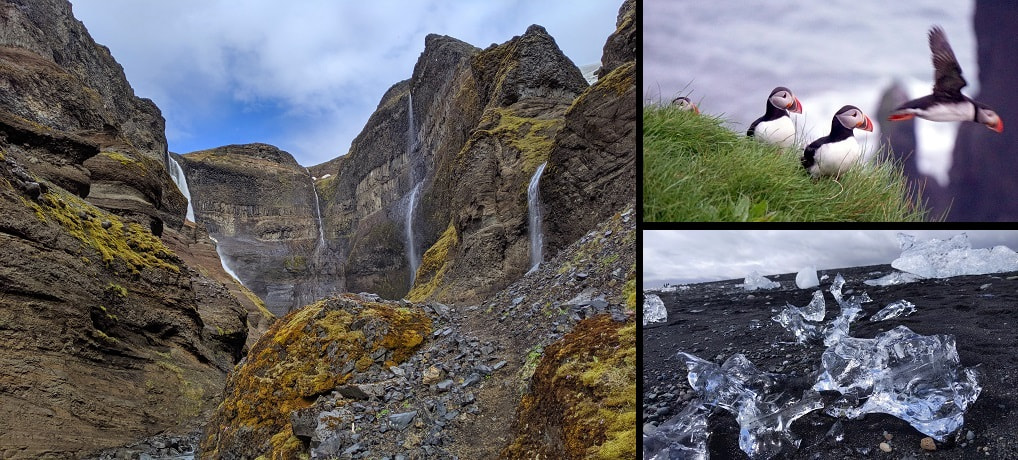
Maybe it was that these were the first of our trip or maybe the isolation of this place, but these are the most beautiful waterfalls I have ever seen anywhere. Haifoss is the big waterfall and Granni is the smaller (but arguably more beautiful) one beside it. There was an ice bridge at the bottom of Granni, created by the river forcing a path under the snow.
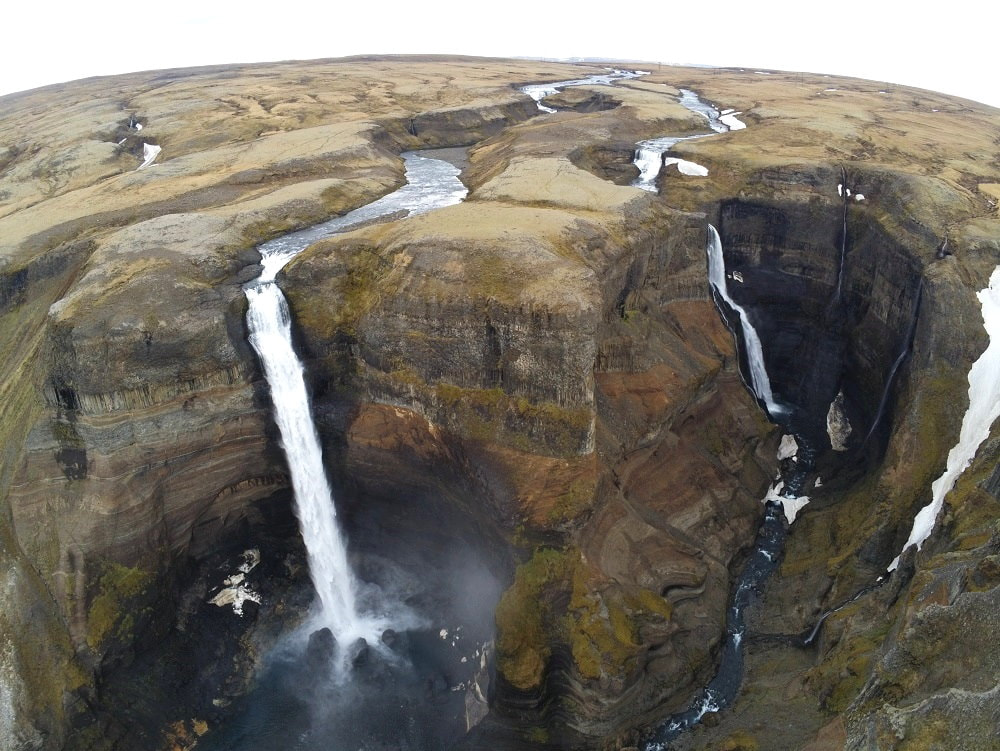
We looked around the rim for a while and flew the drone when the other people left (didn’t want to ruin the experience for anyone), but had a little trouble with the wind tunnel created by the canyon.
Then we geared up for the trip to the bottom of Haifoss and set off, hoping to make it before the storm hit.
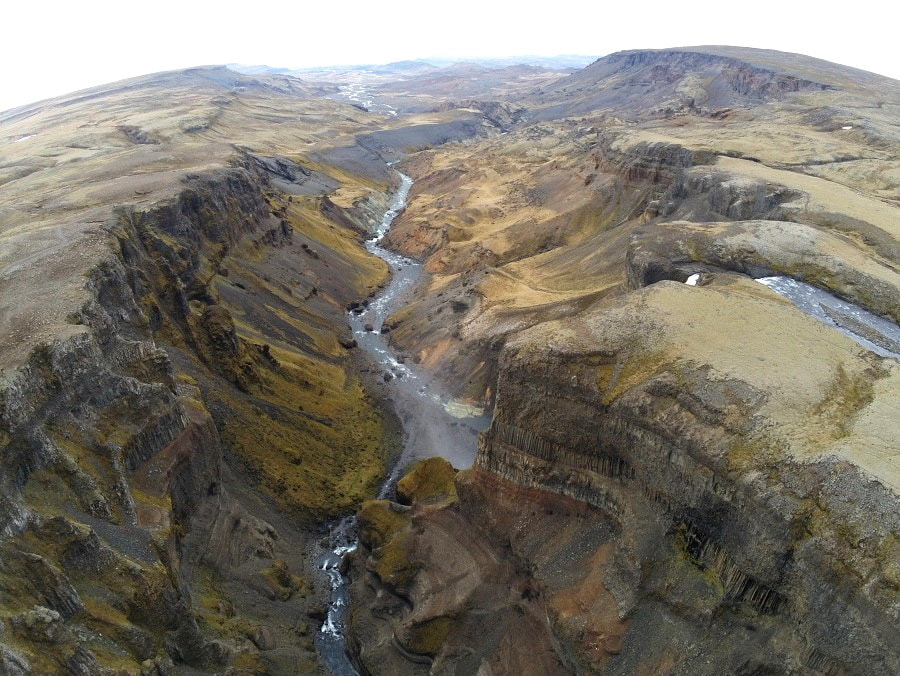
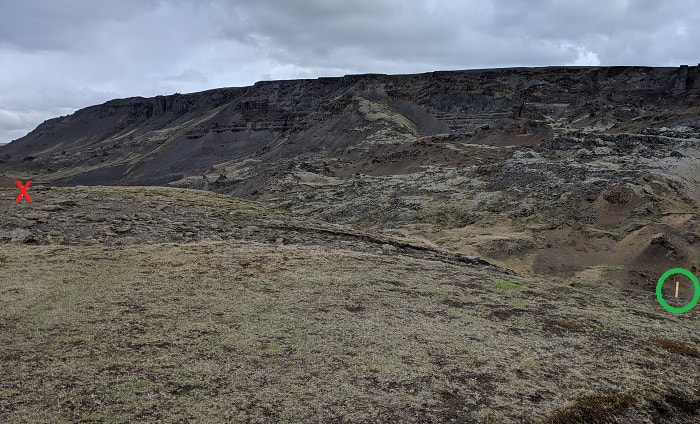
The trail to the bottom continues down the canyon past the end of the lookout trail. It has a ladder over a fence, then continues on for a bit, following plastic orange markers, then splits. One trail continues along the canyon* and the other goes down into it and loops back toward the falls. The split is easy to miss if you are not paying attention, so try to peel your eyes off the vista from time to time to keep an eye out for the marker on the right side of the trail. Rough Location: 64.2023278,-19.6905444

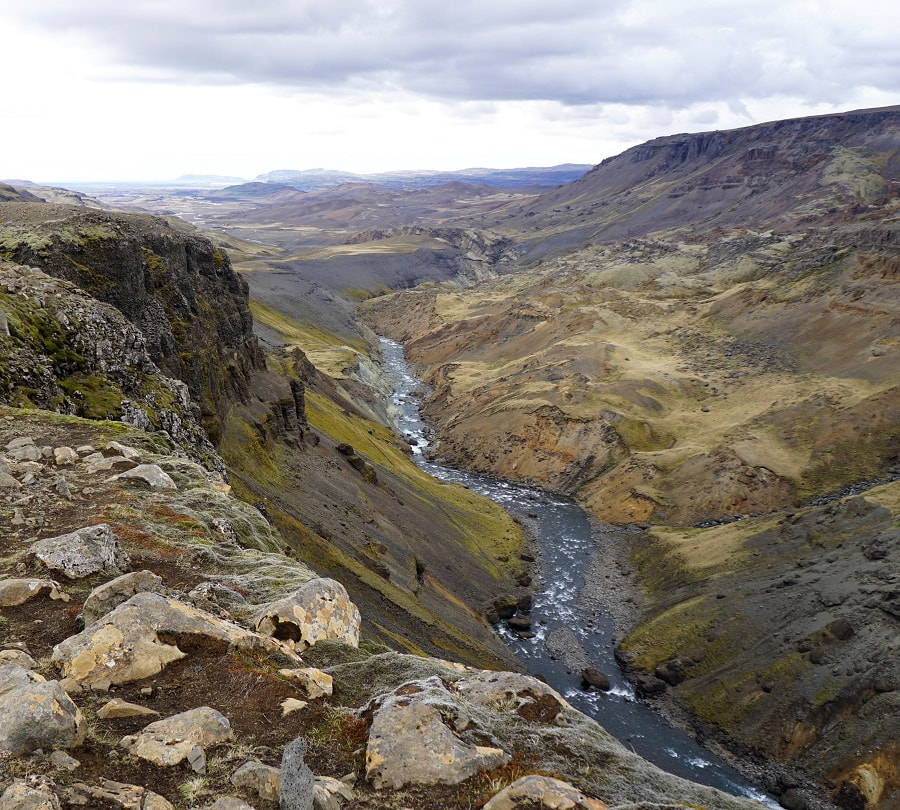
Going down switched back and forth between dirt and loose gravel, which was a little slick, but not too bad with hiking poles. The path disappears under rock slides from time to time, but it should be pretty clear what direction you are heading now. Walking up the canyon felt magical. The green moss on everything, with the powerful walls towering above us, and the gurgle of the river with the roar of the falls in the distance.
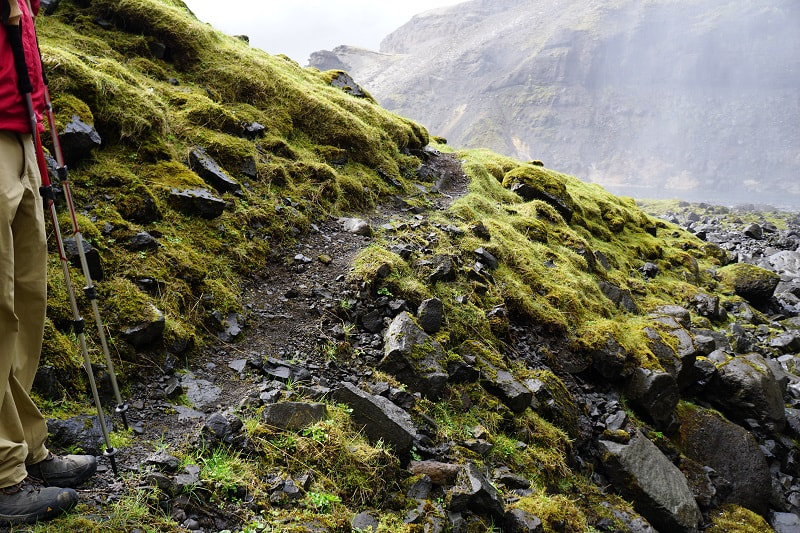
As we continued in we were surrounded by the echoing sound of rushing water and the going got a little more difficult. We had to carefully climb up and around slippery boulders and washed out areas. It was very evident that this section of the canyon is a work in progress, always changing, being sculpted by nature.
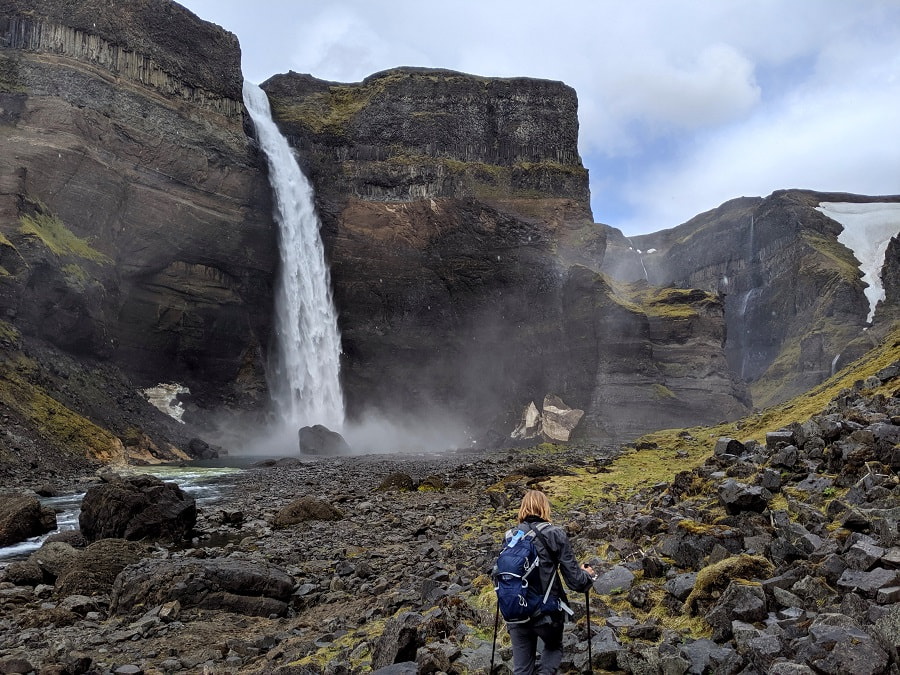
We stood below Haifoss looking up and feeling its power with no one but just the two of us. Looking around the canyon you can see what you miss from above. Haifoss and Granni have the power, but there were numerous other waterfalls all around, trickling down the canyon walls. The trail ended just around the corner from Haifoss, where we could just glimpse Granni.
On the way back up the weather decided to let us have it and it poured. We trudged back to the van dripping but with huge grins that the weather came nowhere near to wiping off our faces. That was incredible.
*I believe the other side of the split either goes towards Gjain or a hot spring. This could be a nice day hike if you took the trail one way and the road the other to make a loop and would allow you to see both areas without a 4x4.
How Much Time and When?: We got there around noon and didn’t leave until after 3 in Mid-May and the lighting was excellent. Plan some extra time for the drive in and out (see my notes under Road & Parking below).
Lookout: You could walk it in under 15 minutes, but with photos and the high probability of just standing there awestruck I would plan for at least an hour.
Bottom of Haifoss Hike: This hike took us about 2.5 hours with lots of picture taking. We took about 1.5 hours down the turn around and 1 hour back up to the parking lot. This could probably be done in 1.5 hours with no dawdling.
Difficulty: Hard drive.
Lookout: Easy gravel path with several spots to see the waterfalls from different angles.
Trail to the Foot of Haifoss: Pretty well marked but lightly trafficked and is a moderate to difficult 3.25 km round trip. About half of the trail is on dirt and the other is on loose rock (some slick from the spray). There are frequent washouts; we crossed a couple that required climbing over boulders on all fours. This area may be unstable during the spring thaw or during heavy rains.
Facilities: None, just a basic sign with a little info but no maps.
Road & Parking: Most of the way is along Route 32, which is a nicely paved road, but the road to Haifoss can be treacherous and conditions change frequently. It is a rough gravel road. We managed it with a campervan (took about 25 minutes each way), and there was another 2-wheel drive car there, but a 4x4 with more ground clearance would definitely be preferred and sometimes necessary. The parking at the end only had room for at most 6 vehicles and there were three there when we visited around noon on a weekday.
What to Bring: If you are going to the lookout all you need is your camera and maybe a tripod (don’t count on anyone being there to take your picture).
If you hike to the bottom of Haifoss you will want:
-
Shoes: Some decent waterproof shoes. We wore Salomon Quest 4d and KEEN Targhee mid-ankle boots to keep the water out.
-
Hiking poles: Aren’t a requirement, but will help keep your footing on the slick rocks
-
Rain Gear: It gets quite wet and misty at the bottom so bring rain gear and something to protect your electronics.
-
Water: Any hydration pack or bottle will do.
-
Pack: Make sure you have a bag to carry things so your hands are free to help you navigate the canyon.
-
Sunscreen: Yes it is Iceland, but they still have sun and very few trees to block it so you might want to consider using some.
-
Check out Day Trip Essentials for a full packing list.
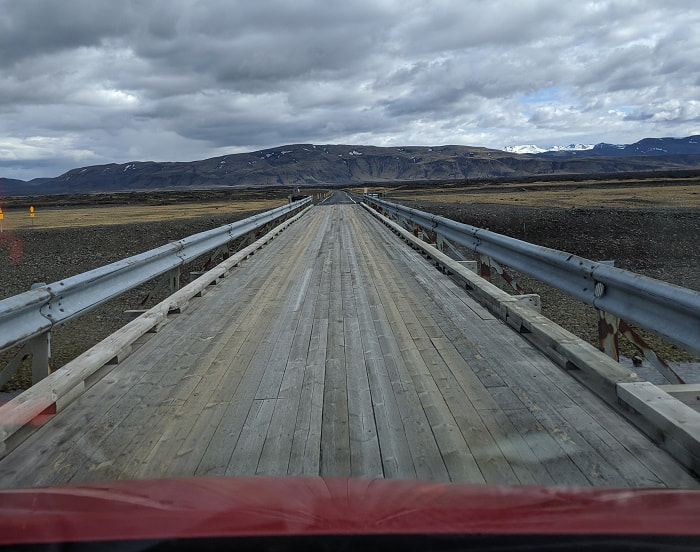
In Between: We had the choice of backtracking down Route 32 or taking Route 26. We chose Route 26 because it passes a slightly different landscape and on a clear day you can catch a glimpse of Hekla Volcano in the distance. 26 was a bit rough, with 14 km of dusty gravel making it hard to see much of anything, and then we hit some fog and rain obscuring everything else. If we had to do it again we would have returned to Route 1 via 32 but who knows how a nicer day would have been. We did get to experience our first wood bridge on a major road.
Seljalandsfoss & Gljúfrabúi Waterfalls
Location: Parking - GPS Coordinates: 63.616021, -19.992649 Map
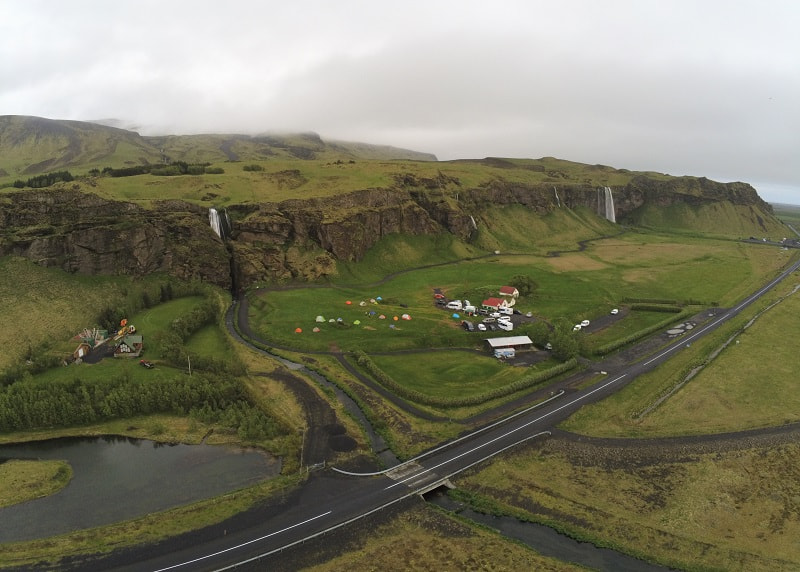
This was a nice spot and Gljúfrabúi was unique, but I felt that Seljalandsfoss was skippable.
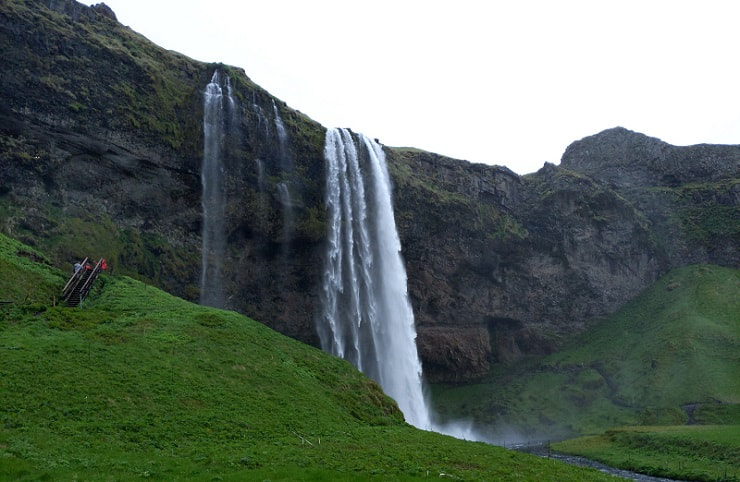
Seljalandsfoss is a well known waterfall which attracts lots of tour buses. There is a path around the waterfall that takes you up one side, behind the falls, and down the other. This can be fun, but on most days you will get very wet doing this.
Gljúfrabúi is just down the path but gets far less visitors; however, the small cavern doesn’t accommodate many people, so if there are more than a handful of people this can turn into a traffic jam.
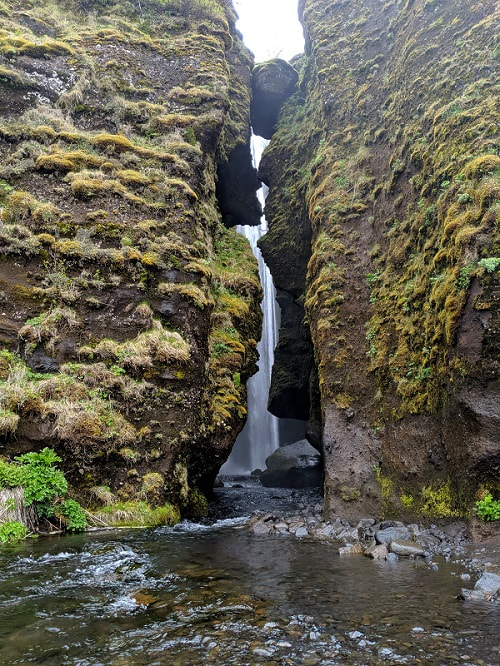
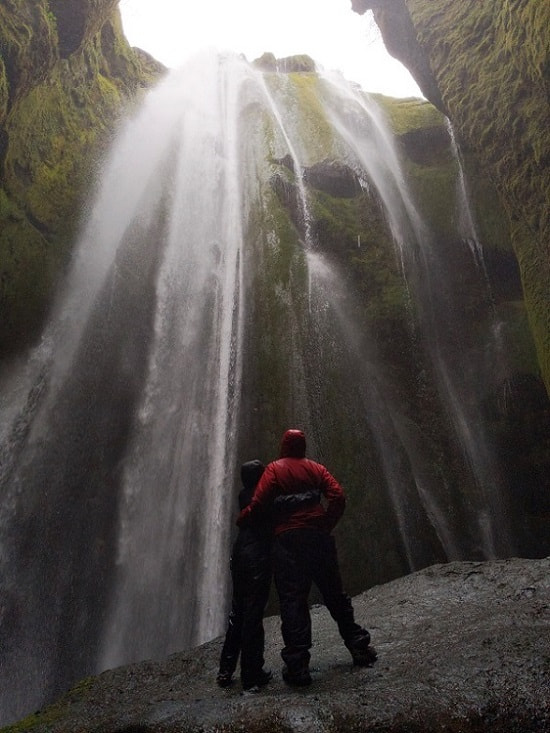
Getting in to see this waterfall is a short ordeal, but a bit of an adventure. When we were there the rocks were very slick and the water was fairly deep. You walk in through the narrow opening where you can touch both walls at the same time and if you look up you can see a boulder stuck overhead (don’t worry it is not going anywhere). The canyon quickly opens into a small room with a large boulder and the waterfalls pouring down at the back. Everything is so wet that ferns grow from the walls. Snapping a picture is a bit of a challenge because of the amount of water coming down on your lens, but this is a very cool spot.
How Much Time and When?: This is an interesting place, but I would think an hour would be plenty to see everything. When there is a sunset this is a popular sunset location. When we got here around 5:30PM in mid-May there were two large tour buses and a bunch of vehicles, so we opted to have dinner before checking it out. We walked over from the campground around 7PM and there were still quite a few people including one mini-bus, but it wasn’t mobbed.
Difficulty: You can admire Seljalandsfoss right from your car, walk up to the edge of the parking lot, walk around on the flat paths, or climb the stairs to get right up behind it. Gljúfrabúi requires walking in the water to actually get in and see it.
Facilities: They have bathrooms, paths, viewing platforms, and a couple of informational signs.
Road & Parking: This is just off Route 1, and the road is good. There is a big parking lot, but it can fill up. When we were there parking cost 700 ISK, but if you camp at Hamragarðar Campsite you can walk over and visit for free.
What to Bring: You will want rain gear from head to toe for both unless you want to enjoy the free shower. A good pair of rain pants will serve you well for Iceland’s unpredictable weather and waterfall exploration. Packable ones (like these women’s/men’s) would be a good option.
You need waterproof boots or grippy sandals for Gljúfrabúi. We wore Salomon Quest 4d Boots and KEEN Targhee Boots but anything waterproof with good grip will do. A waterproof phone case is better than nothing but due to the humidity didn’t work well here. A waterproof camera/phone or GoPro worked better, but it was still hard to keep the water and fog off of the lens long enough to get a picture.
In Between: A short drive with more beautiful scenery and interesting spots.
Skógafoss Waterfall & Hiking Trail
Location: Parking - GPS Coordinates: 63.529484, -19.513191 Map
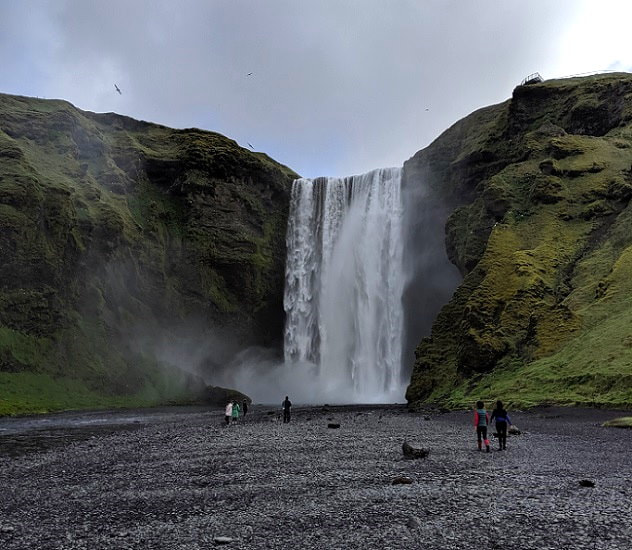
This waterfall is another huge tourist attraction and while it is powerful, I felt like this waterfall is another over rated stop.
We came here to do a part of the Fimmvörðuháls Pass as a day trip hike on the trails above the falls. Unfortunately, they were closed just past the second waterfall, so we had to scrap that plan and just do a mini-hike. In mid-May the trail is usually open but the buses to the highlands aren’t running yet. In June when the buses are running you can do this as a through hike in one to two days by taking the bus to the other end of the trail.
We weren’t able to go very far on this trail due to the closure, but still enjoyed the little bit we did get to see. One you get to the top of Skógafoss you have beautiful green mountain views and many other smaller waterfalls.
How Much Time and When?: Depends on what you want to do. A quick stop and look could be 15 minutes or less, but people make day trips out of exploring the trails above the falls. We were there around 8:30 AM in mid-May and there were already a couple of buses there, but it was pretty quiet. The best lighting is in the evening but it gets quite crowded.
Difficulty: This is another where you could just look from your vehicle or walk a little way, take a picture, and carry on. However, if you desire you can take the stairs to the top of the falls and follow the trails at the top, turning around any time you want.
Facilities: 200 ISK honesty box to use the toilets if you are not a camper. Large campground with lots of space and a view of the waterfall. Lots of signs talking about the area.
Road & Parking: Nice roads just off Route 1 with the biggest parking lot we have seen and this one was free when we visited.
What to Bring: If you just want to look you don’t need much. If you want to go up to the foot of the falls you will want some rain gear. You can climb to the top without getting wet and the trails up there are gentle and well maintained for a while.
In Between: These are just minutes away from each other. You park right by the Skógafoss Museum, which has sod houses and lots of information on what life was like here in colonial times. We didn’t have time for it, but our friends went and loved it.
If you are interested in traditional Icelandic life The Little Book of the Icelanders in the Old Days by Alda Sigmundsdottir and Burial Rites by Hannah Kent both do a good job.
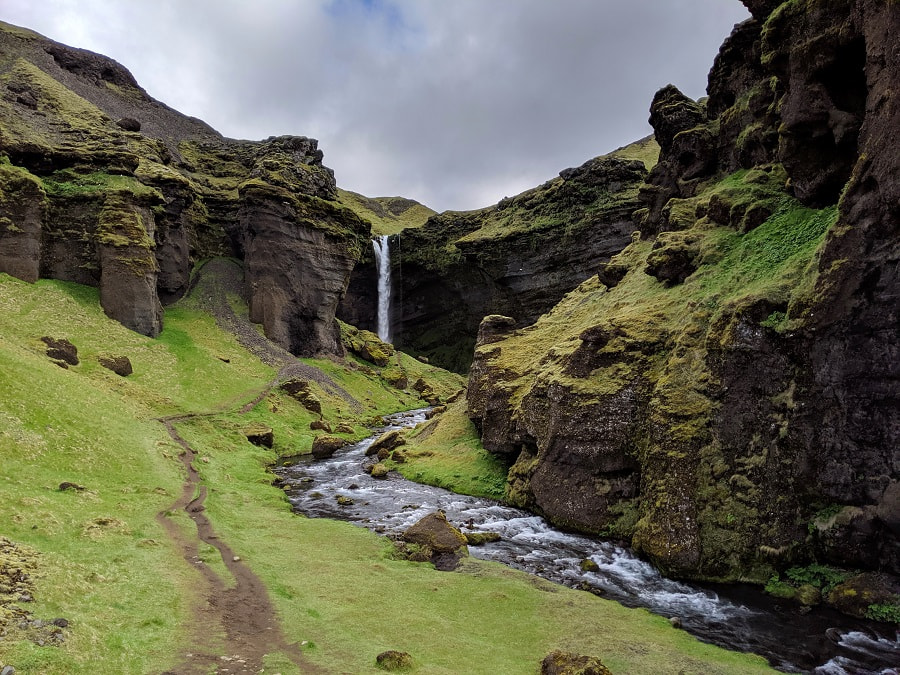
Kvernufoss Waterfall Trail
Location: Parking - GPS Coordinates: 63.525387, -19.491342, Waterfall - GPS Coordinates: 63.528293, -19.480910 Map
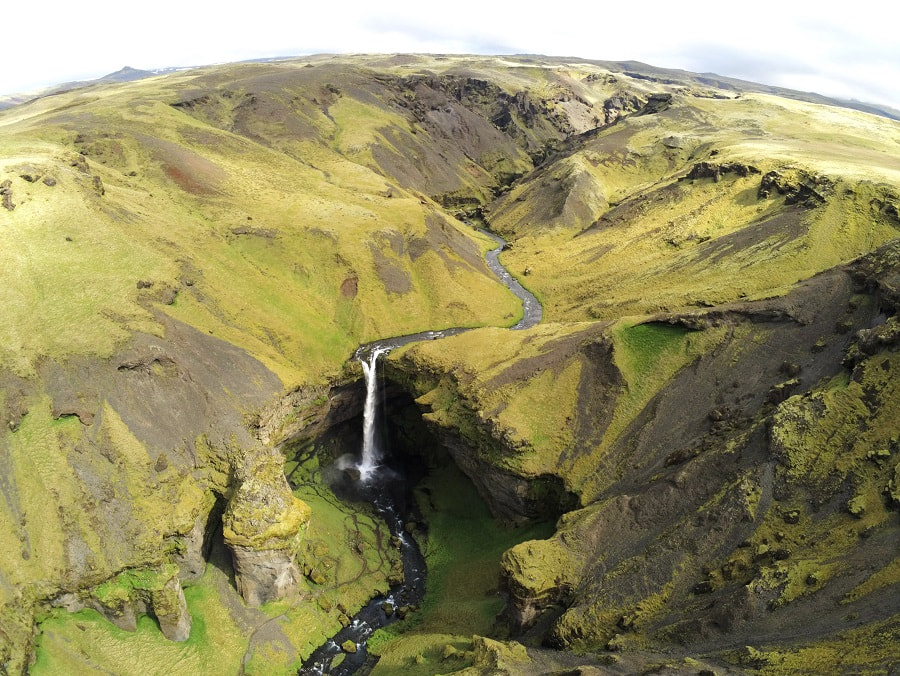
This waterfall is secluded but easy to get to and another of my favorites. It is down a short trail behind the garage next to the Skógafoss Museum. The spot marked as Kvernfoss parking on Google Maps had a chain up, so we could not park there but we were able to park here instead: 63.525387, -19.491342. Go around the back of the building and follow the trail over the ladder and along the river to the left. It is only a few minute walk and you can’t miss it.
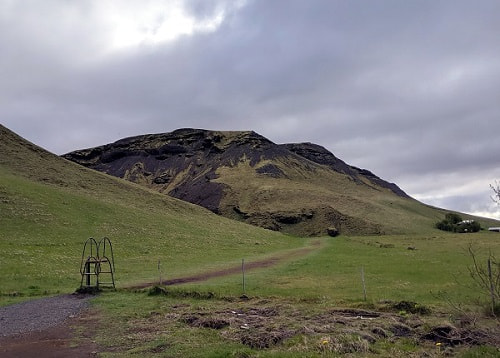
Shortly after we climbed the ladder over the fence we were confronted by an ornery sheep with a lamb. I don’t have much experience with sheep, but usually they run as soon as you take a step towards them. Not this one. Instead it held its ground and stomped its foot at us. This unhappy mama was large and pretty intimidating. While we were standing there trying to look big and deciding what to do it randomly turned and scurried up the hill with its entourage. Relieved, we continued down the path.
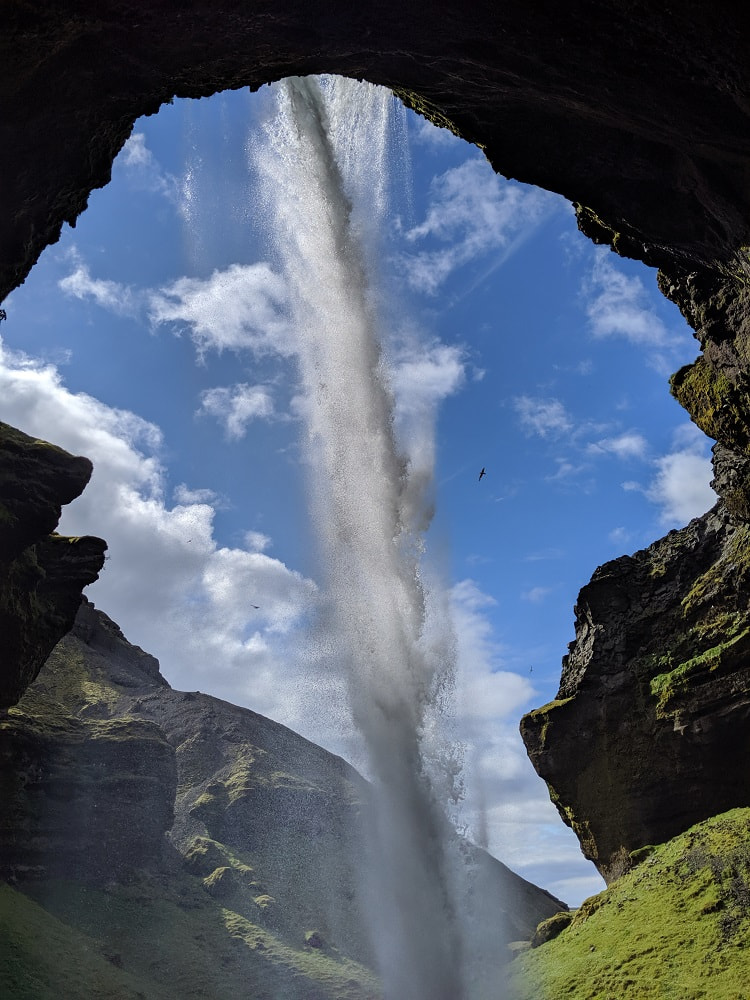
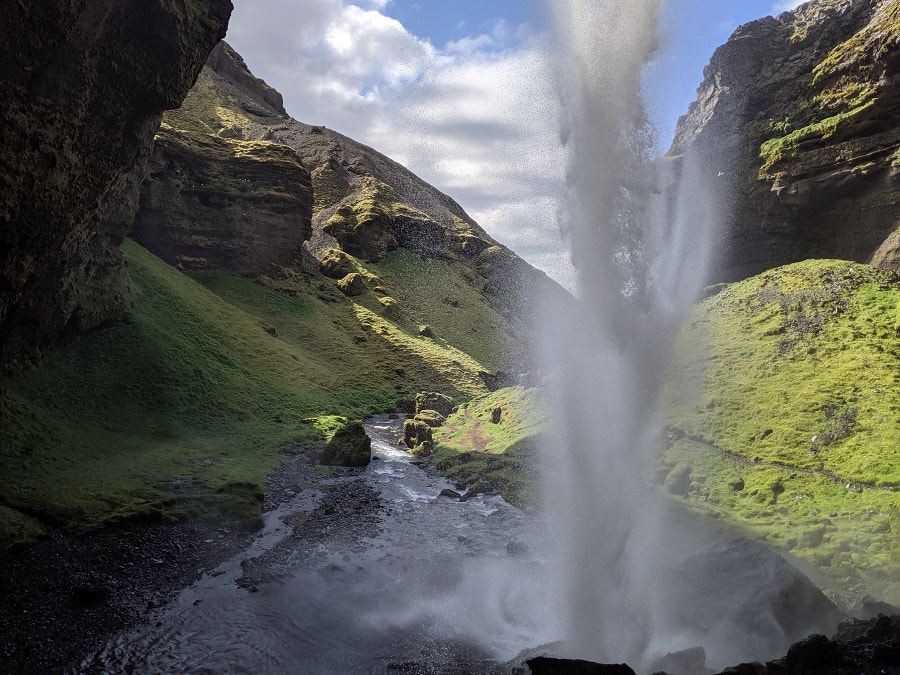
This waterfall and the lush green canyon around it were stunning. There were birds gliding around the falls and nesting in the cliffs above. Everything was alive. I climbed the path up behind the falls for a misty but beautiful view of the shimmering water.
How Much Time and When?: We spent a little under an hour here. We were here mid-morning in May and the lighting was nice.
Difficulty: Fairly easy trail, simple to follow once you find it. Climb one ladder to cross a fence and a dirt trail. The walk is only about ten minutes.
Facilities: None, but you are only a few minutes from Skógafoss.
Road & Parking: Nice roads just off Route 1. You can park in the Skógafoss Museum parking lot which is paved and fairly large.
What to Bring: Good waterproof shoes and rain gear if you want to go behind the falls. If not you should be good with any decent shoes. For going behind the falls I had Salomon Hiking Shoes, a rain jacket, and rain pants and my husband had Mizuno Wave Rider Shoes, a rain jacket, and rain pants. The path was a bit slick and wet, but once you get far enough back you might be able to use a regular camera here, but I stuck with a waterproof phone for my pictures.
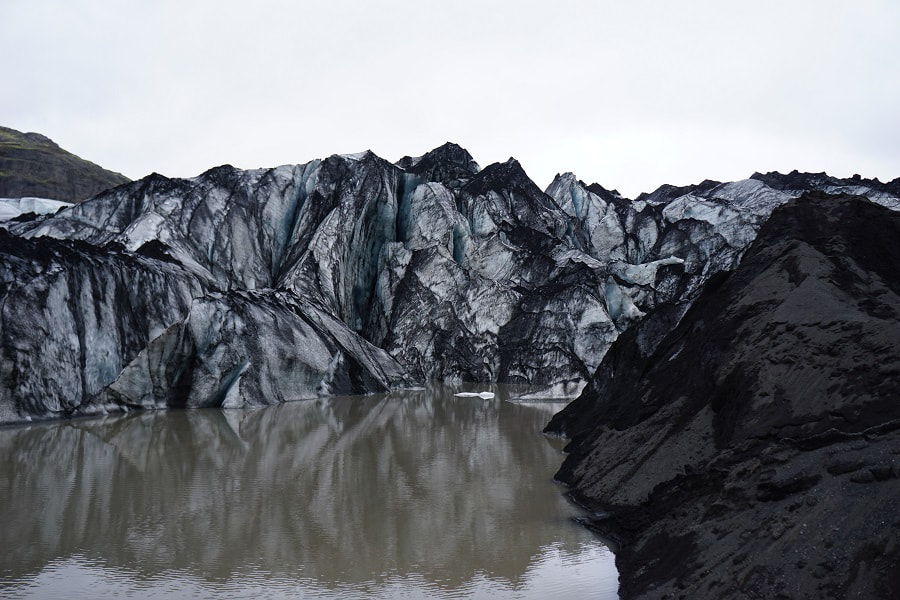
Sólheimajökull Glacier Hike
Location: Parking - GPS Coordinates: 63.530436, -19.370400 Map
This was one of those things that I kind of scoffed at the idea of (what’s the big deal with hiking on a big piece of ice?) but was totally wrong about and was very glad that I gave it a shot.
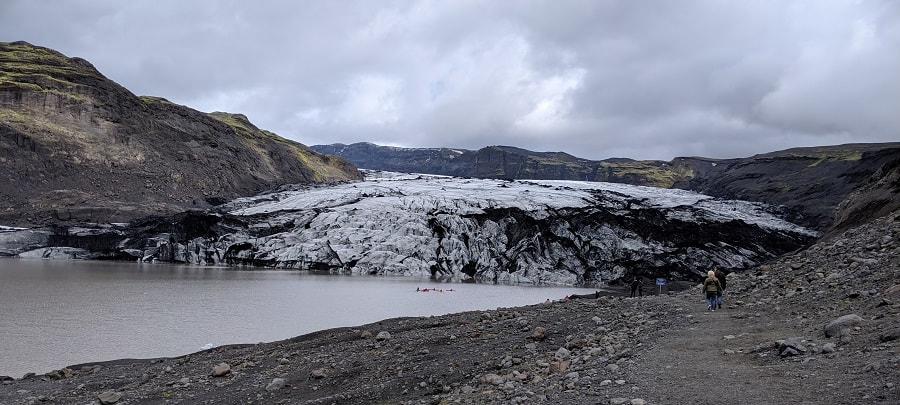
If you want to visit Sólheimajökull Glacier you have two options. Take a guided tour up onto the glacier with one of many companies or walk up the trail to the foot of the glacier, take a few pictures, look at the glacier lagoon, and turn around. Independent glacier hiking is not allowed because glaciers are constantly shifting and dangerous, with many crevasses hidden in the ice. Falling into one can be deadly.
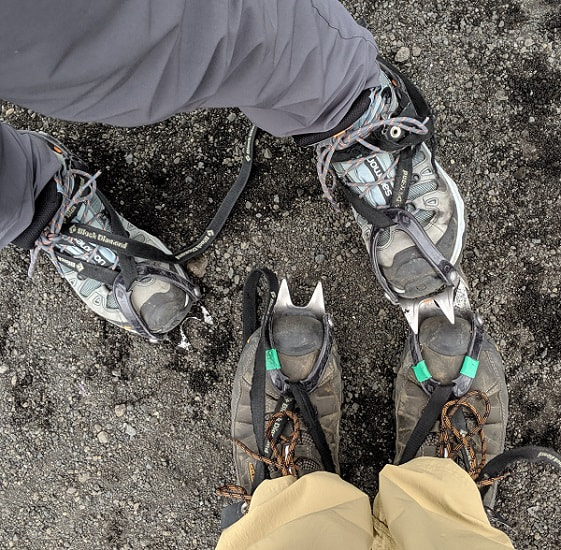
Before the tour we had to strap on climbing harnesses (just a precaution so there is something to grab onto in the rare case someone fell into a crack), helmets, get ice picks, and get fitted for crampons. Our tour started out with walking down the path with all the other people going to look at the glacier. At the foot of the glacier our guide showed us how to strap on out crampons, then is was up the glacier in single file.
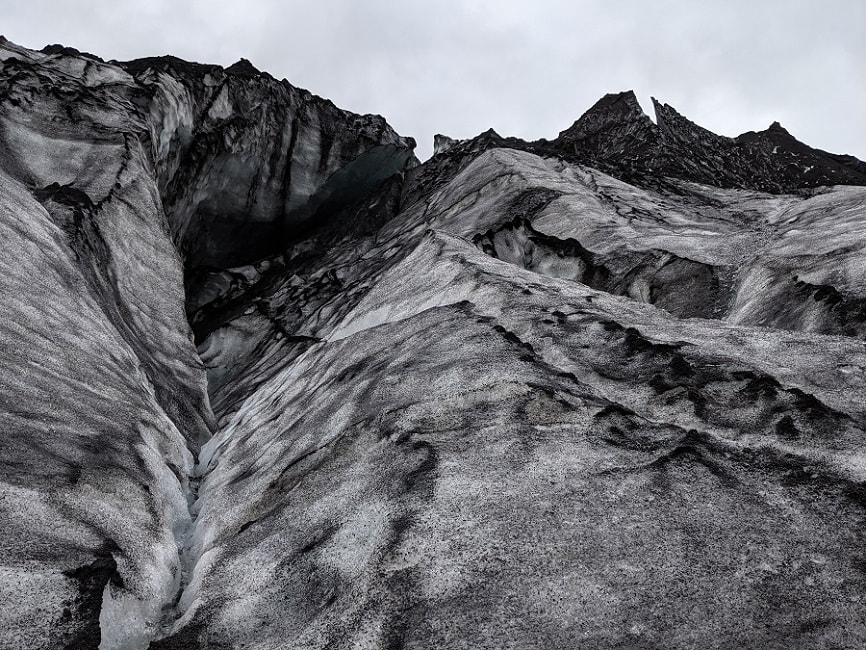
This glacier is painted by volcanic ash that streaks everything. Sometimes it is embedded in the ice, looking like ink blots, and sometimes it is in piles on the surface or running in veins through the ice. I think it makes the ice look much prettier than just white. The moving and melting ice formed all kinds of jagged spikes and arches that were fun to look at, but easily distracted us from watching our feet.
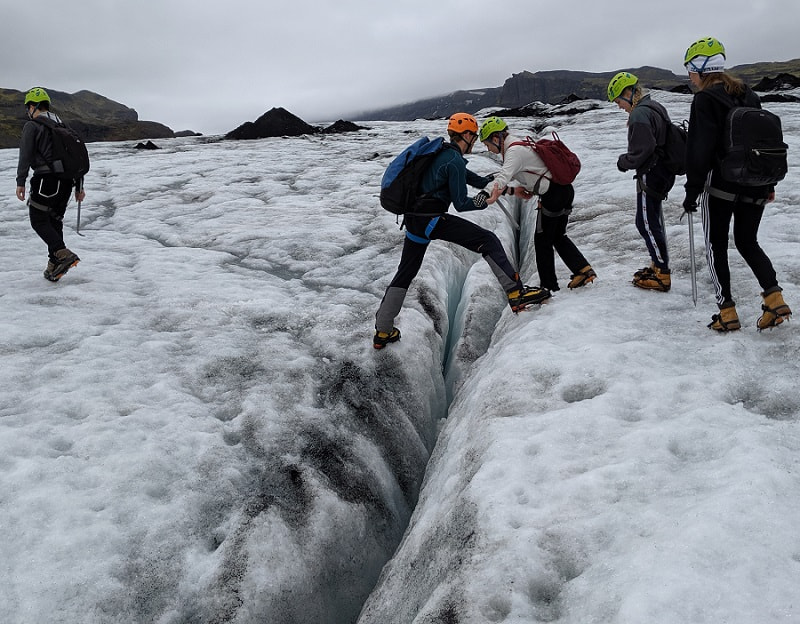
Our guide helped us across a couple crevasses and we found what he called a dinosaur eye, a deep pool of blue water under the ice with just a small opening that we could peer into. At the top we had a little bit to walk around, smear volcanic ash on our faces if we chose to, and take a couple photos, before turning around and climbing back down the way we came.
We did this tour with Troll and were very happy with the service, including their prompt response to e-mail off-hours and being able to accommodate us changing our tour time with short notice.
How Much Time and When?: Simply a sightseeing stop, budget about an hour. For a tour it depends on what you book. We were there early afternoon and the place wasn’t packed, but there were a lot of people.
Difficulty: The walk to the glacier and back is pretty flat, but soft ground so is feels like you are walking in sand. If you do the glacier hike you will be wearing crampons and the difficulty will depend on the tour you choose, but most on this glacier aren’t very hard. The most strenuous part is the unusual walking stomping to make your crampons stick in the ice.
Facilities: Bathrooms in one of the tour buildings for 300 ISK for non-Arcanum customers, cash or credit. Some informational signs.
Road & Parking: Decent winding roads with a huge gravel parking lot at the end.
What to Bring:
Walking to the Glacier: Sunglasses, if it is a sunny day the glare off the glacier and the water can be blinding.
Hiking the Glacier:
-
Shoes - You will need solid boots with a strong toebox for the crampons to strap onto, preferably waterproof because there are lots of little streams and it is much easier to walk in the water. We wore Salomon Quest 4d Boots and KEEN Targhee Boots.
-
Sunscreen because the ice reflects the sun right back at you. We both didn’t think of this and got burnt. Glacier sunburns suck just as much as any other type.
-
Rain gear just in case. The glacier creates its own weather and can be unpredictable.
-
Clothes - Comfortable clothes. We thought it would be colder on the ice but we actually peeled off our jackets on the way up. It really depends on the day.
-
Check out Day Trip Essentials for a full packing list.
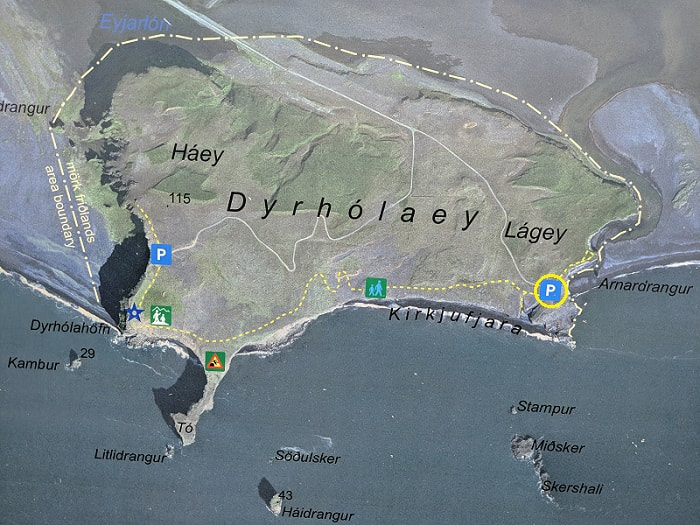
Kirkjufjara Beach with a view of Dyrhólaey
Location: Parking - GPS Coordinates: 63.403714, -19.103910 Map
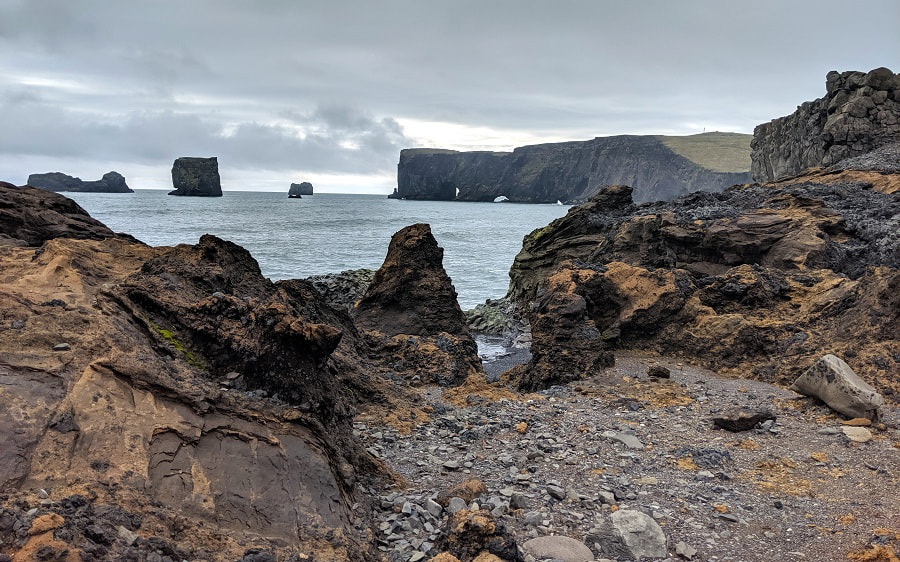
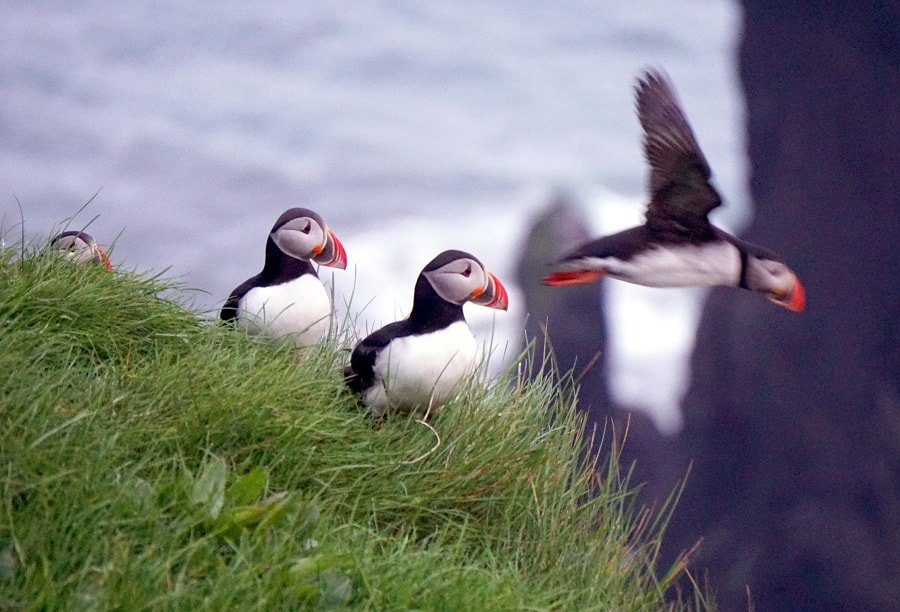
We were planning to drive up to Dyrhólaey but got intimidated by the signs that said 4x4 only, although we saw some vehicles that definitely did not match that description. Instead we continued on and ended up at the Kirkjufjara Beach parking area. A lot of this area was closed for the winter or because of puffin nesting but we were still able to look down at the beach and check out the views of Dyrhólaey.
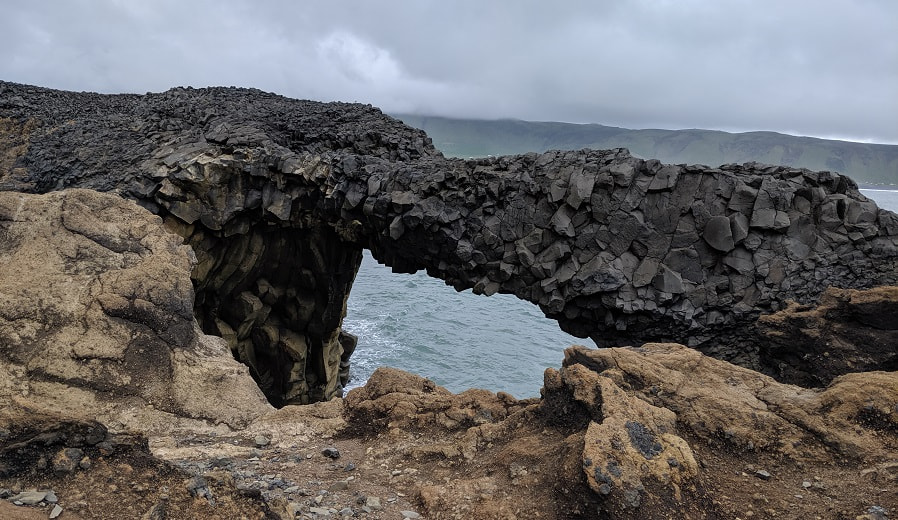
There is an interesting sea arch there and lots of trails, some heading up towards Dyrhólaey. We were really excited when we managed to spot a puffin on a rock for a moment before it took off and felt that the puffin sighting alone made this stop worth it; however, we got very lucky catching that. Overall, this is an interesting stop, but I wouldn’t say obligatory.
How Much Time and When?: We were there for about half an hour in mid-May late afternoon. The place had a few visitors but was far from crowded. I bet this place is much more impressive on a sunny day. You could spend much more time if you walked up to the peninsula, but parts of it are often closed in May for puffin nesting.
Difficulty: You can see Dyrhólaey Arch and another sea arch just a short flat walk from the parking lot.
Facilities: New pay bathrooms are available. They take card and coins and were 200 ISK when we were there. There also were a couple maps and informational signs.
Road & Parking: The road was in good shape and the lot was fairly large.
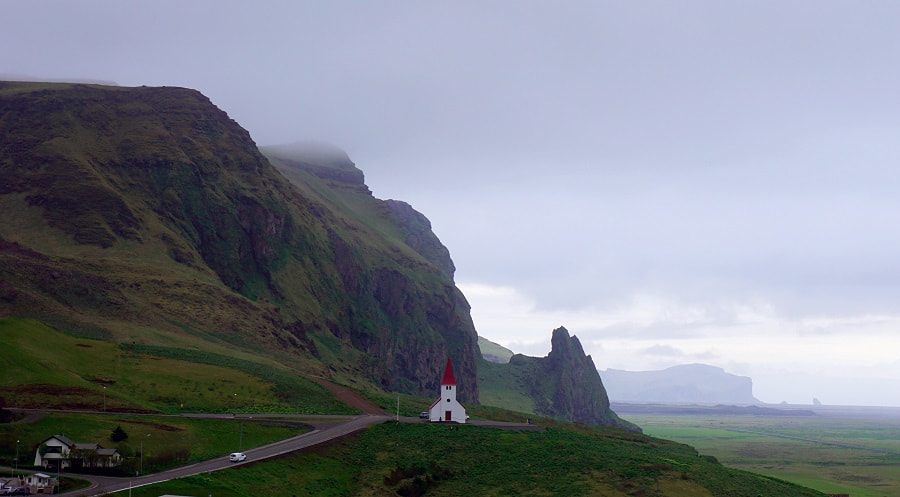
Vik Sight Seeing and Hiking
Location: Parking - GPS Coordinates: 63.415997, -19.006557 Map
Vik has lots of options and variety. Town Map of Things To Do has a few and Area Map of Things To Do shows the trails and gives you other ideas for things a bit farther out. These maps also give you an idea of where to look for puffins. Kirkjufjara Beach & Dyrhólaey is one very popular place to visit. Fjaðrárgljúfur Canyon is also a cool spot an is only about an hour east.
Within walking distance of the town is:
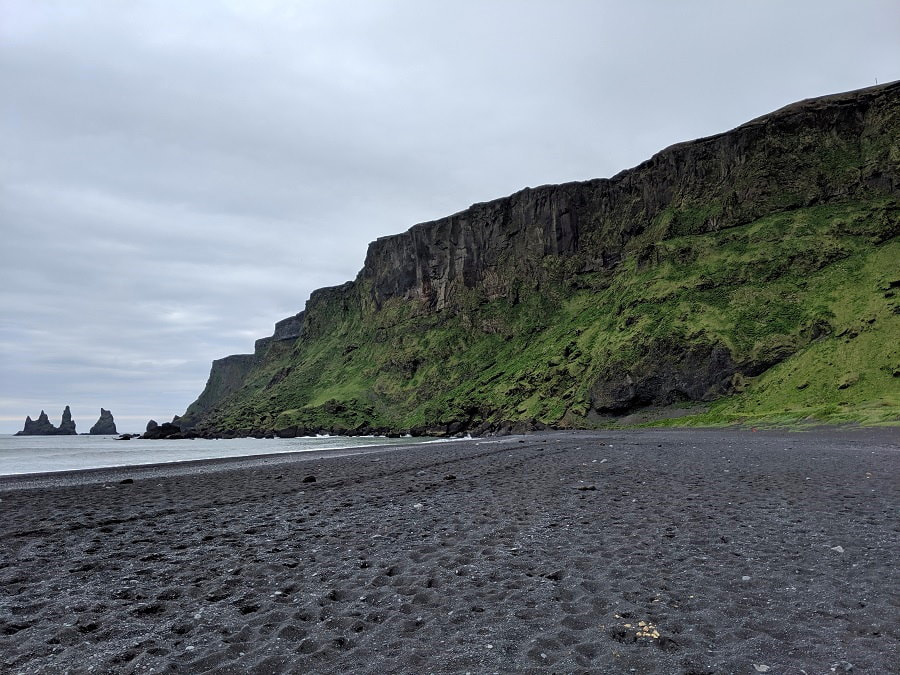
- Vik’s Black Sand Beach - No Swimming here, but you can walk along the beach in the sand or up on the trail. Watch out for the waves. You can see the Reynisdragnar Sea Stacks.
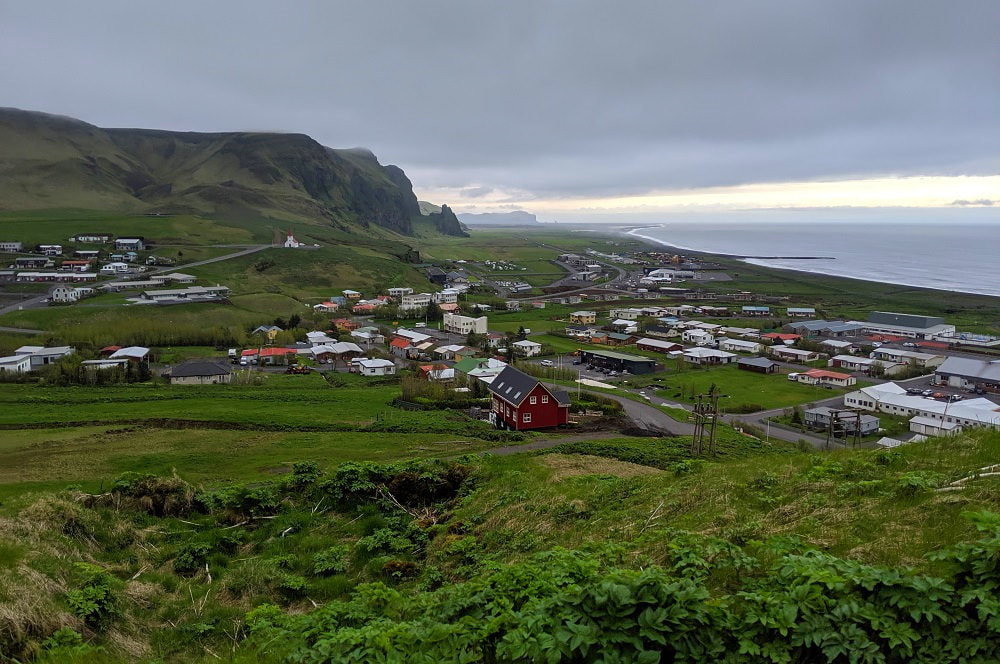
- Mount Reynisfjall - You can do as much or as little of this as you want. This is the yellow trail on the maps. If you go up the trail a bit you get a nice view of the town. When we went there were some low hanging clouds so we got a good view from about half way up, then started to get this eerie view as we walked up to the level of the clouds and finally above.
Once you get to the top the trail gets quite dull. We followed it clockwise and it felt like miles of nothing but flat. A couple Oystercatchers were nesting on the ground close to the trail and they were extremely aggressive, swooping around us as we walked while making a noise that sounded like a pet squeek toy, adding a little excitement to the monotony. They never actually touched us, but they did come close and we found ourselves ducking and giggling at the same time. Revenge of the squeaker!
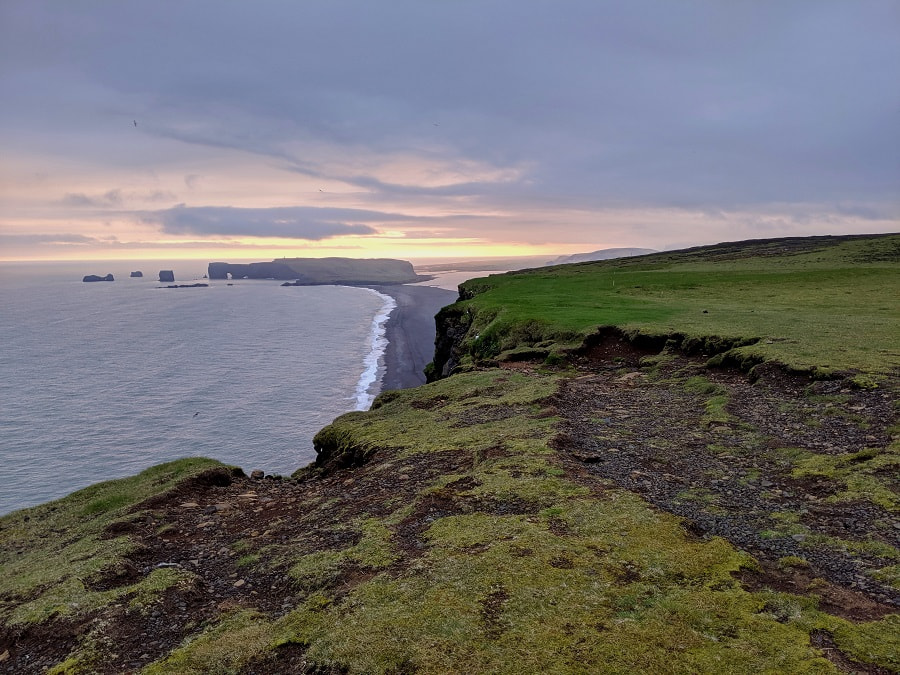
Finally we got close enough to the edge to catch a glimpse of the sunset by Dyrhólaey Arch and the Reynisdragnar Sea Stacks.
According to a sign in town this trail is 10 km roundtrip and takes 1-3 hours. I would say 1 hour would be if you only went to the top or part way up and came back down. The trail up is steep, but a wide gravel road that is supposedly the steepest in Iceland. A few 4x4 use it. There are a couple sod sheds along the trail.
- Mount Hatta - You can walk up to the church for a look around and if you choose to continue up the mountain. This was the one we planned to do, but since from about the church up was hidden in the clouds we opted not to. This is the red trail on the maps.
According to the sign in town this trail is 10 km roundtrip, takes 3-4 hours, and is challenging.
- One more Waterfall: Just down the road from Vik we spotted a pretty waterfall. You could walk to it but it would be easier to drive. It is at GPS Coordinates: 63.422444, -18.948490
Facilities: Free bathrooms at the Kronan grocery store. Trail maps and info on signs up behind the campground.
Road & Parking: The roads were in good condition and there is plenty of parking by the beach.
In Between: Shortly after Vik the mountains faded away into the distance and gave way to eerie barren black volcanic washes and green moss coated lava fields. At first they were interesting, but as the drive carried on they got a bit boring and monotonous. Now I know you may be thinking that this is a pretty petty landscape to complain about, but whether it is a desert or a lava field, at first it is interesting, but as you move forward and nothing changes you loose the sense of movement and the feeling of discovery and accomplishment that you get from a changing landscape.
Fjaðrárgljúfur Canyon Walk
Location:
- Main Fjadrargljufur Parking at the end of the canyon - GPS Coordinates: 63.771316, -18.172022 Map
- Waterfall end of trail entrance at the top end of the canyon on F206, no real parking - GPS Coordinates: 63.779503, -18.168522 Map
- Where we parked (overflow parking perhaps) - GPS Coordinates: 63.768186, -18.143789 Map
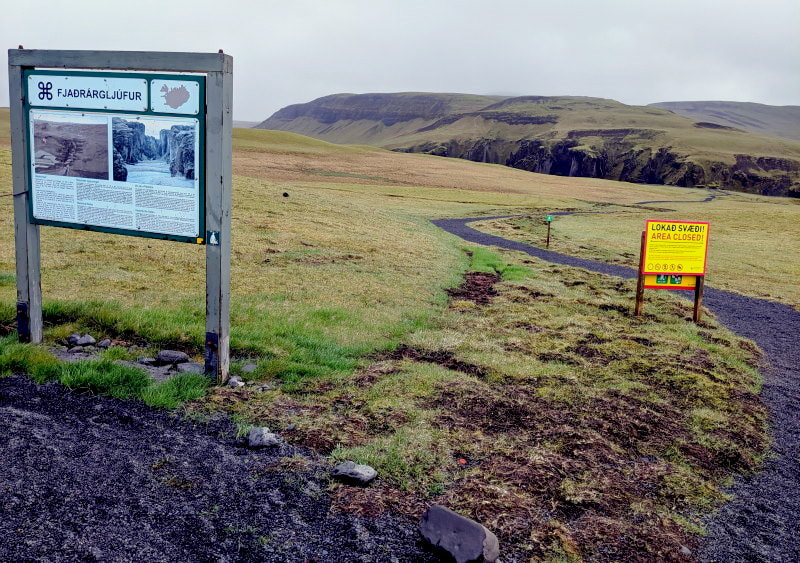
This trail was closed for maintenance when we visited so our experience here was very different than the experience I expect you will have. I wish we actually got to walk the trails and see everything, but we did get the unique experience of seeing a little of this place with almost no one there. The canyon reopened a little over a week after our visit.
We got here on a drizzly afternoon and sat in the car debating what to do. The road was closed a good way up from the trail and the sign said closed but there were other vehicles here and this was at the top of our list for things we wanted to see. Our plan was to send the drone up so we could see it on the screen without entering the closed area, but we couldn’t fly it in the rain and we weren’t sure if we would be able to see anything from the road. We also had conflicting directions on which way to go. We discovered that the two different locations on the map were actually opposite ends of the canyon, but we didn’t know that yet. As badly as we wanted to see it, we weren’t sure that trudging in the rain for a chance of seeing nothing at all was worth it. Just as we were about to get back on the road we saw some guys with some serious photography gear set out down the trail, so we decided they must know where they were going and to go for it.
We walked down the gravel road and took the right fork, following the other group’s lead. We made it to the trailhead and the path went off into the distance, but the rain had stopped and there was no one around so we were able to send the drone up to be our eyes. The view of the canyon, even on the tiny screen, was incredible. We were able to fly the entire length of the canyon and see that the left fork of the road crossed right over the end of the canyon.
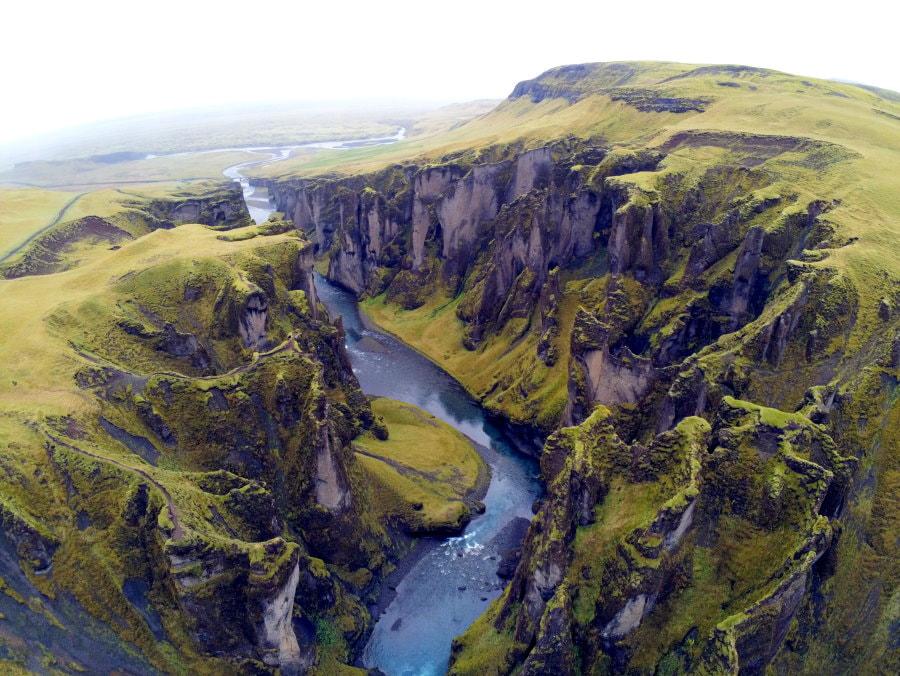
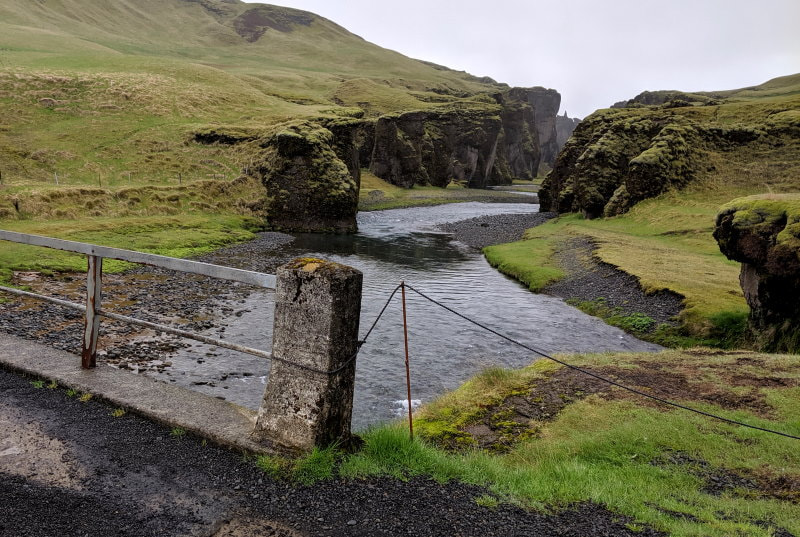
We walked back down the road and took the other fork to the main area and were able to peer into the canyon from the end. Happily we strolled back to the van in the rain. It wasn’t the full experience, but it was also an experience void of the hoards of people and we got some aerial shots that we never would have taken if there had been people there.
How Much Time and When?: We were there late afternoon in May. It was very cloudy, but the lighting was quite nice. However, this place is known for being crowded so you might want to plan accordingly.
If you are able to park right at the main entrance you should be able to walk to the end and back in an hour.
If you park where we did you will have a lot farther to go and could either go down to the main entrance and double back the same way, or take the other road back. There really isn’t much to see on the road so this is up to your preference. I think this is the kind of place that you would see in a different way depending on the direction you are going so crowds permitting I would double back.
Difficulty: Easy trail with a gravel path and gentle inclines
Facilities: There are bathrooms at the main entrance. The other end had a big observation deck to view the waterfall from. This is a place with marked trails with ropes to protect the environment, not a place you can go exploring anywhere you like.
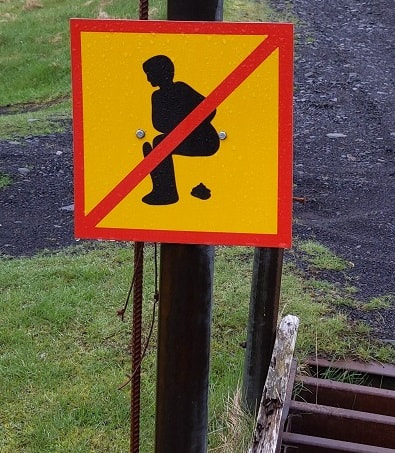
I’m not sure if the public toilet is a new or not, but they seemed to have some problems here in the past and people want to make sure you know that this kind of activity is not appropriate.
Road & Parking: The main road was gravel but decent. There was some parking at the main entrance and more back up the road where we parked.
Product Links: I am not sponsored by any of the products I link to. If you choose to make a purchase from one of the links of a product I listed or any other item a small percentage will go back to me to fund this website, at no additional cost to you. The products I link to are either ones I have used or similar if those are not available. Thank you for your support.
More?
For more of Iceland see my full Trip Itinerary & Travel Budget.
For more of our journey around the Ring Road check out Eastern Iceland, Western Iceland, or Northern Iceland.
Info and Tips on Campsites around the Ring Road
Check out our full Peru Trip Itinerary.